MediaPack Analog Gateways 5 MP-1288
Hardware Installation Manual Contents
List of Figures
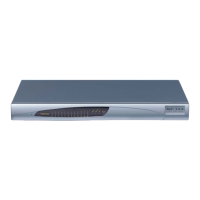
Figure 3-1: Front Panel ........................................................................................................................... 15
Figure 3-2: Fan Tray Module .................................................................................................................. 18
Figure 3-3: Fan Tray Cover .................................................................................................................... 18
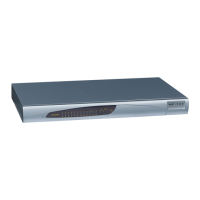
Figure 3-4: Rear Panel Description ........................................................................................................ 19
Figure 3-5: CPU Module ......................................................................................................................... 20
Figure 3-6: FXS Blade Showing Three FXS Telco Connectors ............................................................. 21
Figure 3-7: Chassis Slot Assignment for FXS Blades (Front Panel) ...................................................... 21
Figure 3-8: FXS Blades and FXS Channels per FXS Connector (Rear Panel) ..................................... 22
Figure 3-9: Power Supply Module .......................................................................................................... 23
Figure 3-10: FXS LED Location on Front Panel per FXS Blade ............................................................ 25
Figure 3-11: FXS LED Location on Rear Panel per FXS Blade ............................................................. 25
Figure 4-1: Attaching Mounting Brackets to Chassis ............................................................................. 28
Figure 4-2: Front-Mounting Brackets Flush and Aligned with Front Rack Posts ................................... 28
Figure 5-1: Stripped Grounding Wire ..................................................................................................... 30
Figure 5-2: Removing Screws and Washers .......................................................................................... 30
Figure 5-3: Attaching Grounding Wire to Grounding Lug ....................................................................... 30
Figure 5-4: Attaching Grounding Lug to Chassis ................................................................................... 30
Figure 5-5: Connecting the LAN Ports ................................................................................................... 31
Figure 5-6: 50-pin Telco Connector ........................................................................................................ 33
Figure 5-7: Orderable FXS Patch Panel ................................................................................................. 35
Figure 5-8: Mounting Patch Panel in Rack ............................................................................................. 36
Figure 5-9: Connecting 50-Pin Telco Connector to Port on FXS Blade ................................................. 36
Figure 5-10: Connecting Analog Equipment to FXS Patch Panel .......................................................... 37
Figure 5-11: Connecting FXS Interfaces using FXS Patch Panel .......................................................... 37
Figure 5-12: Orderable Centronics Cable and Pinouts .......................................................................... 38
Figure 5-13: Connecting 50-Pin Telco Connector to Port on FXS Blade ............................................... 38
Figure 5-14: Connecting FXS Interfaces Directly to MDF ...................................................................... 40
Figure 5-15: 50-pin Telco Connector for FXS Lifeline ............................................................................ 41
Figure 5-16: Cabling FXS Lifeline .......................................................................................................... 41
Figure 5-17: RJ-45 to DB-9 Female Cable Adapter ............................................................................... 42
Figure 5-18: Connecting Serial Interface ................................................................................................ 43
Figure 5-19: Swinging Cable Anchor Clip away from Power Inlet.......................................................... 45
Figure 5-20: Connecting to Power .......................................................................................................... 45
Figure 5-21: Strain Relief for Power Cord using Cable Anchor Clip ...................................................... 45
Figure 6-1: Location of Screws on Fan Tray Cover ............................................................................... 48
Figure 6-2: Removing Fan Tray Cover ................................................................................................... 49
Figure 6-3: Location of Screws on Fan Tray Module ............................................................................. 49
Figure 6-4: Location of Handles and Removing Fan Tray Module......................................................... 49
Figure 6-5: Removing Fan Tray Cover on Front Panel .......................................................................... 50
Figure 6-6: Removing Air Filter Cover from Fan Tray Cover ................................................................. 51
Figure 6-7: Removing Air Filter from Air Filter Cover ............................................................................. 51
Figure 6-8: Removing 50-Pin Telco Connector ...................................................................................... 52
Figure 6-9: Removing Hex Standoff Screws on Rear Panel (Example FXS Blade S4) ......................... 53
Figure 6-10: Loosening Screws on FXS Blade on Front Panel .............................................................. 53
Figure 6-11: Removing FXS Blade from Chassis Slot on Front Panel .................................................. 54
Figure 6-12: Slot's Guiding Rails for FXS Blade .................................................................................... 54
Figure 6-13: Inserting Screwdriver into Cover Plate Hole ...................................................................... 55
Figure 6-14: Removing Cover Plates ..................................................................................................... 56
Figure 6-15: Slot's Guiding Rails for FXS Blade .................................................................................... 56
Figure 6-16: Tightening Captive Screws of FXS Blade on Front Panel ................................................. 57
Figure 6-17: Removing CPU Module on Rear Panel ............................................................................. 58
Figure 6-18: Handle and Release Latch on Power Supply Module ....................................................... 59
Figure 6-19: Removing Power Supply Module from Chassis ................................................................. 60

 Loading...