70
c. Remove the drives from the chassis by pushing the button, then pull the handle to unlatch
the drive and slide the drive carrier out of the server.
d. Unscrew the old drive from the carrier, noting the holes used for each screw on the carrier.
e. Fasten the new drive into the carrier making sure to line up the screws with the correct holes
in the carrier.
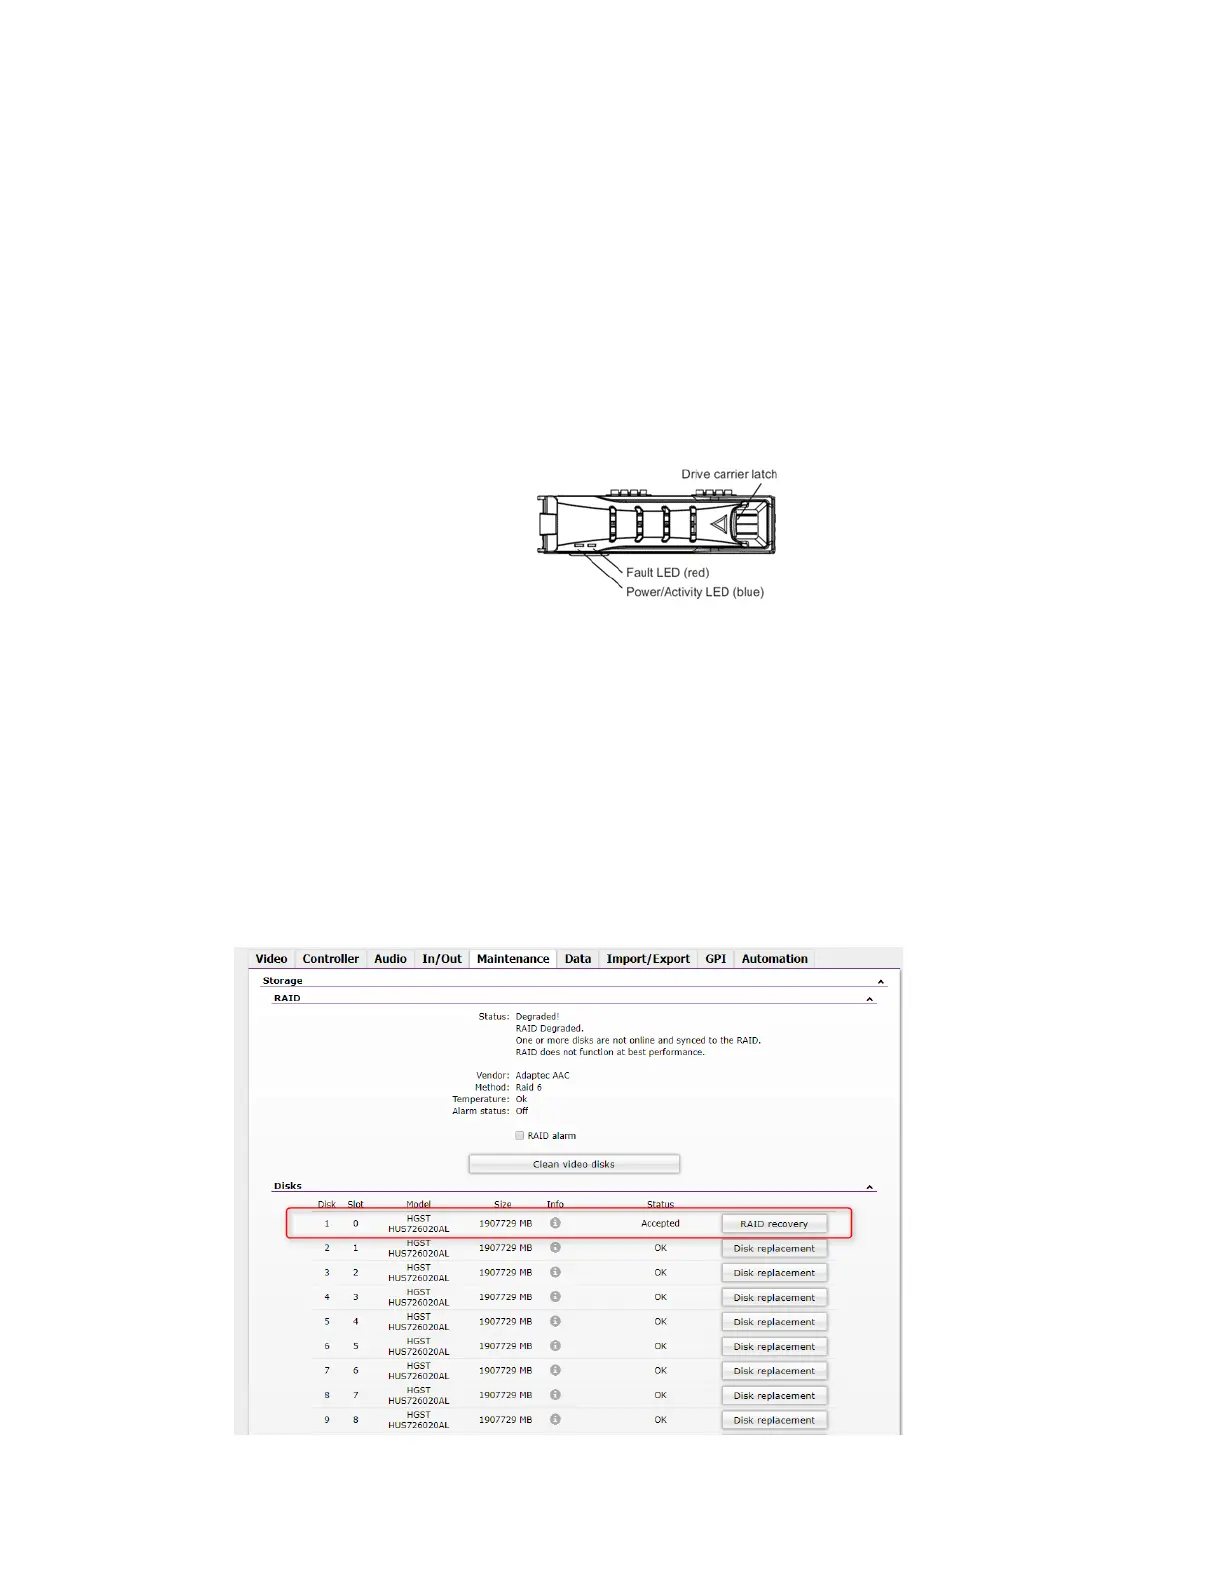
f. Push the drive carrier latch in, to release the handle and pull the handle completely open
prior to inserting the drive carrier into the open slot.
g. Make sure the drive LEDs are on the bottom before you begin to slide the drive into the
server.
c
Do not force a drive into a slot. If you are having problems installing a drive, check to make
sure it is level and flat as you insert it into the server, that the drive carrier latch is open and at
a 45 degree angle to the drive carrier, and that the LEDs are on the bottom of the drive carrier.
h. Slide the drive into the open drive slot in the server until it stops. Approximately 1/2 inch of
th
e drive carrier should be outside the server.
i. Push the handle into the drive carrier. This seats the drive in the server. You will hear a click
when the drive is fully seated and the handle latches in place.
4. Go back to the FastServe | Live Edit / FastServe | Ingest WebSetting to check the status of the
newl
y inserted drive: