EasyManuals Logo

Avigilon H5A Series User Manual

Avigilon H5A Series
57 pages
To Next Page IconTo Next Page
To Previous Page IconTo Previous Page
Page #31 background imageLoading...
Page #31 background image
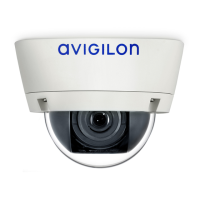
1. Unscrew the lens collar from the micro bullet imager.
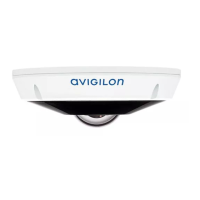
2. Drill a 25 mm (1.0") hole through the mounting surface. The mounting surface should be no more than
6.35 mm (0.25") thick. A countersink hole may be required if the mounting surface is thicker than 6.35
mm (0.25").
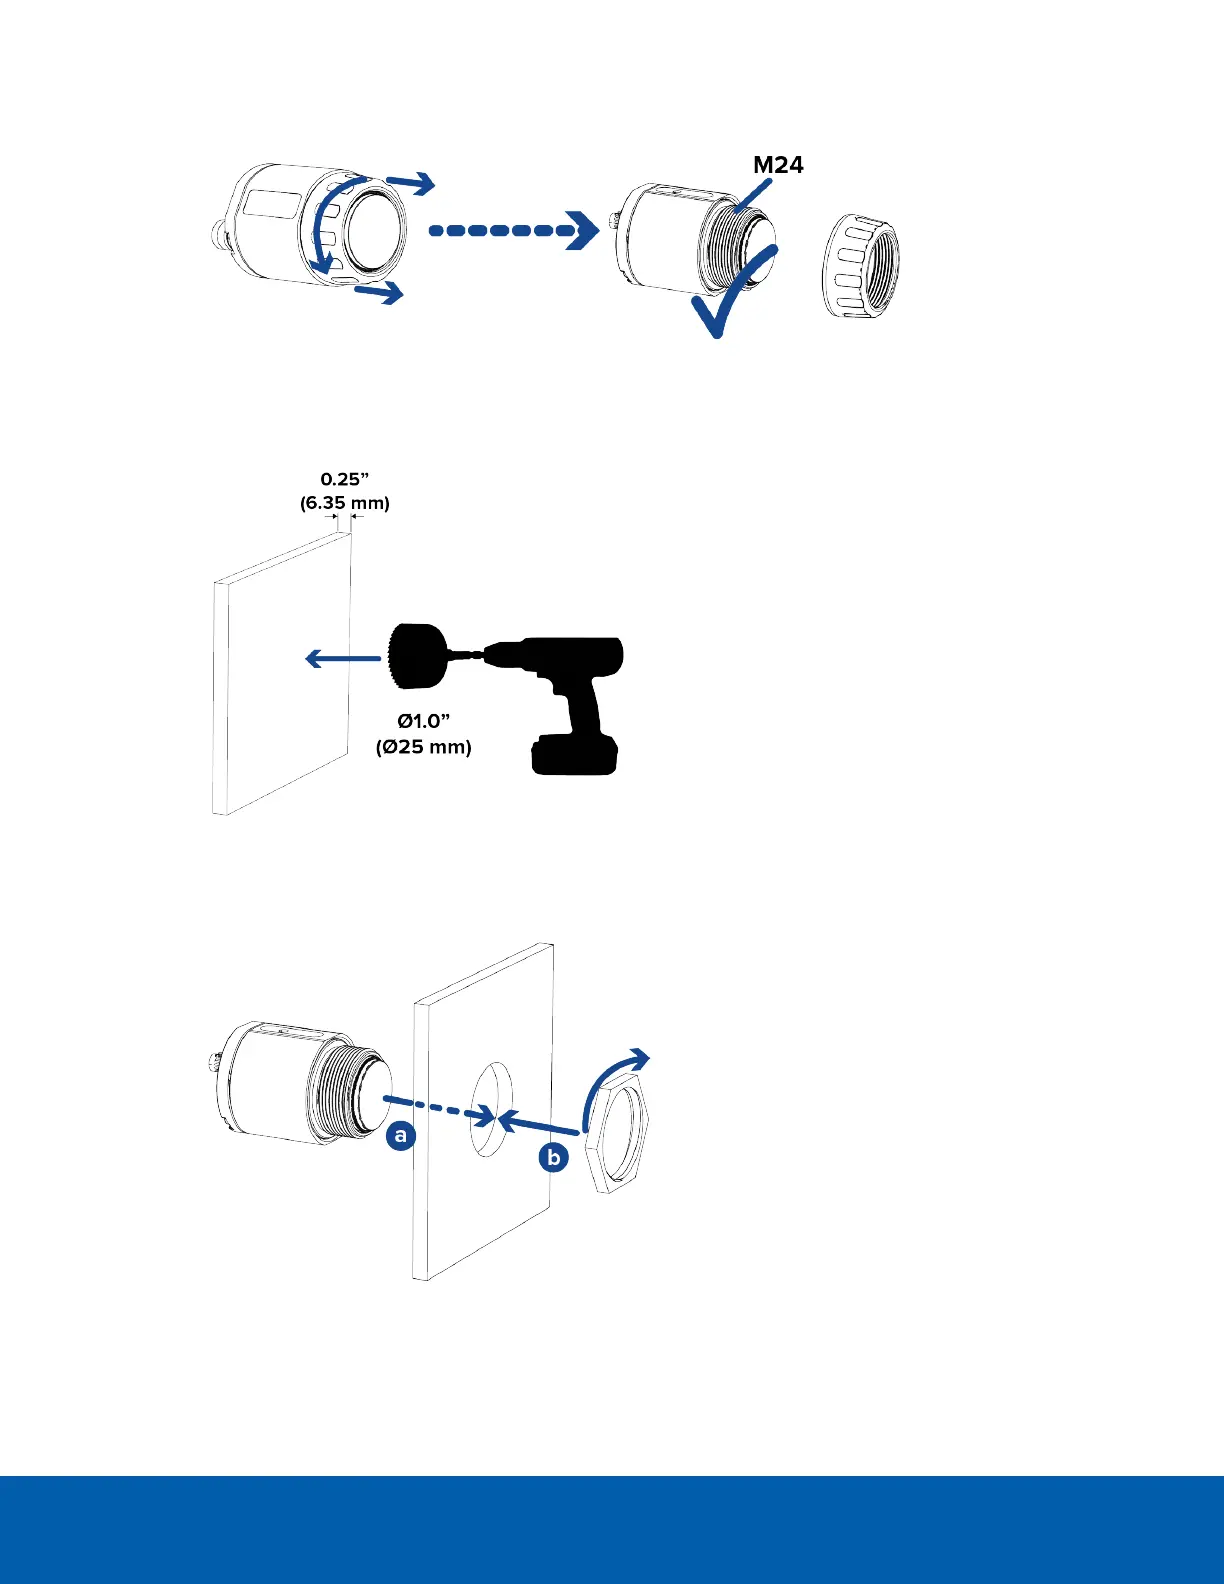
3. Push the micro bullet imager through the mounting hole (a). Secure it in place with the lens ring
provided (b). The mounting screw hole on the imager should be on the top of the micro bullet when
mounted. This mounting screw hole aligns with the top of the imager's video frame.
4. Tighten the lens ring to secure the micro bullet in place.
Mounting Through the Mounting Surface 31

Table of Contents

Questions and Answers:

Question and Answer IconNeed help?

Do you have a question about the Avigilon H5A Series and is the answer not in the manual?

Avigilon H5A Series Specifications

General IconGeneral
ModelH5A Series
Sensor TypeCMOS
Lens TypeVarifocal
Day/NightYes
IR DistanceVaries by model
WDRYes
Video CompressionH.265, H.264
Frame RateUp to 30 fps
Ethernet100BASE-TX
PowerPoE or 12VDC
Operating Temperature-40°C to +60°C (-40°F to +140°F) (depending on the model)
Ingress ProtectionIP66
Impact RatingIK10
DimensionsVaries by model
WeightVaries by model

Related product manuals