EasyManuals Logo

Avigilon H5A Series User Manual

Avigilon H5A Series
57 pages
To Next Page IconTo Next Page
To Previous Page IconTo Previous Page
Page #37 background imageLoading...
Page #37 background image
Installing with the Adhesive Strip
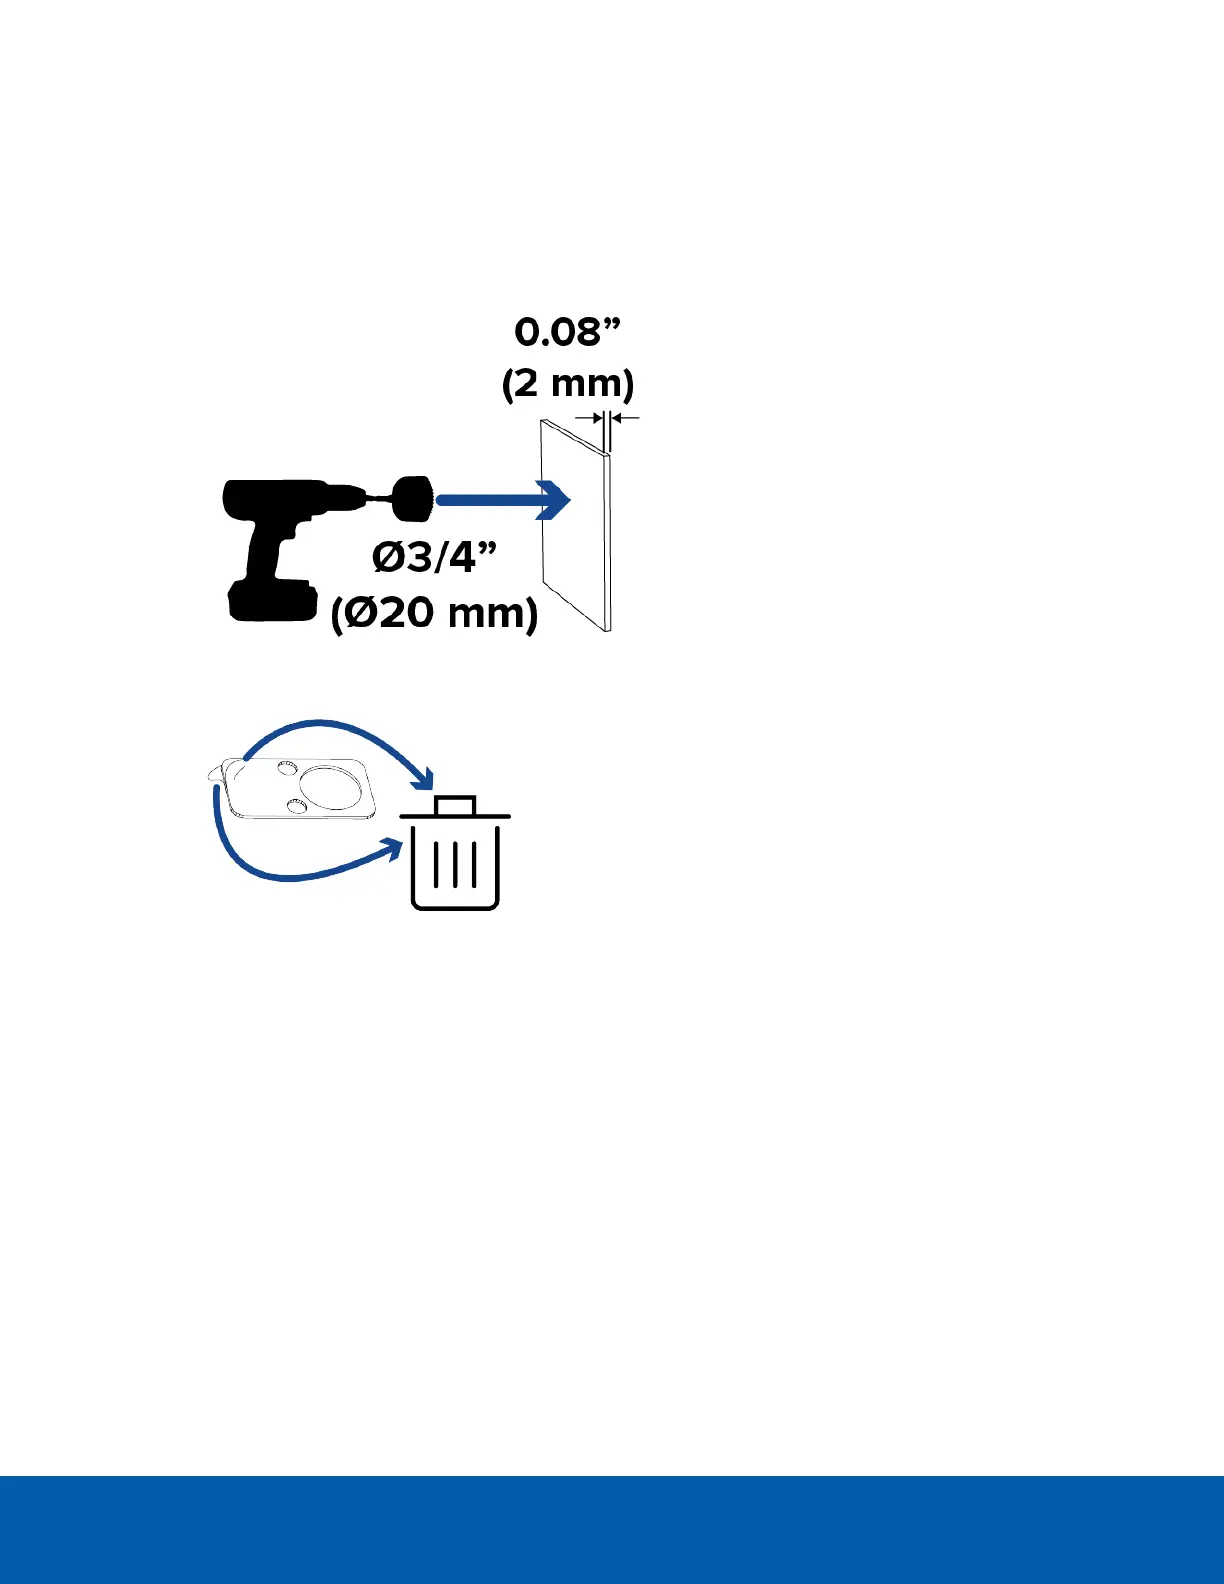
1. Drill a 20 mm (3/4") hole through the mounting surface.
If the mounting surface is more than 2 mm (0.08") thick, there may be occlusions on the video image. If
a smaller drill hole is preferred, we suggest having a countersink hole in the wall to bring the imager
closer to the outer mounting surface.
2. Peel the protective layer off of each side of the adhesive strip and discard.
3. Place the adhesive strip onto the mounting surface, making sure to align it with the drilled hole. Align
the right angle imager with the adhesive strip and press the imager firmly onto the adhesive for at least
5 seconds.
Installing with the Adhesive Strip 37

Table of Contents

Questions and Answers:

Question and Answer IconNeed help?

Do you have a question about the Avigilon H5A Series and is the answer not in the manual?

Avigilon H5A Series Specifications

General IconGeneral
ModelH5A Series
Sensor TypeCMOS
Lens TypeVarifocal
Day/NightYes
IR DistanceVaries by model
WDRYes
Video CompressionH.265, H.264
Frame RateUp to 30 fps
Ethernet100BASE-TX
PowerPoE or 12VDC
Operating Temperature-40°C to +60°C (-40°F to +140°F) (depending on the model)
Ingress ProtectionIP66
Impact RatingIK10
DimensionsVaries by model
WeightVaries by model

Related product manuals