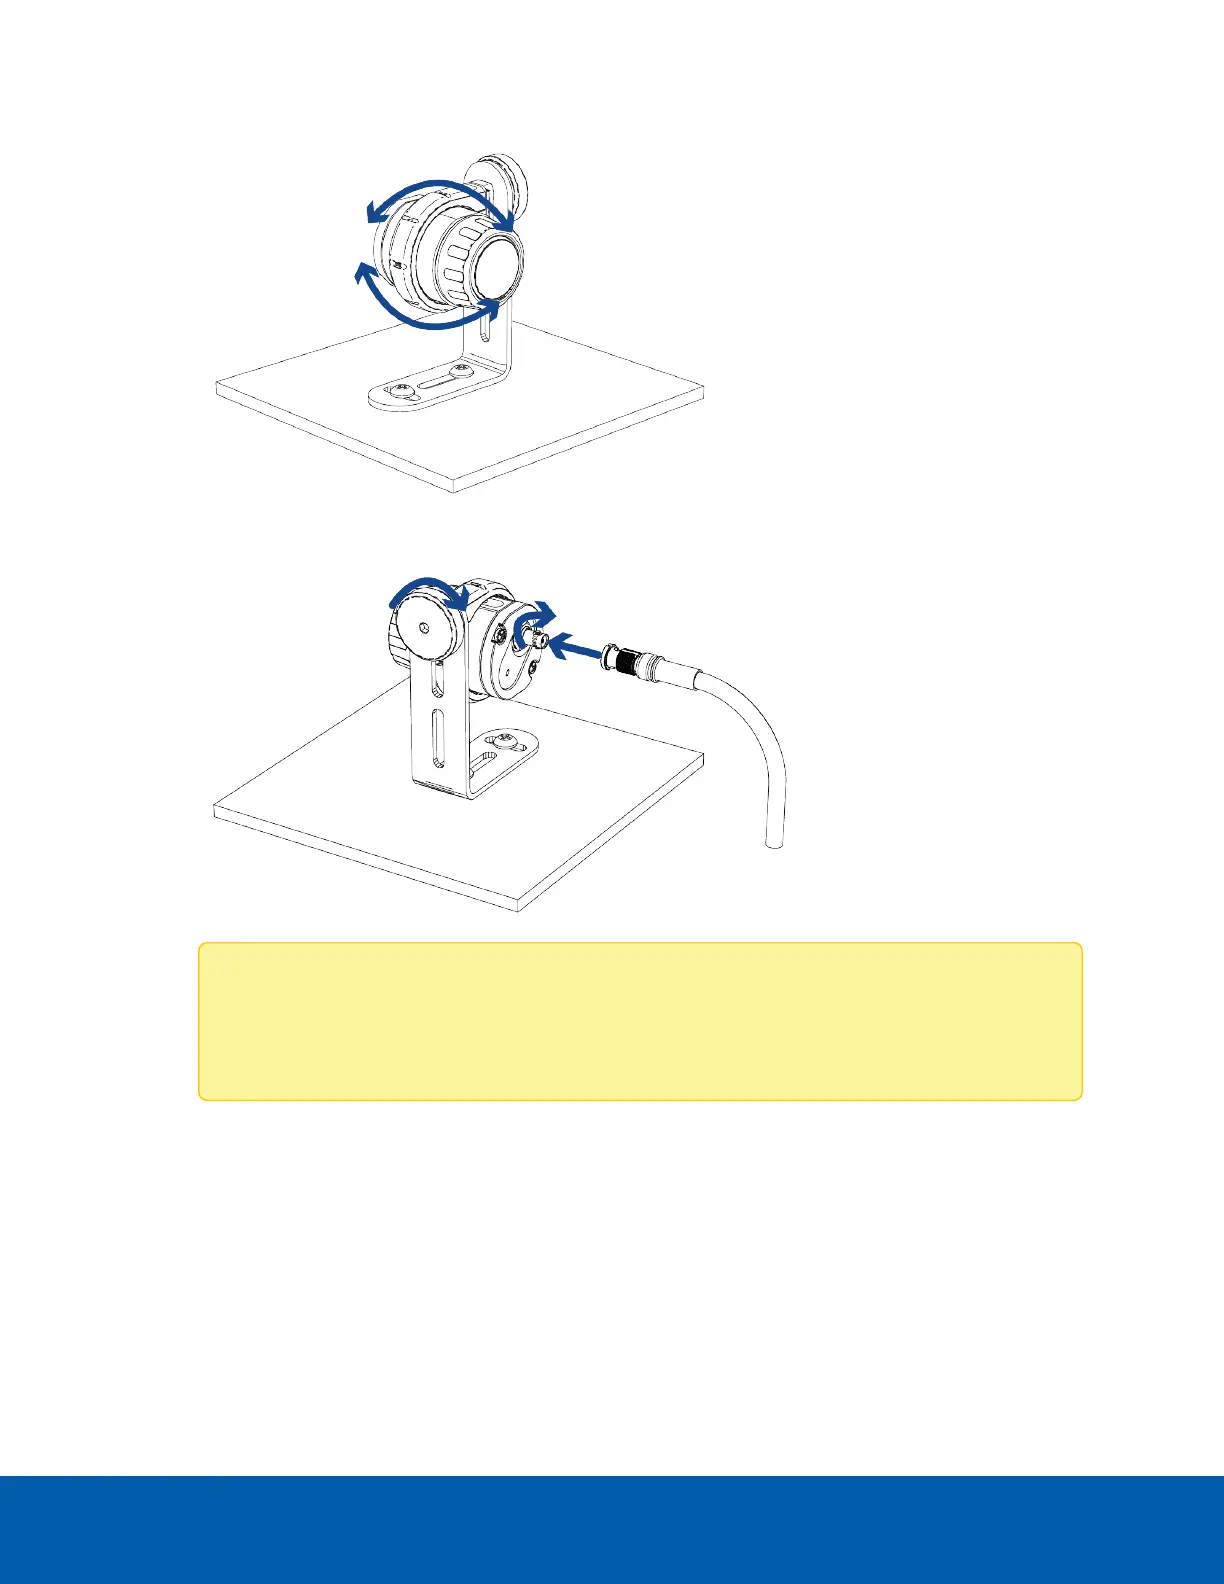
3. Twist the micro bullet forwards or backwards to change the aim up or down.
4. Tighten the thumbscrew to secure the position of the micro bullet imager. Connect the HD BNC cable.
Note: To ensure the micro bullet imager maintains protection from dust and water, make sure
to connect the IP66 rated end of the HD BNC cable to the micro bullet. For more information,
see Recommended Use of HD BNC Cables on page15.
Mounting Through the Mounting Surface
For a more discreet mounting installation, and to keep cables out of reach, you can mount the micro bullet
imager through a hole in a mounting surface. Only part of the lens will be visible on the recorded side of the
mounting surface.
Mounting Through the Mounting Surface 30

 Loading...