mounting adhesive strip. Both options will be described below.
Use one of the following two options to install the right angle imager to the mounting surface.
Installing with Mounting Screws
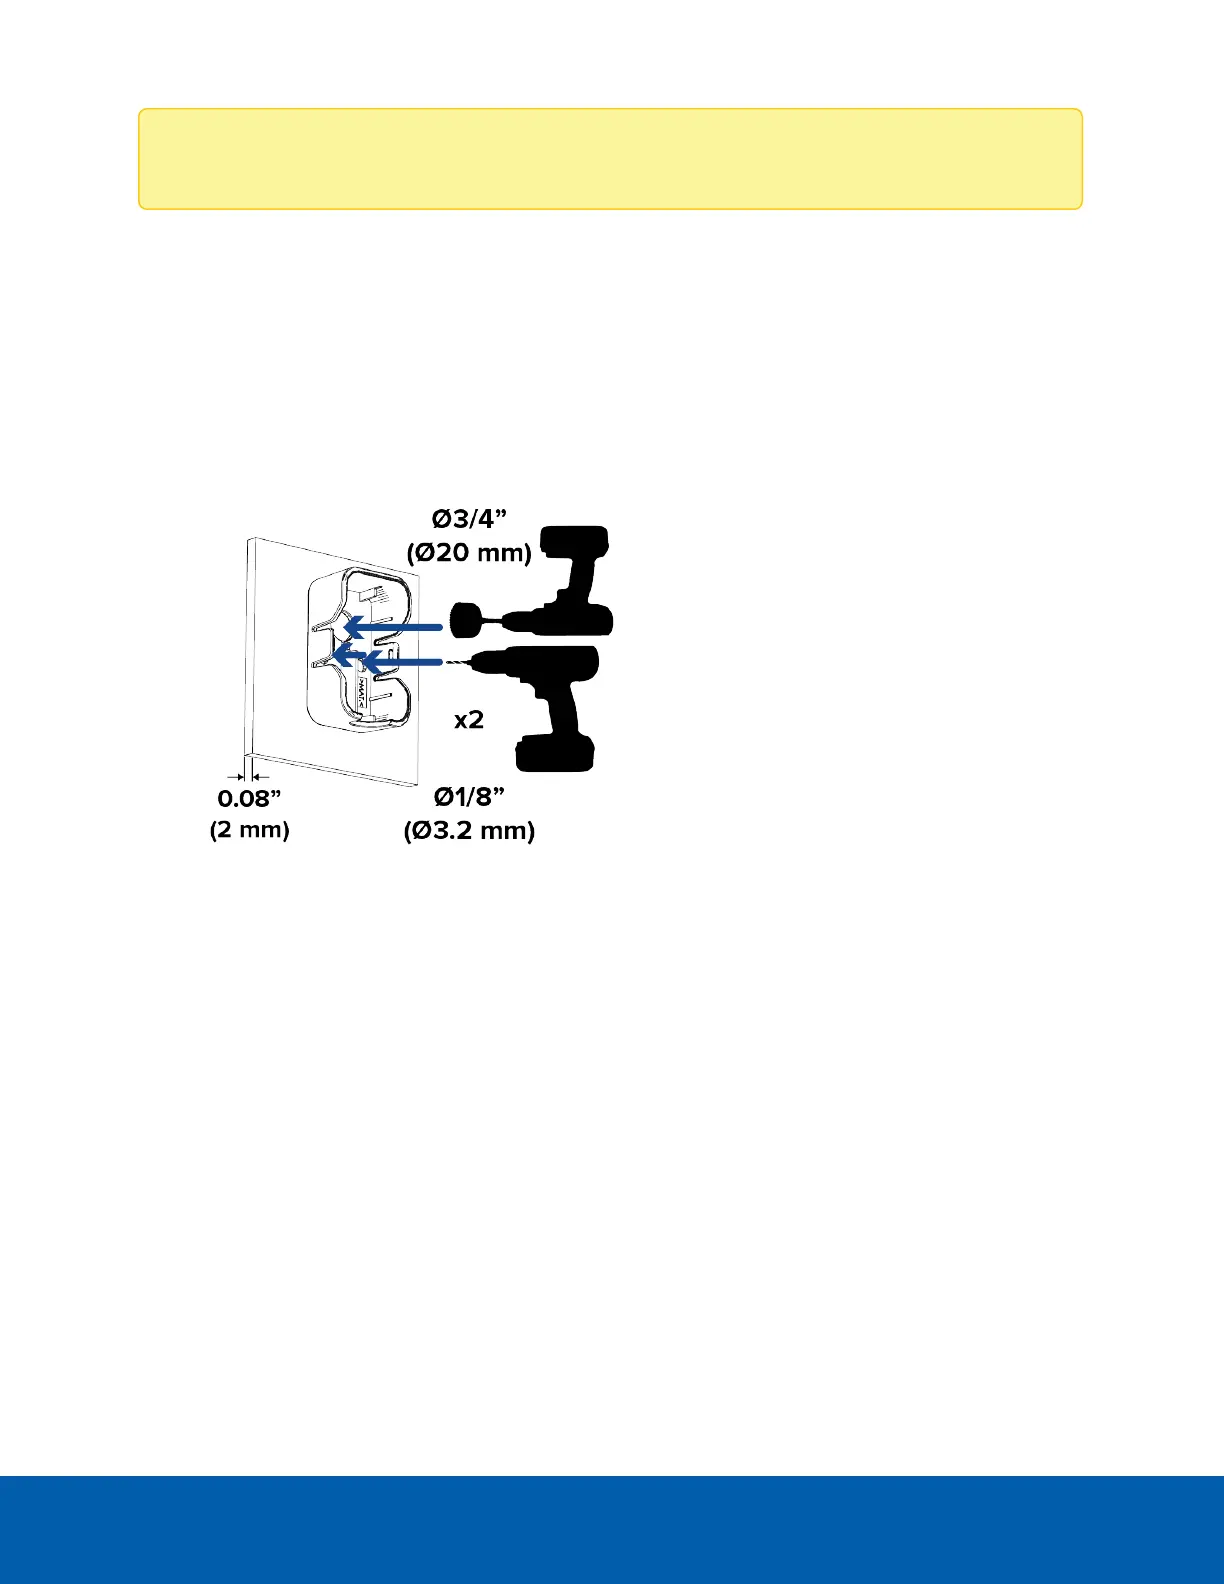
1. Drill a 20 mm (3/4") hole through the mounting surface. Use the mounting bracket as a guide for the
hole.
If the mounting surface is more than 2 mm (0.08") thick, there may be occlusions on the video image.
2. Drill two pilot holes into the mounting surface for the mounting screws. Use the mounting bracket as a
guide for the holes.
3. Align the lens and mounting holes on the mounting bracket with the drilled holes. Secure the bracket
in place with the mounting screws. Snap the right angle imager into the bracket by gently pushing the
imager inwards until the bracket mounting clips click into place.
Installing with Mounting Screws 42

 Loading...