3. Getting started
3. GETTING STARTED
Overview
• Environmental Condition Check
•BasicWorkflow
3.1 Environmental Condition Check
Environment condition c heck
For installations in environments whe re the device is subject to excessive dust, then it is highly advisable and desirable to have this
dust rem oved prior to it reaching the device clean air supply. Devices or structures to extract or shield excessive dust well away
from the dev ice are a prerequisite; if this is not a f easible solution then measures to r elocate the device to a clean air enviro nment
should b e considered.
It is the customer’s responsibility to ensure at all times that the dev ice is protected from the harmful effects of hostile airborne particles
in the environment of the device. The manufacturer reserves the right to refuse repair if a d
evice has b een subject to negligence,
abandon or improper use .
Ambient temperature conditions
Max. ambient temperature : +40°C or 104°F
Min. ambient temperature: +0°C or 32°F
Storage temperature: - 10°C to +60°C (14°F to 1 40°F)
Humidity Conditions
Storage: 0 to 90% relative hum idity, non-condensing
Operation: 0 to 85% relative humidity, non-condensing
Environment
Do not install the devic e in a site near hea t s ources su ch as radiators or air ducts, or in a place subject to direct sunlight, excessive
dust or hum idity. Be aware that room heat rises to the ceiling; check that temperature near the installation site is not excessive.
3.2 Basic Workflow
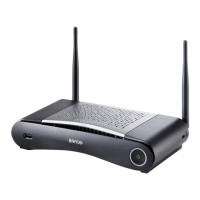
Before using CSE-200
1. Unpack the ClickShare components an d ac cessories from the box.
For a detailed ove rview of the content of the C SE-200 box, see "About the CSE -200", page 5 .
2. Install the Ba se Unit in the meeting room using one of the 2 possible installation methods.
For more information on the installing procedures, see "CSE -200 Installation", pag e 15
3. Connect the video signal between the Base Unit and the display.
4. Connect the audio from the Base Unit to the mee ting room ’s sound system (only required for audio via jack or SPDIF).
5. If configuration via a network is needed, connect a network c able betw een the Bas e Unit and the local network (if not yet done
to power the B ase Unit).
6. Connect the Ba se Unit to the mains power (optional if E thernet supports PoE+.
For more information see "Power connection", page 18,
7. If desired, configure CSE-200 via the Configurator.
For more information on the different ways to configure CSE -200, see "CSE-200 Configurator", page 25
For more information on using CSE-200, refer to the CSE-200 User Guide. This manual can be found on Barco’s
website w
ww.barco.com/clickshare Click on Visit the ClickShare product page and go to tab D ownloads..
R5900023 CSE-200 11/04/2016 13
 Loading...