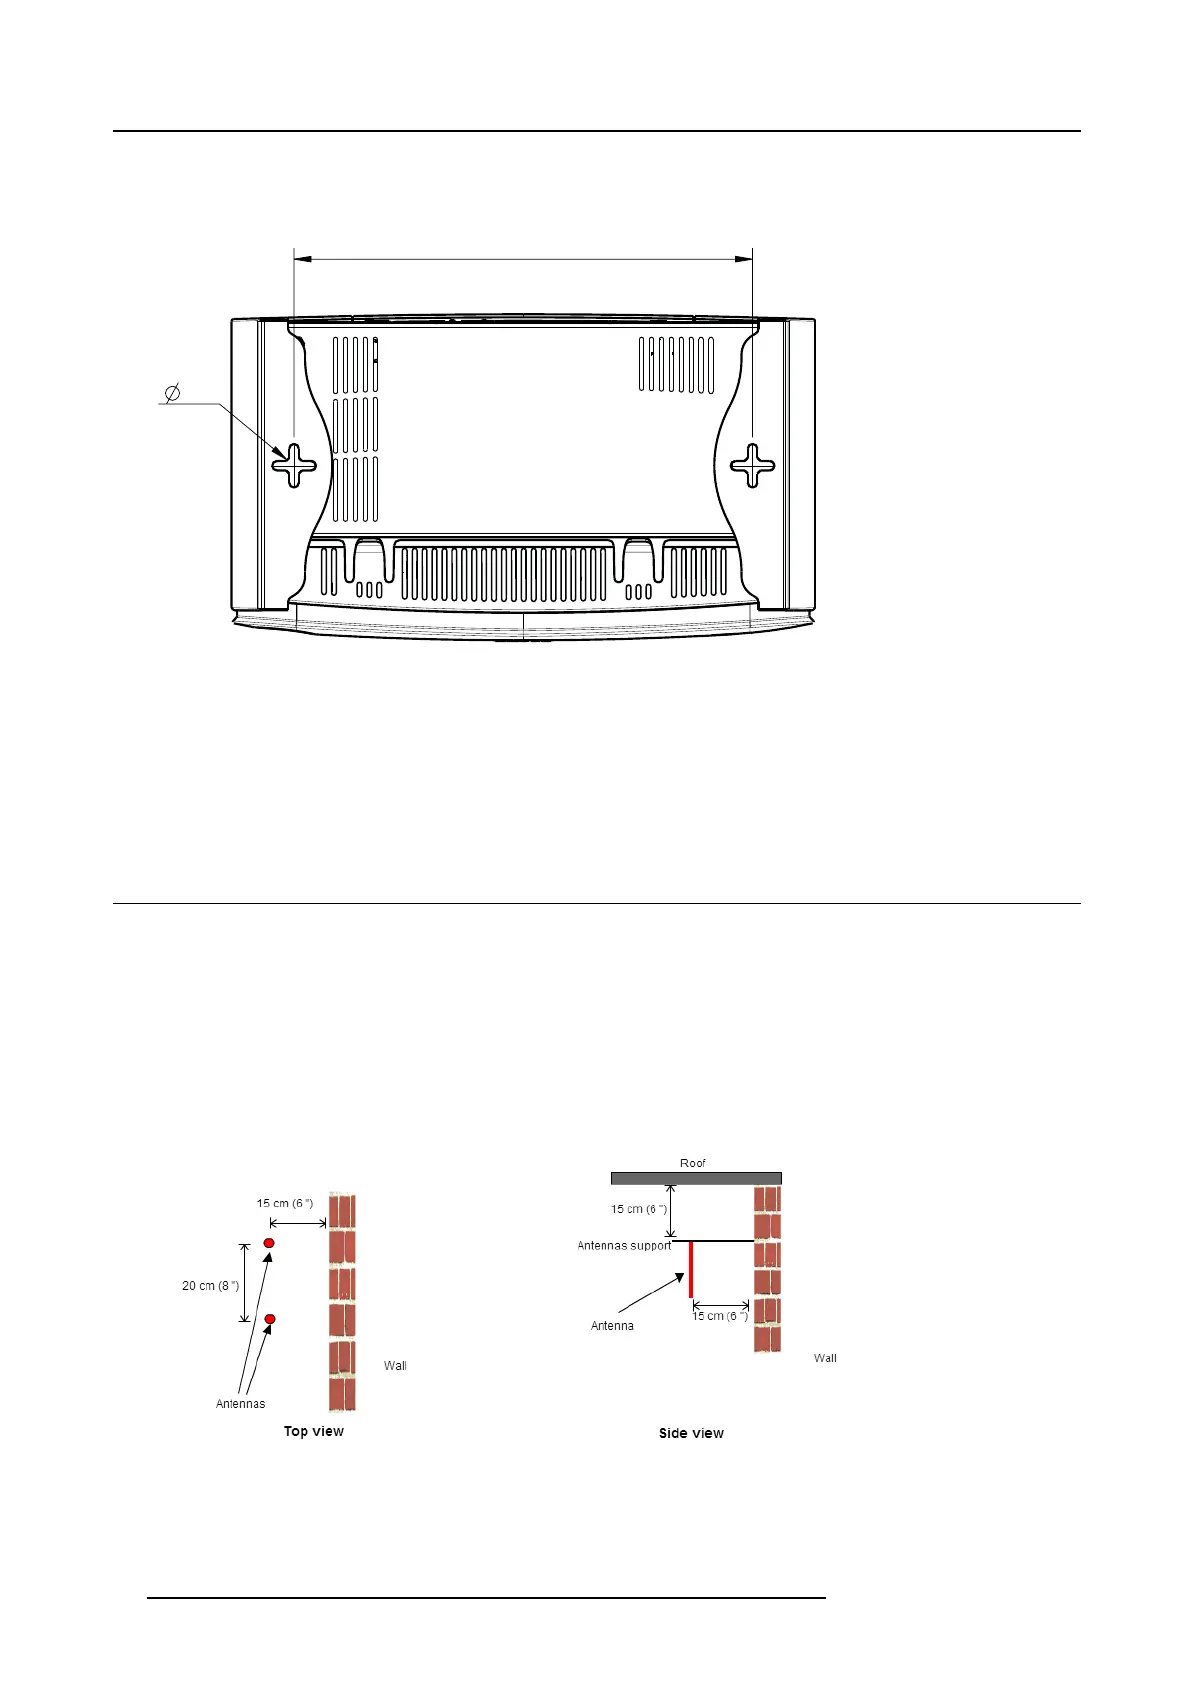
4. CSE-200 Installation
How to install
1. Drill two holes in the wall or ceiling as indicated on the drawing.
Horizontal distance : 162 mm ,
6,5
(2x)
161,84
Image 4-1
Mounting holes
2. Insert a plug in eac h hole (if ne eded, depends on the wall or c eiling type) and drive in 2 s crews. Do not drive in the screws
completely.
Note: Mounting s crews and plugs are not included in the CSE-200 box . T he type of screws and plugs depend on the type of
wall (stone, wood, plasterboard, ...) you are m ounting the Base Unit to. Make sure the head of the screw is not larger
than the hole in the bottom plate of the Base U nit (< 6.5 mm).
3. Hook the Base Unit on both screw heads and slide the Ba se Unit downwards un til it is fixed.
4.4 Recommendations about antenna placement and orientation
Antenna placement rul es
• The antennas should be oriented vertically, so perpendicular to the ceiling and parallel to the walls.
• The antennas should be installed far enough (at least 50c m/1.6ft) from metallic surfaces to avoid unwanted reflections and
far enough (at least 1m/3.3ft) from other radio equipment that operates in the sam e frequency range, e.g. other Wi-Fi ac cess
points, cordless telephone, microwave ovens, …. It is also best to install antennas at least 15 cm (6 inches) from concrete walls.
• The most favorable situation is a direct line
of sight between antennas and Buttons. Any obstruction will cause the signal to
follow a longer pr opagation path, which c an res ult in performance degradation.
• Due to the particular radio pattern of the dipole antennas, the antennas should not be plac ed just above potential pos itions of
ClickShare users. As a result, the advised pos ition for the antennas is at the side of the meeting room.
Image 4-2
Closer view of antennas in
stallat ion in the meeting room
16 R5900023 CSE-200 11/04/2016
 Loading...