14. Maintenance procedures
14.2 Check the small dust fi lt er
Necessary tools
7mm flat screwdriver.
How to check the small dust filter?
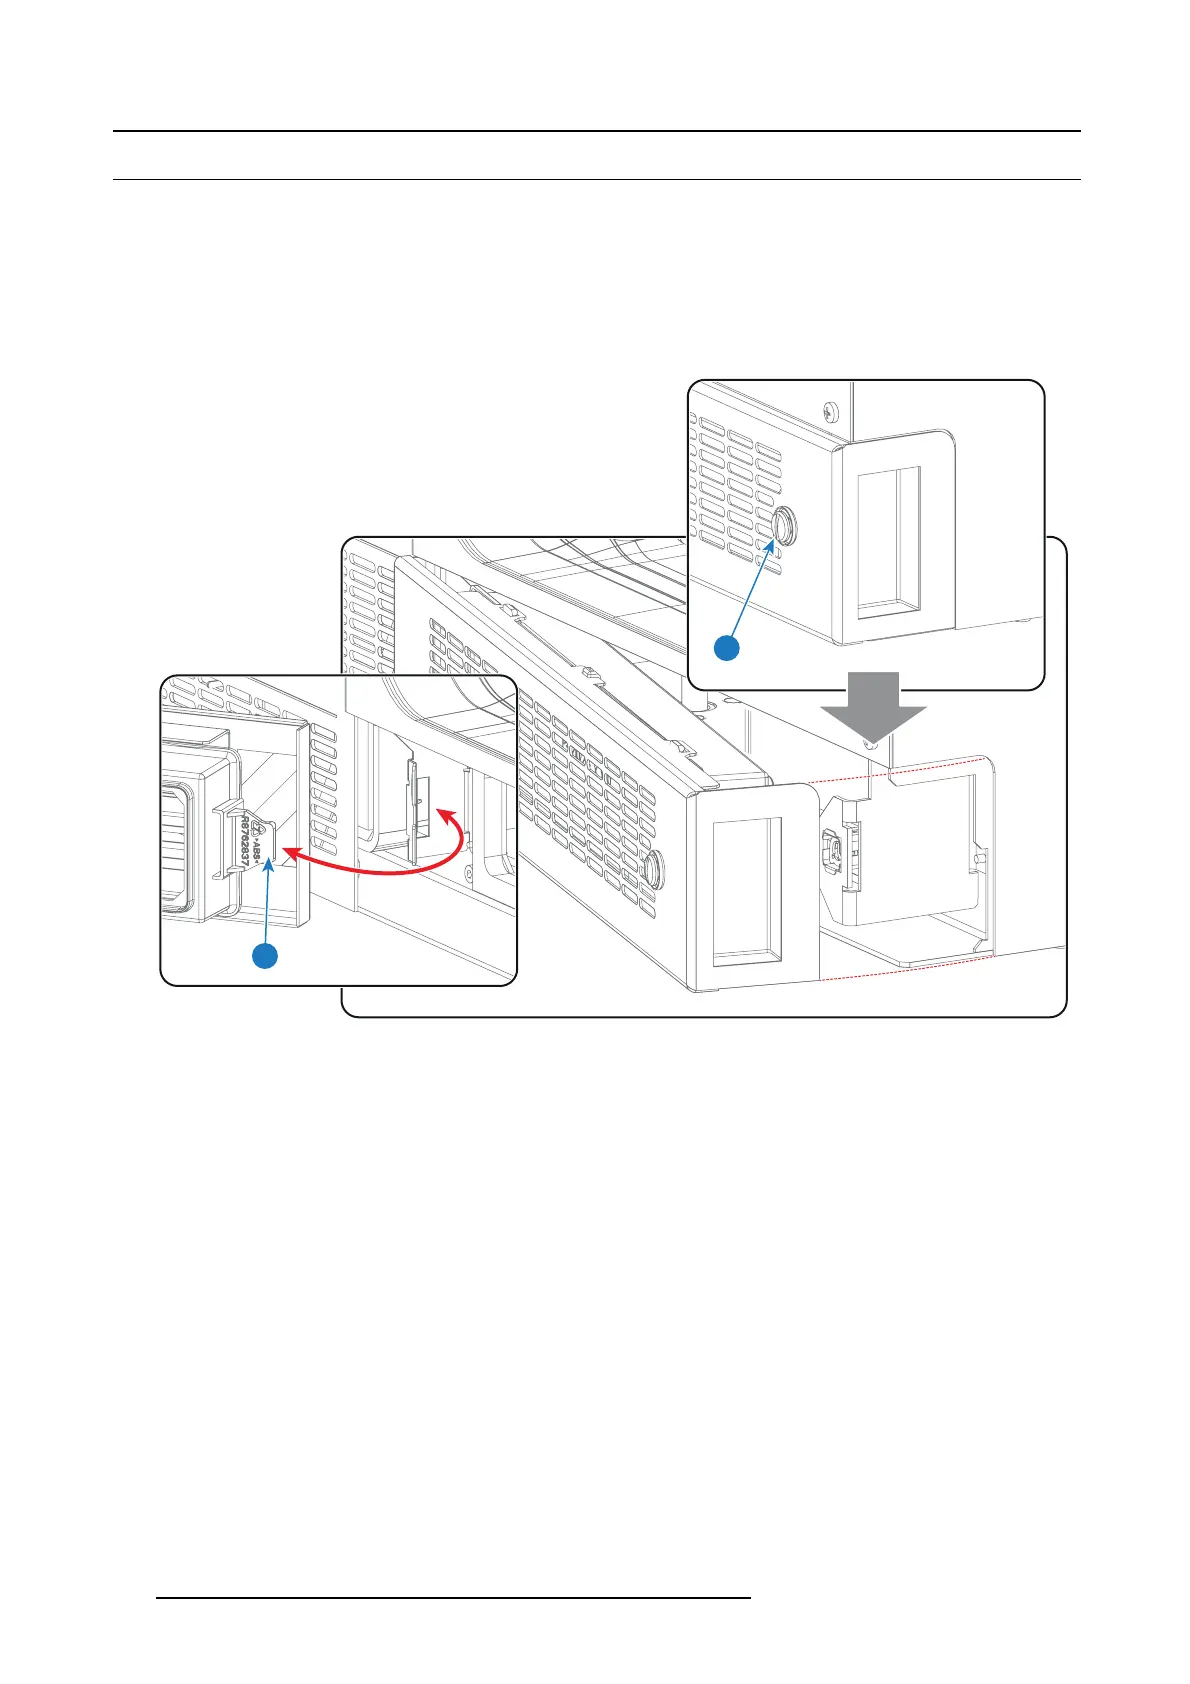
1. Loosen the captive screw (reference 1 image 14-3) of the small dust filter assemb ly using a 7mm fla t screwdriver.
2. Remove the dust filter as sem bly from the projector by pivoting the assembly away from the projector as illustrated. Note that the
other side of the assembly contains a mounting lip ( reference 2 image 14-3) which is engaged in the projector chassis.
1
2
Image 14-3
3. Detach the dust filter from the cov er plate. Do this by pus hing the two latches (reference 3 image 14-4) of the dust filter inwards.
4. Check the “air in” side of the dust filter for dust and/or grease.
In case the filter is contaminated with grease wash and dry the dust filter. See cleaning procedure "Washing and drying the dust
filters", page 127.
In case the filter contains dust but doesn’t feel greasy then vacuum clean the dust filter. Se e procedure "Vacuum cleaning of the
dust filters", page 126.
Note: Grease on the filter can build up after s everal months in an environment contaminated with greasy air. Note that areas
where popcorn is consumed are s ubject to greasy air.
Tip: Take into account that the time ne eded to dry the dust filters may be 24 h ours or more. For that, it’s recommended to
have a second set of dus t filters which can be used while cleaning the first set .
5. Attach a clean dust filter to the c
over plate. Ensure that both latches (reference 4 image 14-4) of the dust filter are engaged.
Caution: UNDER NO CIRCUM STANCES SHOULD WE T FILTERS BE INSTALLED BACK INTO THE PR OJECTOR. THIS
CAN HAVE SERIOUS SAFETY CONSEQUENCES AS WELL AS JEOPARDIZE THE INTERNAL OPTICS OF THE
SYSTEM.
124
R5906847 DP2K SLP SERIES 02/06/2017
 Loading...


