R5906788-03 Thor series136
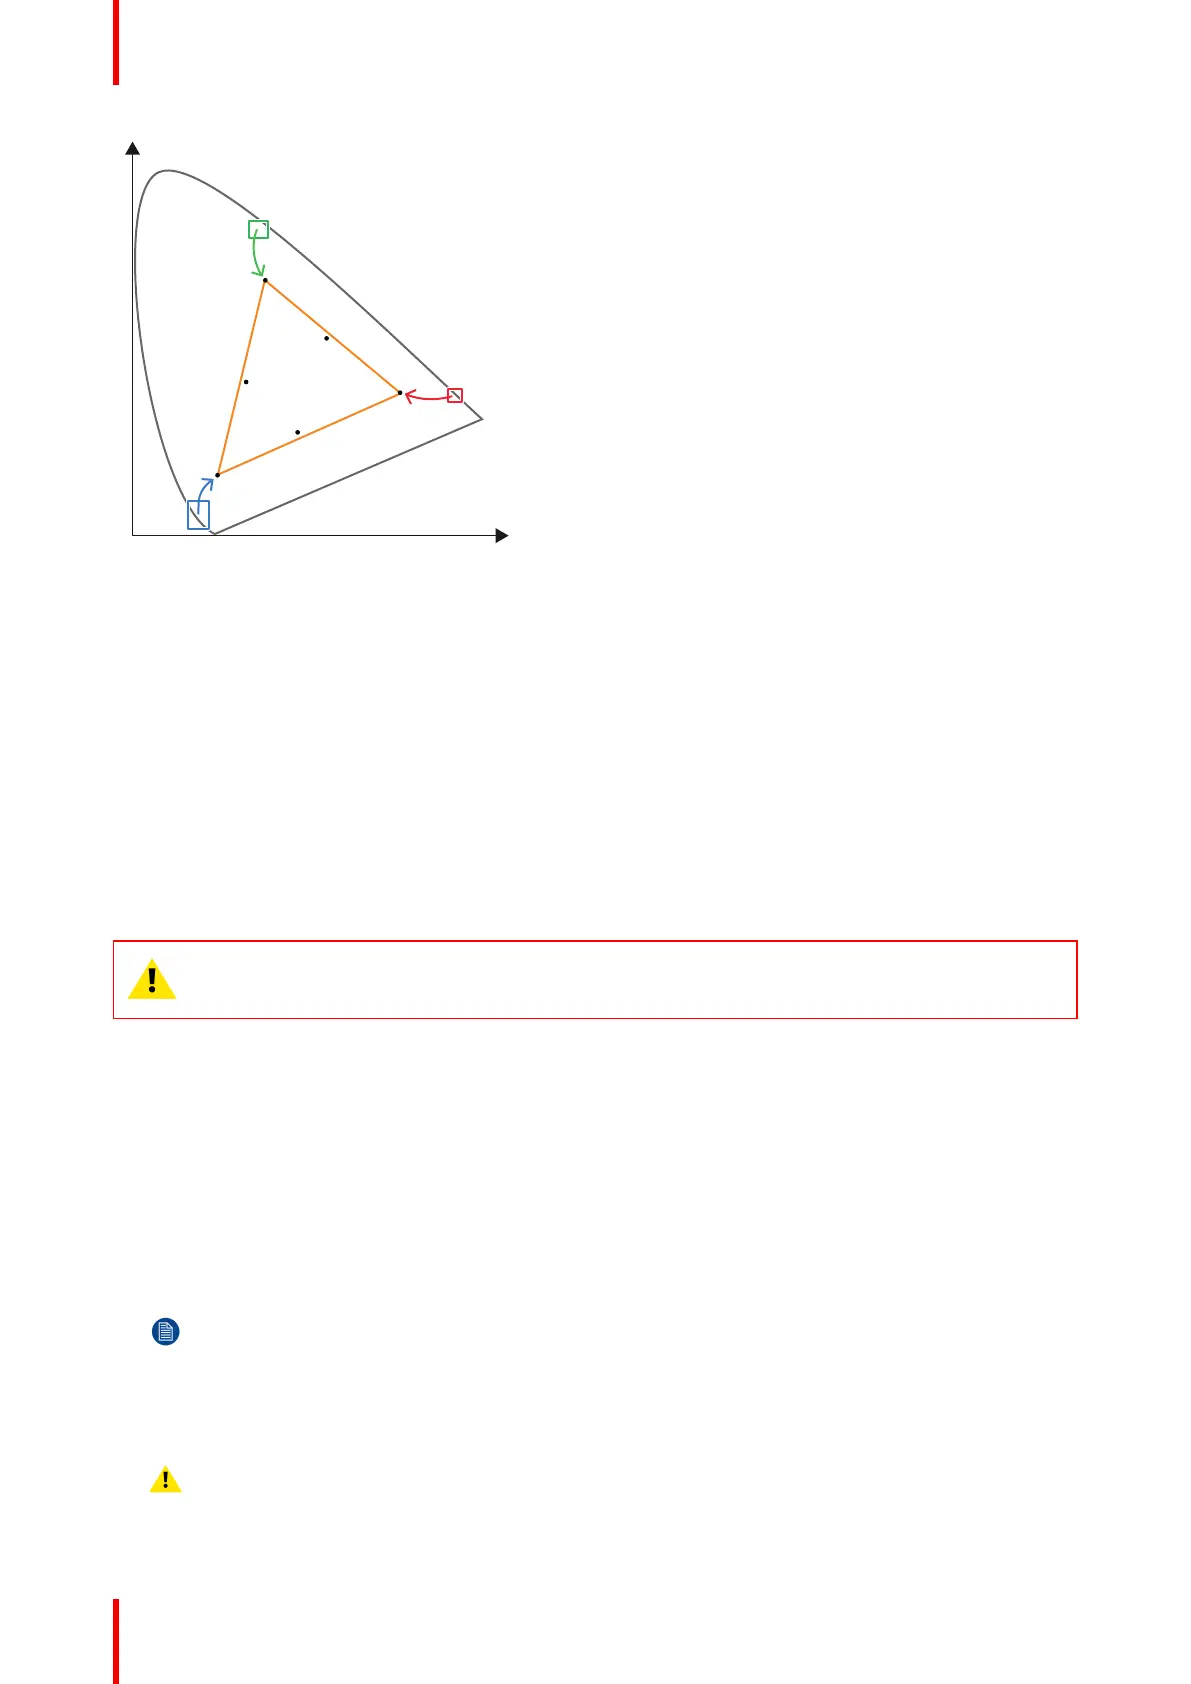
Image 13-3: Correction of native color gamut towards desired color gamut (electronic correction)
Electronic correction
The electronic correction adapts the native color gamut towards the desired (target) color gamut (e.g. DC28_
DCI_Xenon.TCGD). This correction is introduced by the DMD drivers and is also called ‘P7 correction’. The
electronic correction takes place once the MCGD file of the projector is mapped with the TCGD file of the film.
Influence of aspect ratio
The aspect ratio of the projected image could have a small influence upon the measured xy coordinates.
Therefore, it's recommended to save the xy coordinates per aspect ratio in separate MCGD files.
3D color calibration
In case of 3D projection the uncorrected (native) Red, Green, Blue and White color coordinates of the
projector has to be measured twice. Once through the left eye glass of the 3D goggles and once through the
right eye glass.
CAUTION: Prior to start with color gamut calibration ensure that the white point calibration for the
same projection mode (2D, Laser3D or External 3D) is finalized successfully. See chapter “White
point calibration”, page 133.
Required tools
• Spectroradiometer.
• Communicator.
Color gamut calibration procedure:
1. Check if the white point calibration for the projection mode (2D, Laser3D or External 3D) of which you want to
apply color gamut correction is done. If not see chapter “White point calibration”, page 133.
2. Setup the ambient light conditions as it should be during the play out of the movie. (e.g. only the stairs and
emergency exit lighting is switched on).
Note: In an optimal setup less than 1% of light from any other source than the light from the projector
should illuminate the screen.
3. Sequentially measure and enter the xy coordinates of the three primary colors (red, green, blue) and full
white. Use therefore the Communicator. Go to Installation > Color calibration > Measure native colors. For
detailed instructions see user guide of the Communicator.
Caution: Ensure that the correct projection mode is selected: 2D, Laser3D or External 3D.
Calibration
 Loading...


