R5906788-03 Thor series54
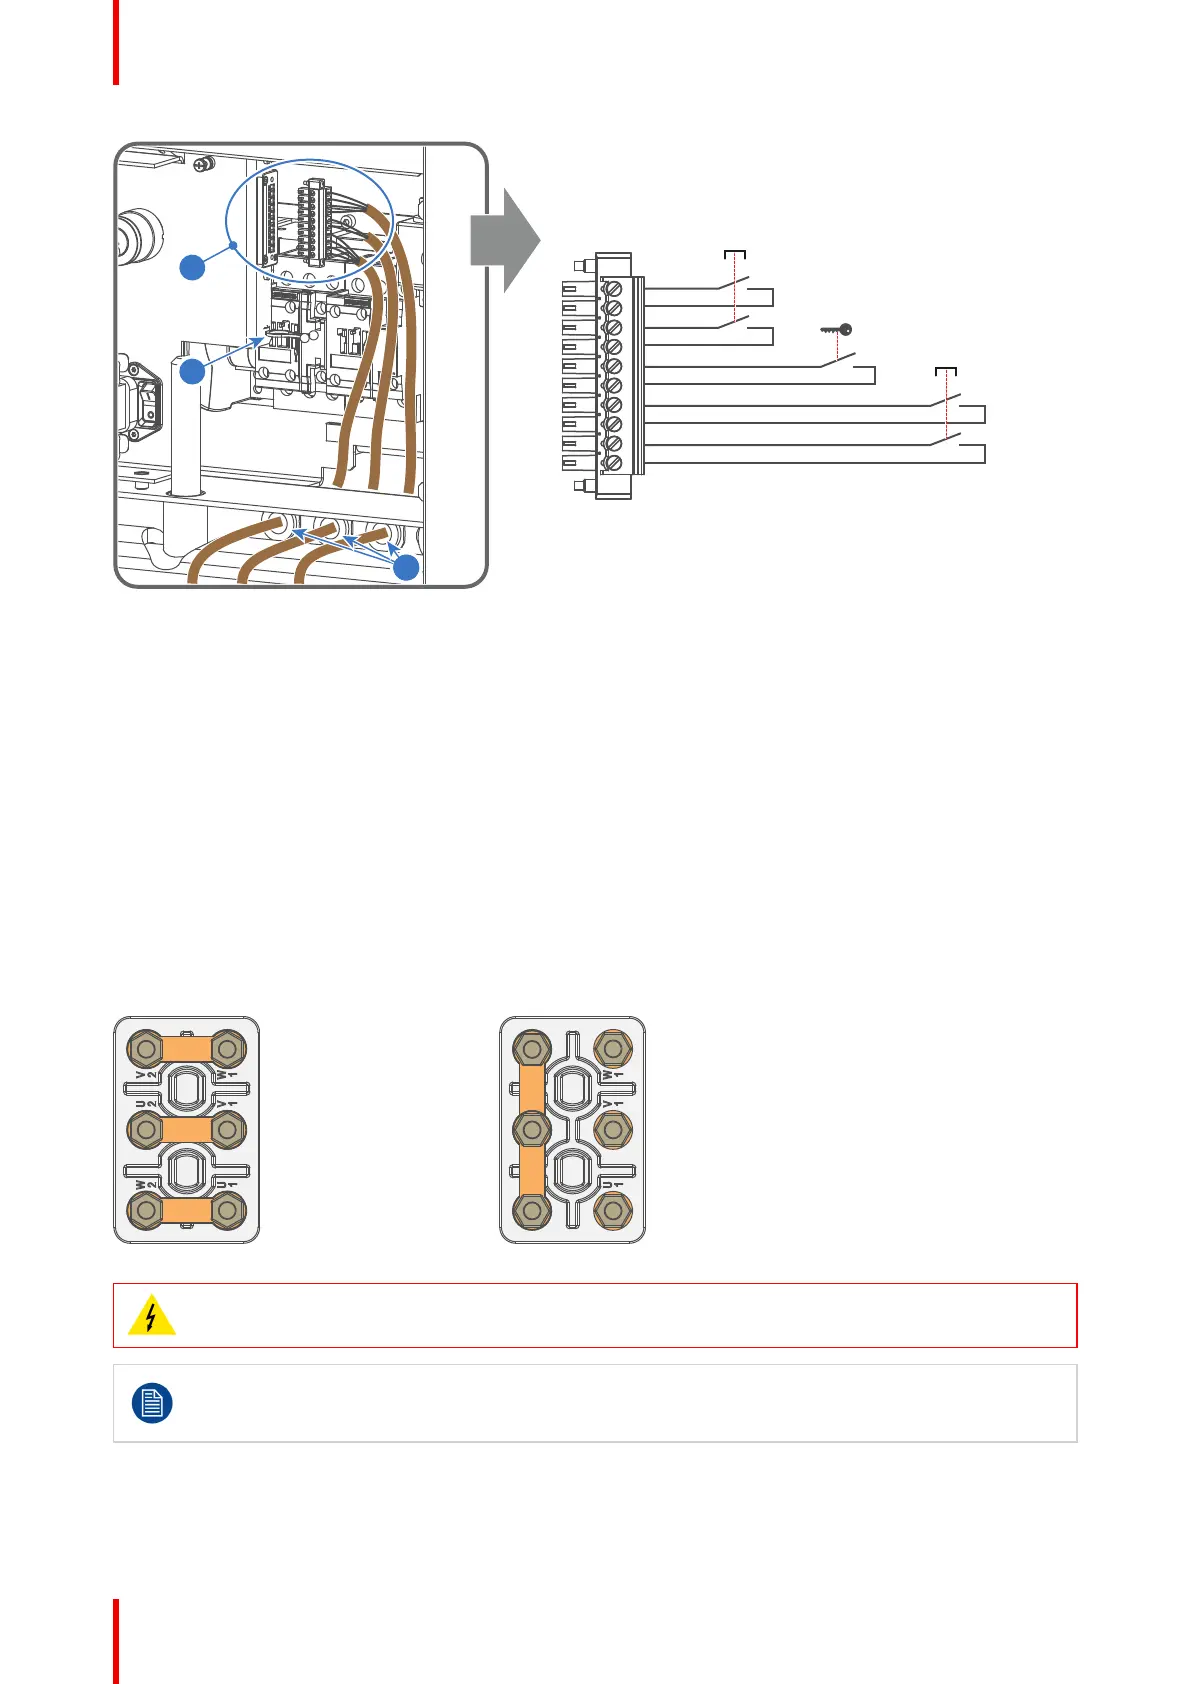
Image 6-13
6. Install the cover of the mains compartment.
6.7 Three phase power input configuration of the
projector
About the power input
The projector power input can be configured for a power supply of 200-240V / 346-415V in a Y configuration
(3W+N+PE) or for 200-240V in a Δ configuration (3W+PE). Before operating the projector, place the links in
the correct position depending on the local power supply.
For a 3W+N+PE system, 346-415V is measured between the lines, 200-240V is measured between the lines
and the neutral.
For a 3W+PE system, 200-240V is measured between the lines.
Image 6-14: Υ/Δ configuration block (left: delta, right: star)
WARNING: Ensure that the mains is disconnected from the projector prior to start with this
procedure.
The Υ/Δ configuration block is located inside the mains compartment. This procedure assumes that
the cover of the mains compartment is already removed. See chapter “Accessing the mains
compartment”, page 51.
Required tools
• Nut driver 10 mm
Physical installation
 Loading...


