R5906788-03 Thor series58
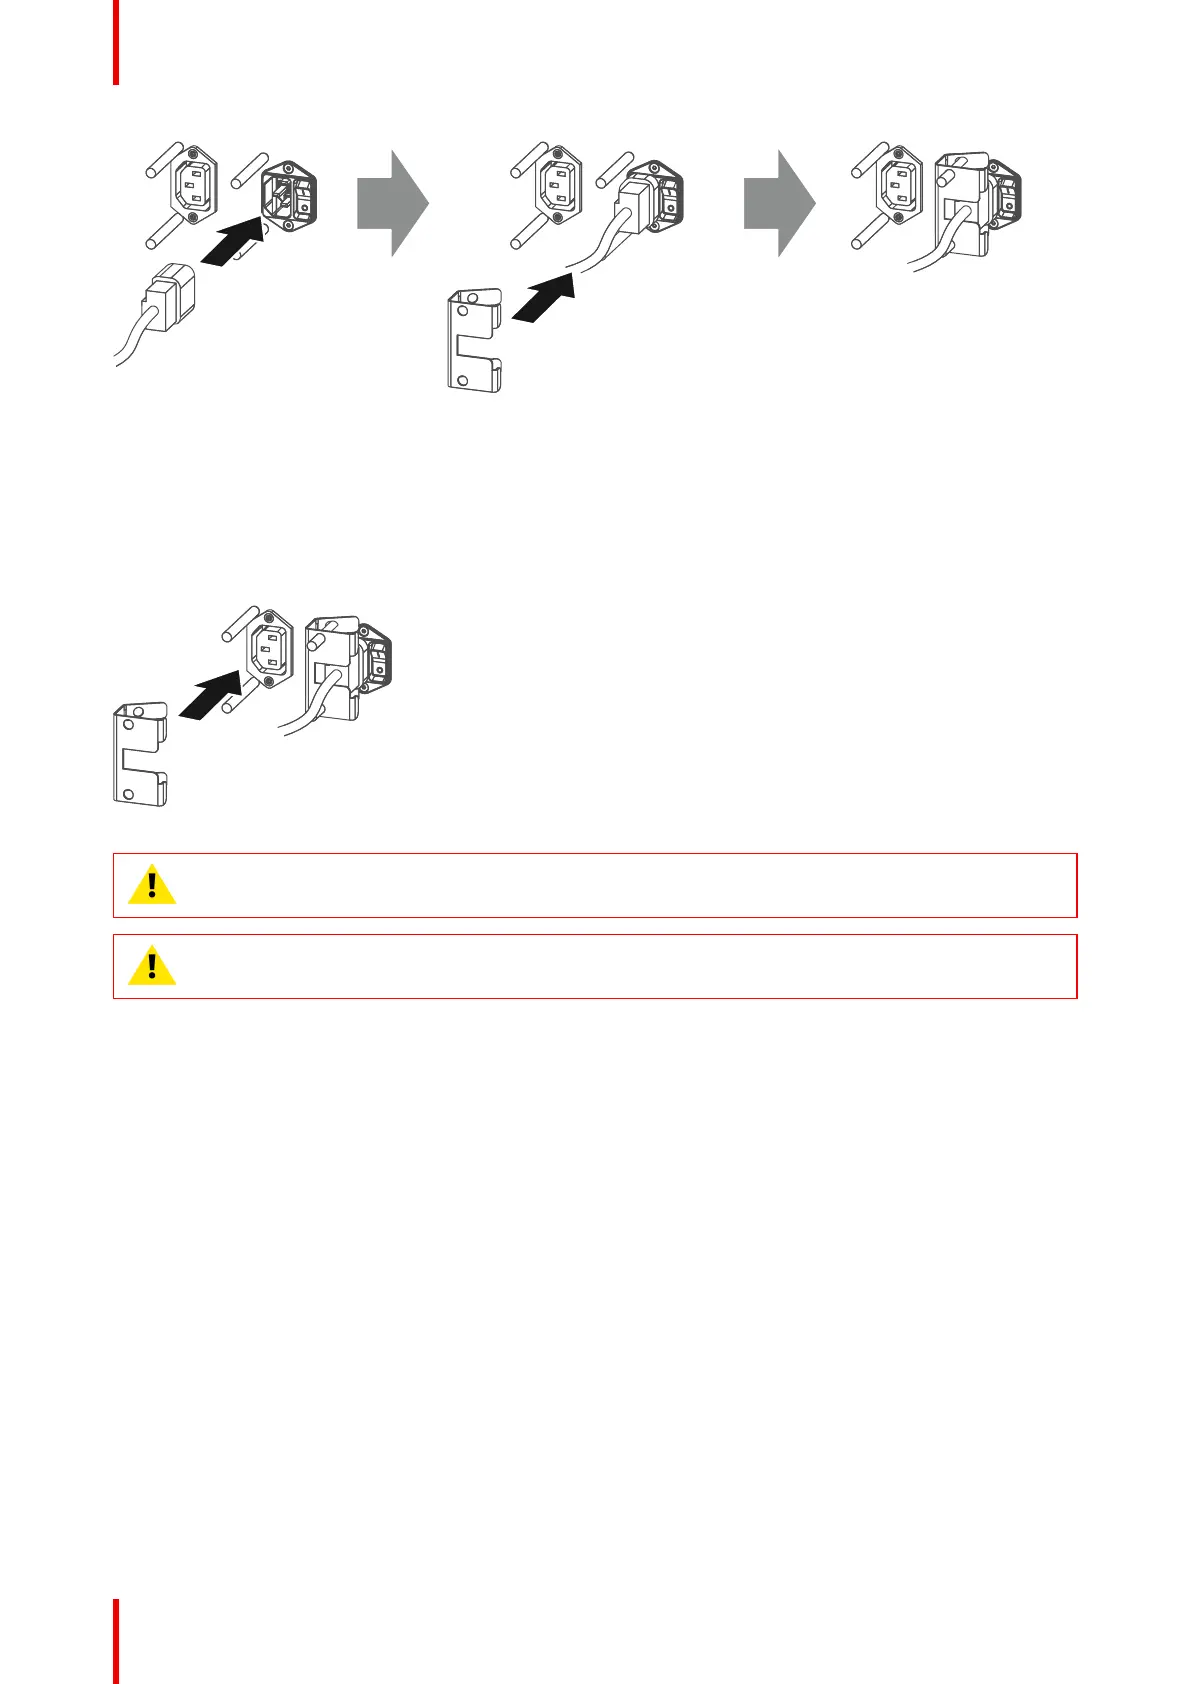
Image 6-19
3. Secure the UPS inlet socket with a fixation spring. Handle as follow:
• Squeeze the fixation spring together.
• Slide the fixation spring on the fixation pins while squeezing together and push it against the power plug.
• Release the fixation spring.
4. Install on the power outlet the second fixation spring to prevent losing it.
Image 6-20
CAUTION: The electrical connection with the UPS INLET socket of the projector must be done with
a certified AC power supply cord (minimum 0,75 mm² or 18 AWG and minimum 300V)
CAUTION: Do not use the power OUTLET socket of the projector to provide power to other
equipment!
6.11 Installing the Communicator Touch Panel
Required tools
• 17mm open wrench.
• 10mm open wrench.
How to install the Touch Panel interface onto the top of the projector?
1. Assemble the mounting plate and the swivel arm together as illustrated. First place the nut (reference 1
Image 6-21) upon the rod of the mounting plate, then add the lock washer (reference 2 Image 6-21), then
fasten the mounting plate and the swivel arm together. When the arm is mounted, turn the nut (reference 1
Image 6-21) against the arm to secure the position.
Physical installation
 Loading...


