R5906788-03 Thor series 59
Image 6-21
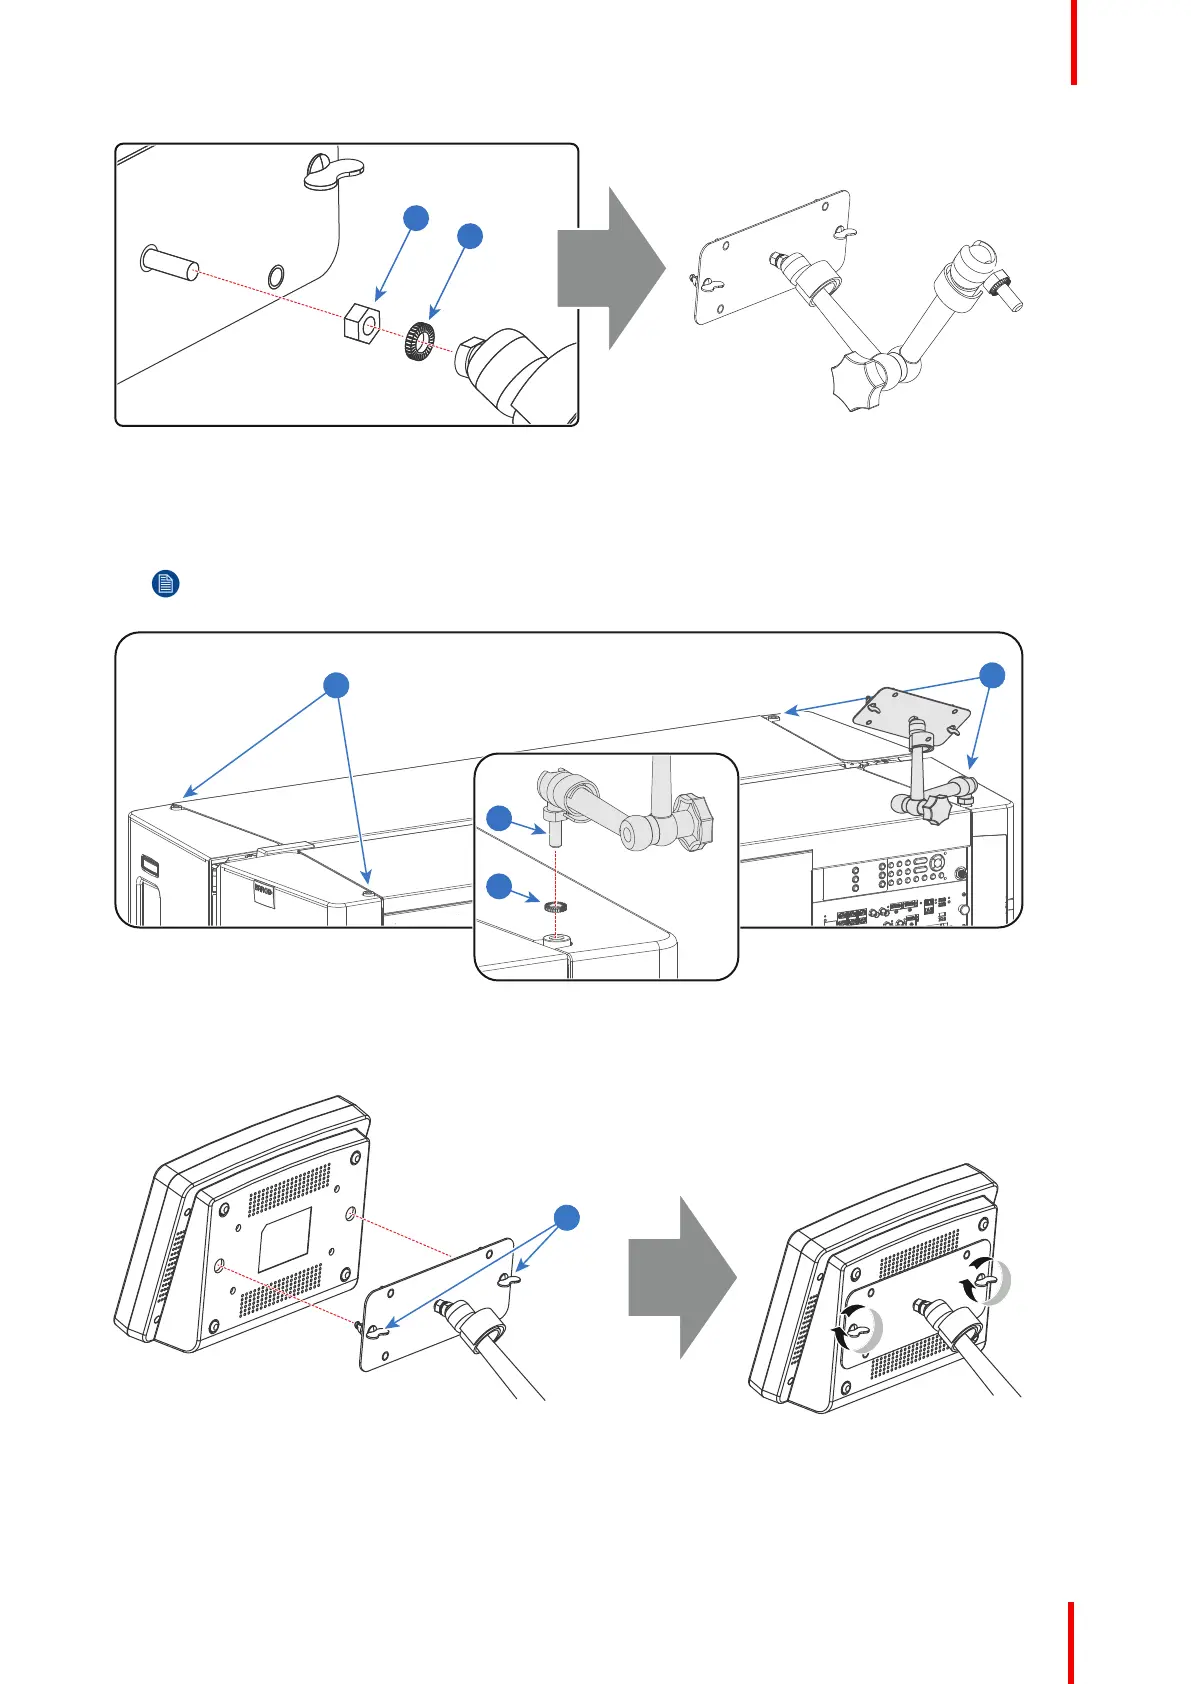
2. Slide a washer (reference 4 Image 6-22) over the base of the swivel arm (reference 3 Image 6-22) and insert
the base of the swivel arm into one of the four possible mounting holes (reference 1 & 2 Image 6-22) at the top
of the projector.
Note: Which mounting hole to use depends on the operator preferences. In the illustration below the
swivel arm is installed into the mounting hole nearest by the Local Keypad of the projector.
Image 6-22
3. Place the Touch Panel interface upon the mounting plate of the swivel arm and fasten the two wing nuts
(reference 5 Image 6-23) as illustrated.
Image 6-23
4. Connect the DC plug, the RJ45 Ethernet plug and the D-SUB plug of the customized cable into their
respective sockets on the Touch Panel interface.
Physical installation
 Loading...


