R5906788-03 Thor series60
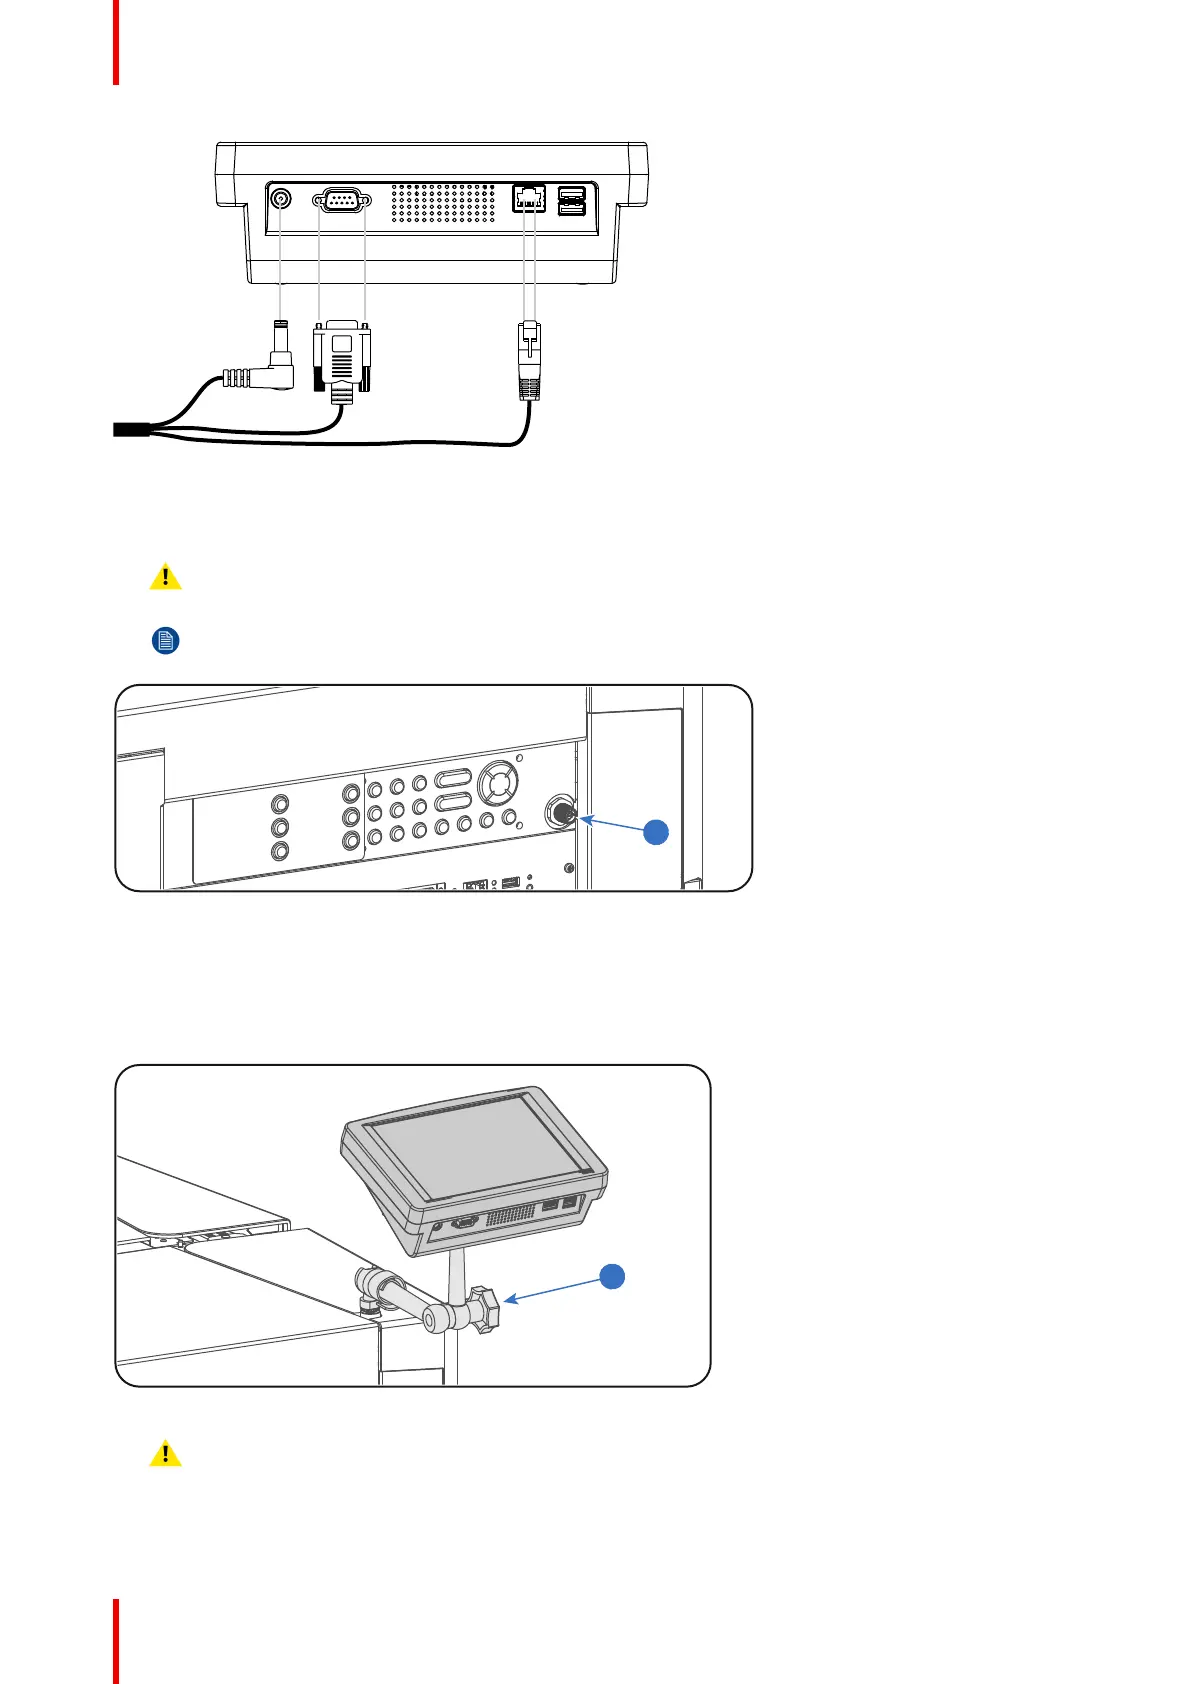
Image 6-24
5. Connect the circular plug of the customized cable with the circular socket (reference 6 Image 6-25) at the right
side of the Local Keypad of the projector.
Caution: To avoid connector damage, align the pins before you connect the customized cable.
Note: Ensure to tighten the locking nut on the connector.
Image 6-25
6. Attach the multi cable to the swivel arm using the two Velcro strips.
7. Position the Touch Panel interface in the desired location. Hold the Touch Panel interface with one hand,
release the swivel lock (reference 7 Image 6-26), reposition the Touch Panel interface in the desired location,
and fasten the swivel lock.
Image 6-26
Caution: Never release the central swivel lock without supporting the Touch Panel interface.
Physical installation
 Loading...


