R5906788-03 Thor series 51
CAUTION: Do not interchange the different cooling circuits with each other! Otherwise the system
will fail.
CAUTION: The minimum bend radius of the hoses is 30 centimeter.
6.4 Connecting the data cable with projector and
chillers
What has to be done?
Next to connecting the hoses, the communication port of the chillers has to be connected with each other and
with the projector.
Depending on the projector model one or two chillers are required! For the Thor series projector one chiller
has to be installed. The Thor+ series needs two chillers.
Required parts
• One long (10 meter) communication cable with SUBD Male/Female 15 pins plugs.
• One short (5 meter) communication cable with SUBD Male/Female 15 pins plugs (only if two chillers are
required).
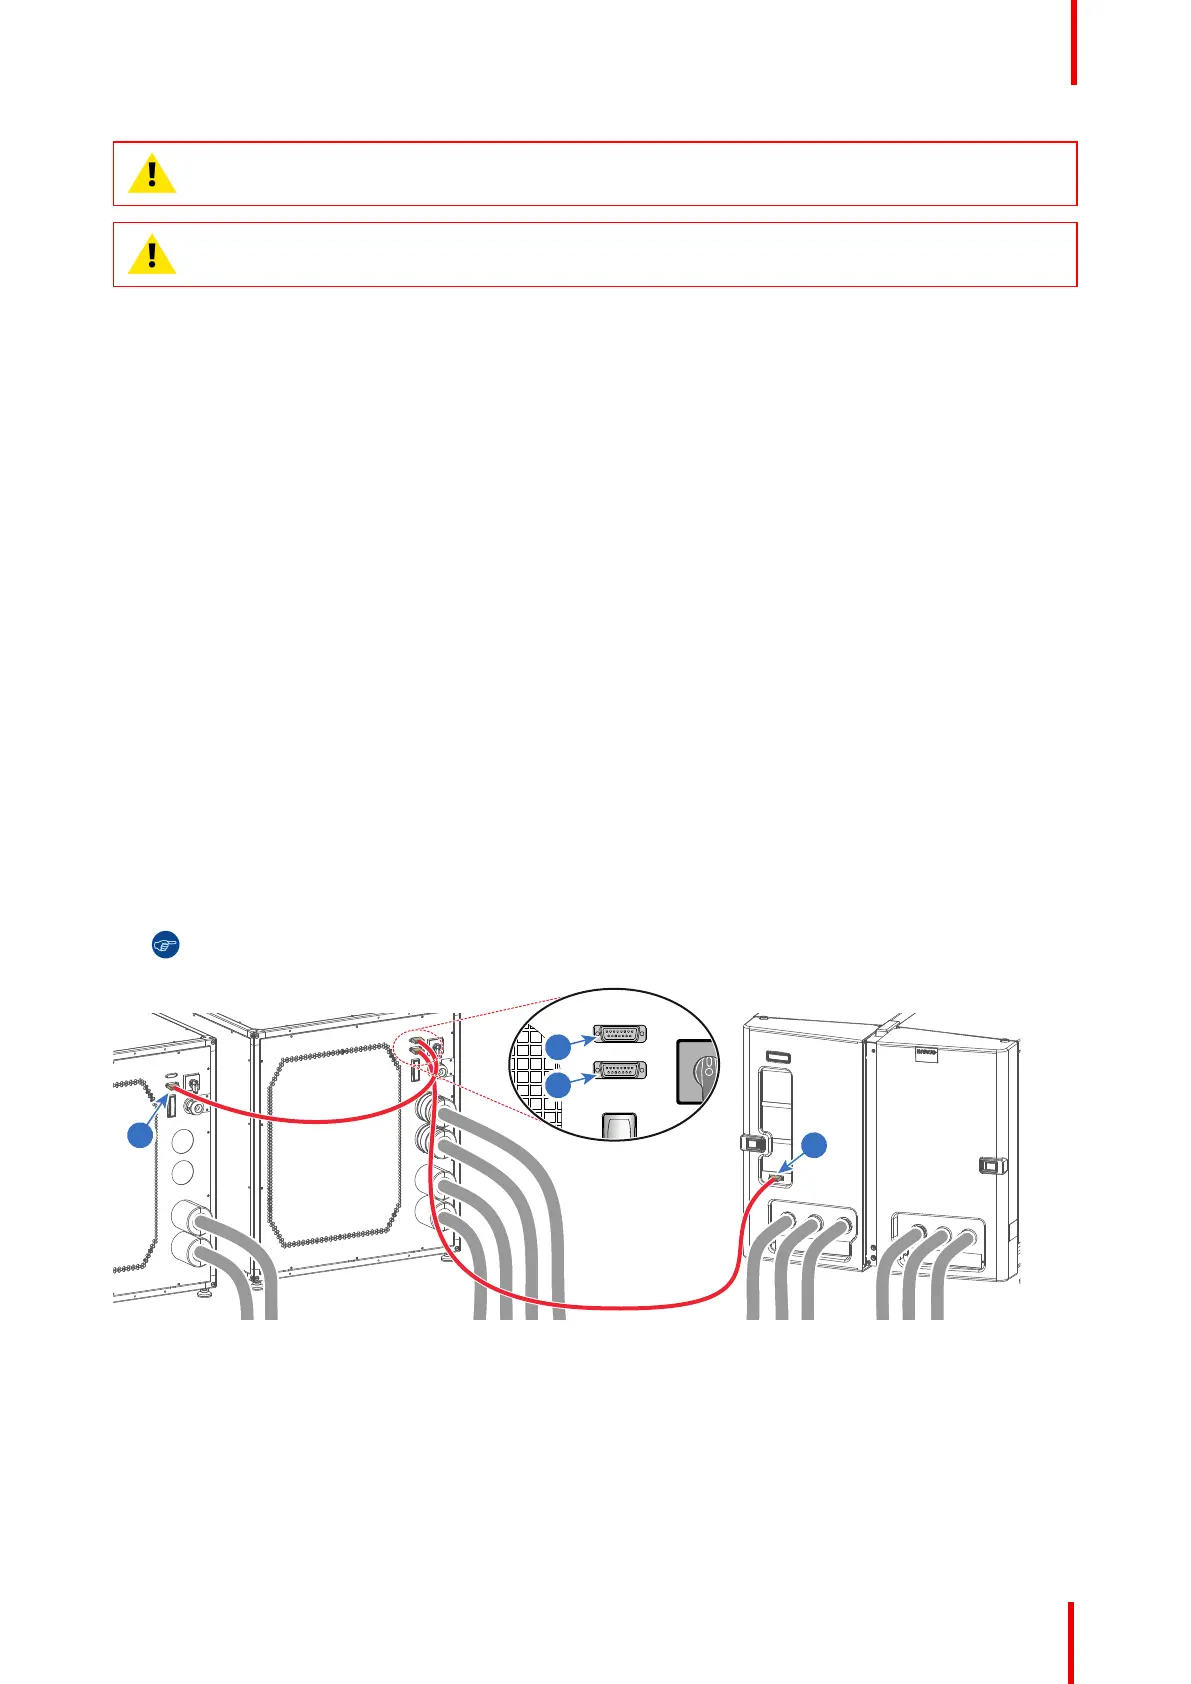
How to connect the communication ports of the chillers with the projector?
1. Does the system contain two chillers?
► If yes, connect the output port of one chiller (reference 1 Image 6-9) with the input port of the other chiller
(reference 2 Image 6-9). Use for this a short communication cable.
► If no, proceed with the next step.
2. Connect the output port of the chiller (reference 3 Image 6-9) with the communication port of the projector
(reference 4 Image 6-9). Use for this a long communication cable.
Tip: Guide the long communication cable together with the hoses.
Image 6-9
6.5 Accessing the mains compartment
Required tools
• Phillips screwdriver PH1
• Allen wrench 3 mm
Physical installation
 Loading...


