21
Getting Started with Videohub Controllers
XY Controller Configuration
Step 1. Drag the Number of Destinations slider to the desired number.
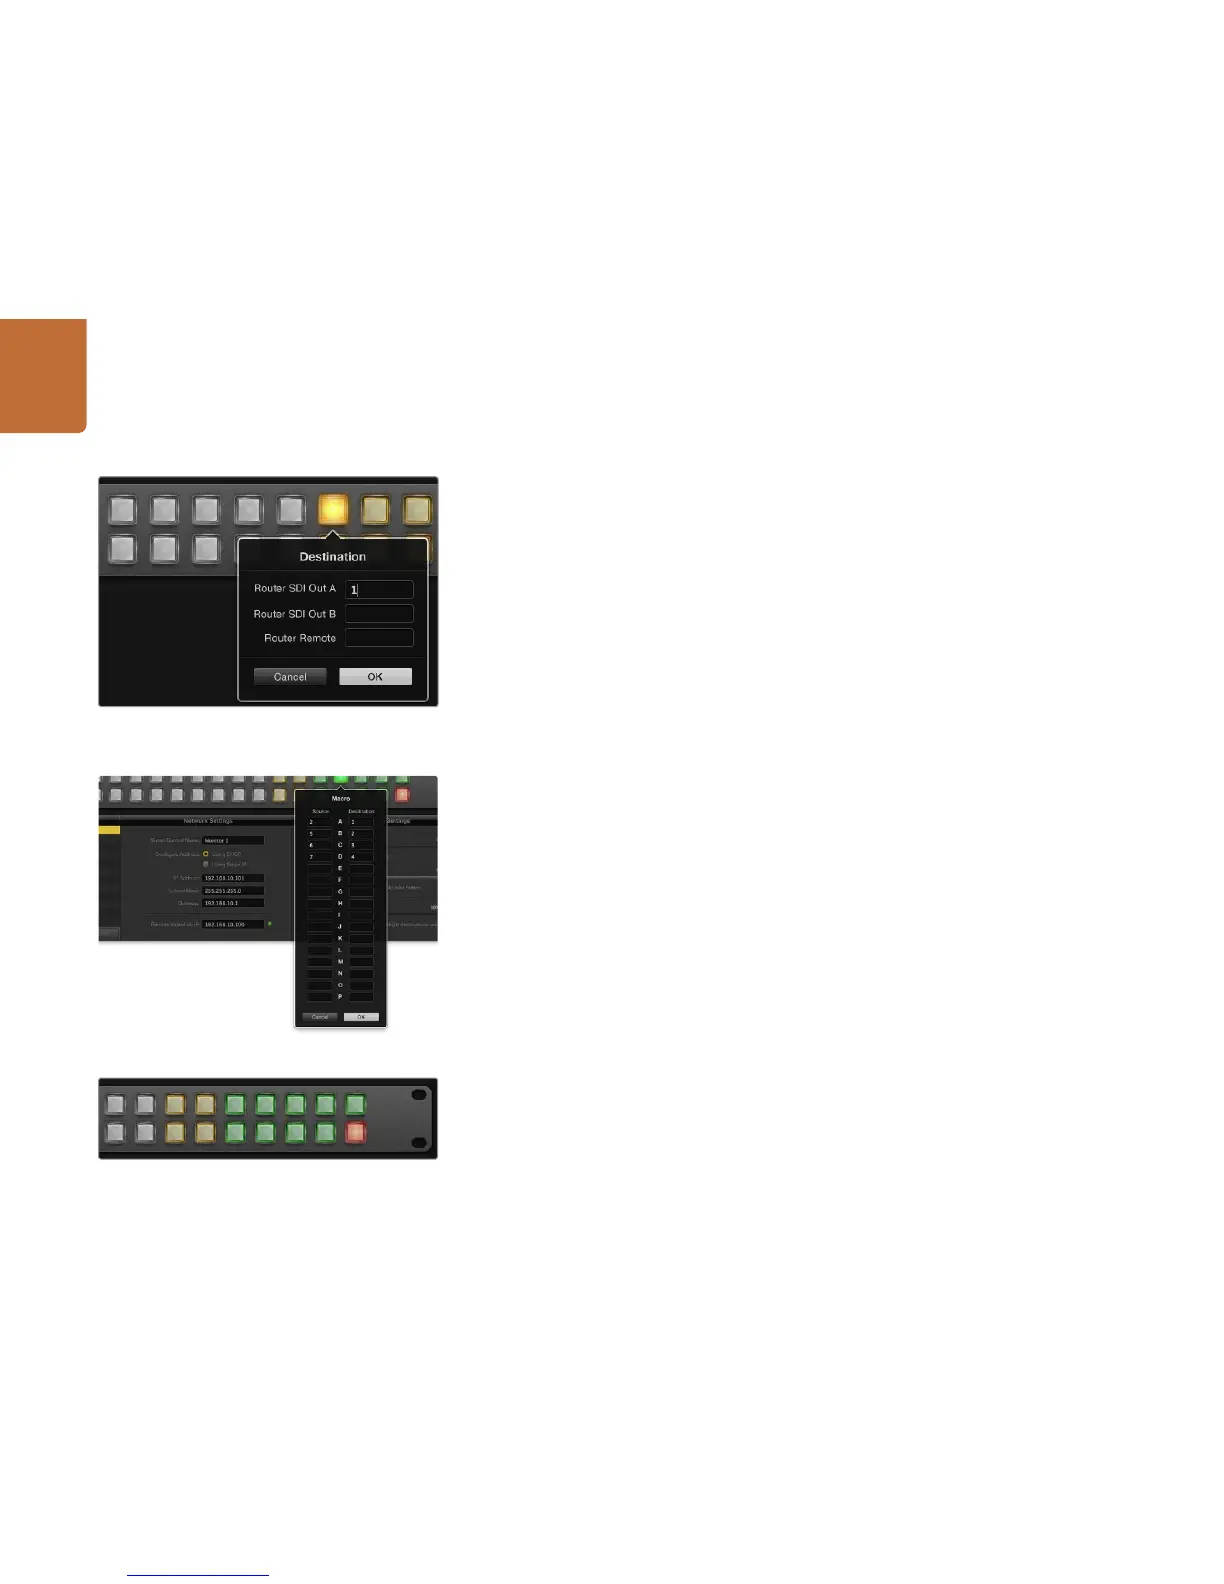
Step 2. You can now configure the destination buttons by clicking on each gold button in the software
interface. In the Router SDI Out A field, enter the number of the Videohub output port to
which the destination device is connected. If your destination device is receiving dual link
HD-SDI or dual stream 3D, you will also need to enter an output port number in to the Router
SDI Out B field. There is also a Router Remote field if your Videohub is also routing RS-422
deck control to the destination device.
Step 3. Click OK to confirm. If you increase the number of destination buttons, there will be a matching
decrease in the number of available source buttons.
Step 4. Click on each white button in the software interface to configure the source buttons.
Step 5. In the Router SDI In A field, enter the number of the Videohub input port to which the source
device is connected. If your destination device is receiving dual link HD-SDI or dual stream 3D,
you will also need to enter an input port number into the Router SDI In B field. There is also a
Router Remote field if your Videohub is also routing RS-422 deck control from the source device.
Step 6. Click OK to confirm.
Number of Macros
Macros allow you to make up to 16 crosspoint routing changes simultaneously with a single button press.
Step 1. Drag the Number of Macros slider to enable up to 10 macro buttons. As you increase the number
of macro buttons, there will be a matching decrease in the number of available source buttons.
Step 2. Click a green macro button to reveal the corresponding Macro window and enter up to 16
pairs of sources and destinations.
Step 3. When finished, click OK to save the routes and close the window.
Take Button
When the Enable Take Button checkbox is active, the lower right button on the control interface turns
red. Use this if you want a confirmation option to come up before your route change takes place. Press
the red take button to confirm your route change. The take button can be used with both Cut-Bus and
XY controller configurations and can also be used with macros.
Backlight
Adjust the backlight slider to vary the brightness of the backlit buttons as desired. Enable Backlight
Destinations Only if you wish to disable the backlighting of the white source buttons.
Click on the desired Destination button to configure it.
The Take button illuminates red in the lower right corner.
Up to 16 crosspoint routes can be changed by a single macro.