20
Getting Started with Videohub Controllers
You are now ready to label the Videohub Master Control buttons.
Step 1. Launch the Videohub Hardware Panel Setup and select your Videohub Master Control from
the Panels pane.
Step 2. Click one of the 15 buttons in the picture of the panel. Enter a text label so it partially matches
the labels of SDI and deck control ports that you previously entered for your router.
Step 3. Click OK and continue labeling the other buttons as desired.
Step 4. You can immediately test the buttons as you program them and verify the SDI routes are valid.
You can refer to page 23 for instructions on how to label the physical pushbuttons.
Configuring Videohub Smart Control
Videohub Hardware Panel Setup lets you customize the hardware features of each Videohub control panel.
Number of Destinations
Videohub Smart Control can be configured as a Cut-Bus controller or as an XY controller. When configured
as a Cut-Bus controller, every button represents an SDI source and there is only one destination.
When configured as an XY controller, Videohub Smart Control can work with up to 20 destinations.
The source buttons will illuminate white and the destination buttons will illuminate gold. Use this
configuration if you don’t intend to dedicate a Videohub Smart Control unit to each destination device.
Cut-Bus Configuration
Step 1. Drag the Number of Destinations slider to 1.
Step 2. Click on the Destination button. In the Router SDI Out A field, enter the number of the
Videohub output port to which the destination device is connected. If your destination device
is receiving dual link HD-SDI or dual stream 3D, you will also need to enter an output port
number into the Router SDI Out B field. There is a Router Remote field if your Videohub is
also routing RS-422 deck control to the destination device.
Step 3. Click OK to confirm. All the buttons will become white, indicating that they are all sources.
Step 4. Click on each white button in the software interface to configure the source buttons.
Step 5. In the Router SDI In A field, enter the number of the Videohub input port to which the source
device is connected. If your destination device is receiving dual link HD-SDI or dual stream 3D,
you will also need to enter an input port number into the Router SDI In B field. There is a Router
Remote field if your Videohub is also routing RS-422 deck control from the source device.
Step 6. Click OK to confirm.
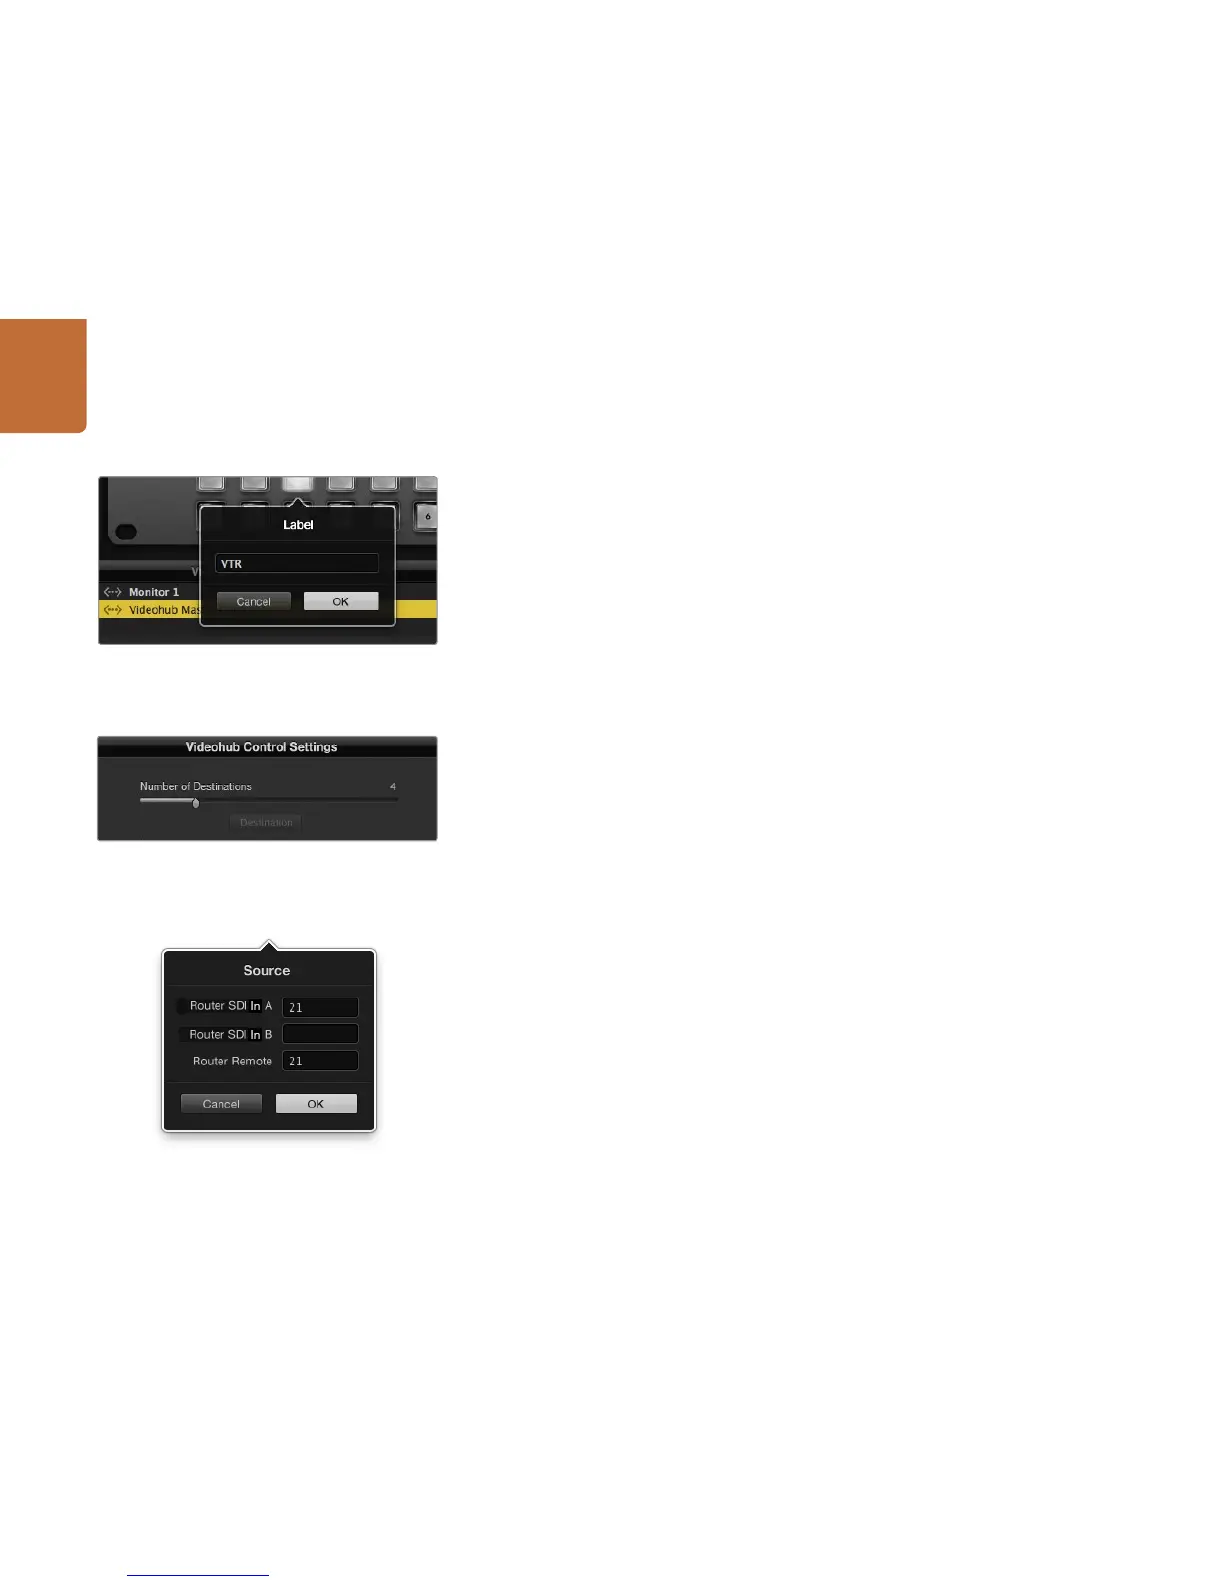
Click on the desired button to edit its label.
Videohub Smart Control configured with multiple
destinations.
Enter the number of the Videohub port to which the SDI
device is connected.