13
Getting Started
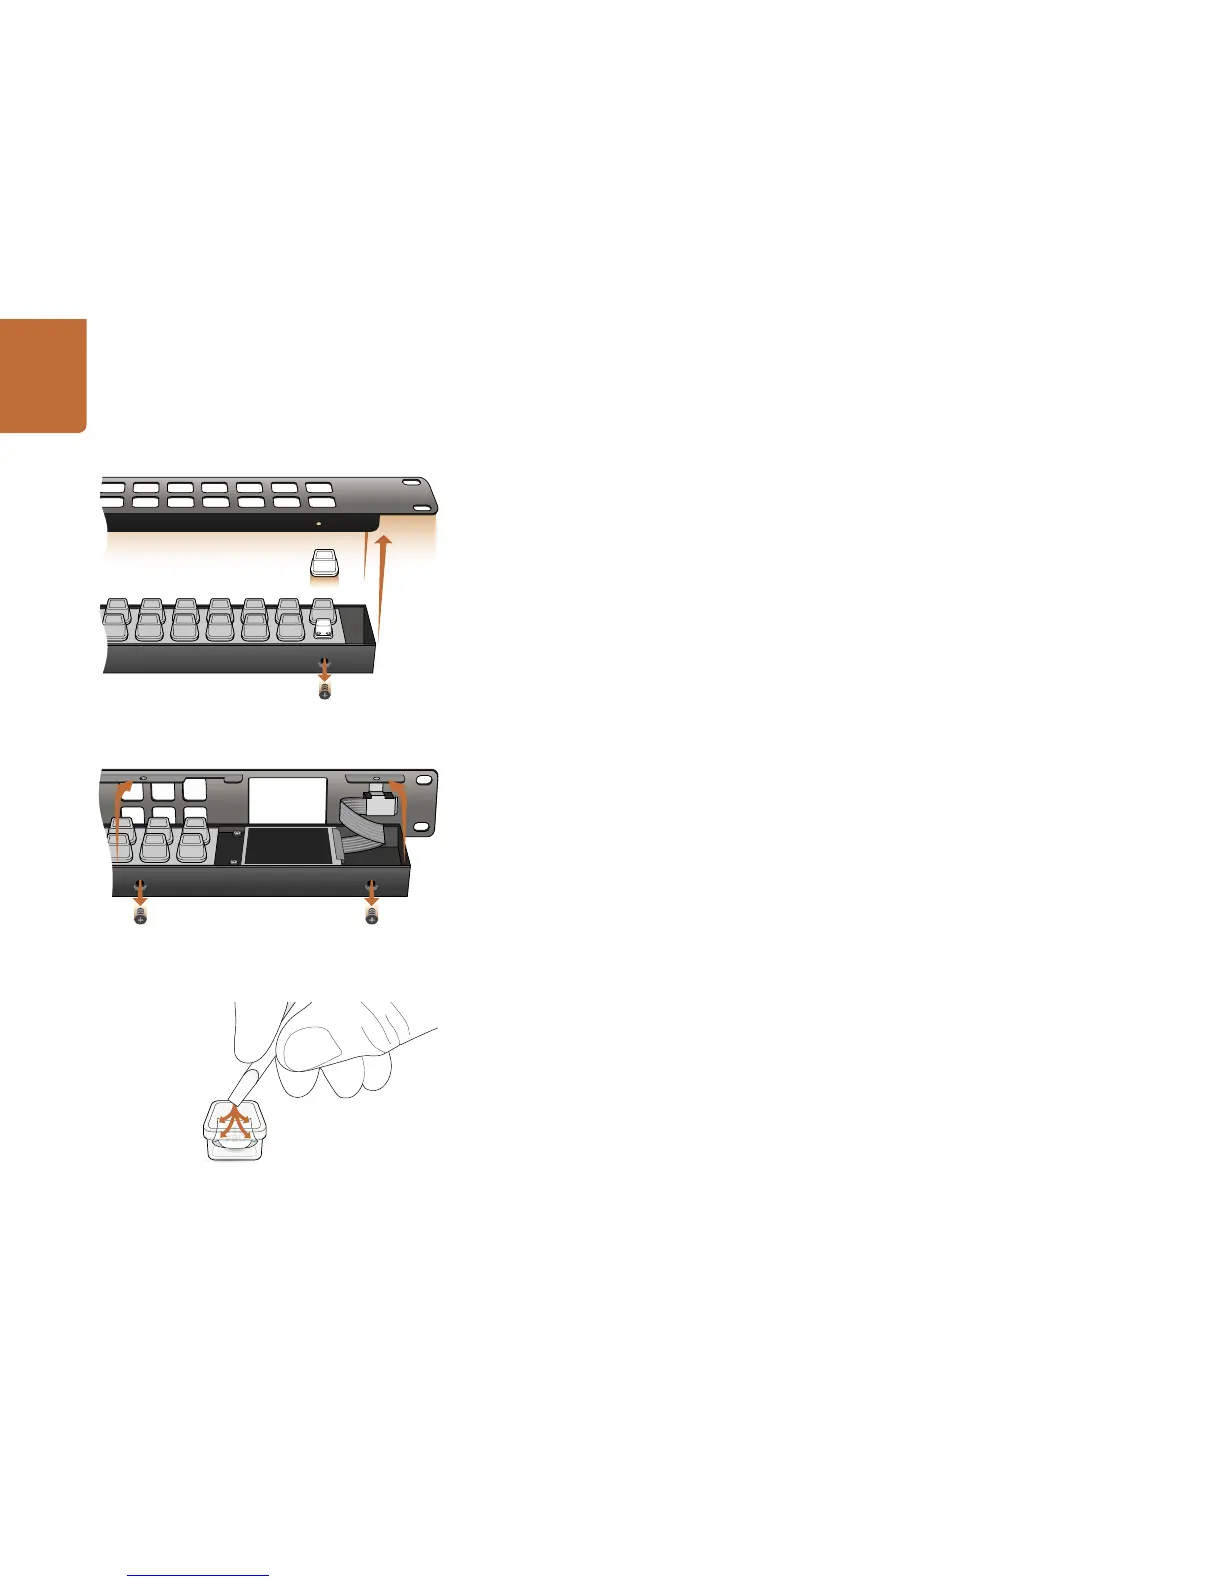
Labeling Pushbuttons
Videohub Master Control and Videohub Smart Control have removable face plates, which provide access
to the pushbuttons for labeling.
Included with the software installer is a Videohub Control Labels folder containing both PDF and Adobe
Illustrator template files. You can print and use either of these files for labeling the buttons. The Illustrator
file contains text boxes so you can add your text labels before printing them out. If you don’t have Adobe
Illustrator, you can just fill out and print the PDF file labels. Then cut out the square labels so they are
ready to be inserted into the buttons.
To remove the face plate:
Step 1. Power off the unit, disconnect all cables and lay it flat with the buttons facing upwards.
Step 2. Using a No. 2 Phillips head screwdriver, remove the 8 screws found on the top and bottom
sides of the faceplate.
Step 3. Gently lift the face plate off the unit. If you have a Videohub Master Control, take care not to
pull on the data cable that connects the scroll wheel to the rest of the unit.
Step 4. The button caps can be easily lifted off with your fingers. Remove the clear cap from a button
that you wish to label, while taking care to avoid lifting the silicon button membrane.
Step 5. Loosely place the printed label into the upturned clear cap.
Step 6. Use a pointy device, such as the tip of a screwdriver, to lightly press the four corners of the
square paper label into the four rounded corners of the clear cap.
St e p 7. Reinstate the clear cap containing the printed label. As the clear cap is pressed down onto
its silicon button, the paper label will be pushed forward, and neatly held flat against the
window of the clear cap. Repeat for as many buttons as you wish to label.
Step 8. Lower the face plate back into position, making sure the Blackmagic Design logo is the correct
way up. If you have a Videohub Master Control, make sure the data cable tucks neatly into place.
Step 9. Reinstate the eight screws.
Congratulations! Your Videohub control unit is now ready to use!
For Videohub Smart Control and Smart Videohub, remove the
8 screws, lift off the face plate and then the button caps.
For Videohub Master Control, remove the 8 screws, lift off the
face plate and carefully allow the face plate to lie down next to
the rest of the unit. Then remove the button caps.
Lightly press the four corners of the square label into the
rounded corners of the clear cap.