9-8
Bosch Security Systems 05/10 BLCC100I
Solution 16
plus
Installation Manual Comms Programming
2) Use the up and down arrow keys to select the required ring
count then Press [OK] to save and exit or press [MENU] to exit
without saving.
If answering machine bypass is required to allow a SolutionLink
connection to be made without the answering machine
answering the call, see MENU 5-3-4 — SolutionLink RAS Options
Comms > Remote Access >
SolutionLink RAS Options
MENU 5-3-4
1 RAS Allowed Y
2 Call Back Verication Required N
3 Terminate RAS on Alarm Y
4 Answer Bypass Y
5 Answer Incoming Call Only If Armed N
6 Tone Bypass Y
7 Allow User Functions Via Remote Access Software Y
8 Report / Log RAS Start / End Sessions Y
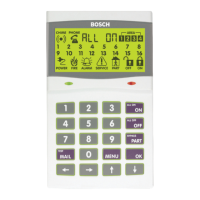
1) Press [MENU] + [5] + [3] + [4]. The keypad will display the
current RAS options.
RAS Allowed
Callback Verify
Abort RAS On Alarm
Press OK ON OFF MENU
2) Use the up and down arrow keys to highlight the option then
press the [ON] key to enable or the [OFF] key to disable.
3) Repeat Step 2 until all options are programmed as required,
then press [OK] to save and exit or press [MENU] to exit
without saving.
RAS Allowed
This option allows you to congure the panel via the SolutionLink
RAS upload/download software using a PC.
There are two dierent methods of connection avialable;
1) Direct Connect – via serial cable.
2) Remote Connect – via telephone line.
See Direct Link and SolutionLink RAS Upload/Download
programming in Section 5 — Programming Overview for more
information.
Call Back Verification Required
Setting this option will force the panel to use call back verication for
all remote SolutionLink RAS sessions. See MENU 5-3-0 — Call back
Number for more information.
Terminate RAS On Alarm
If this option is programmed, the RAS connection between the panel
and the remote upload / download computer will be terminated if
panel registers an alarm that needs to be reported.
Answering Machine Bypass
Answering machine bypass allows you to establiish a RAS connection
to a panel when there is an answering machine or facsimile machine
connected on the same telephone line.
1) Using SolutionLink call the paneland let the phone ring no
more than 4 times before hanging up.
2) Wait a minimum of 8 seconds (but no more than 60 seconds)
before calling the panel again. This time the panel will answer
the incoming call as soon as it registers the rst ring and the
connection will be established.
Answer Incoming Call Only If Armed
Setting this option will prevent the panel from answering an
incoming call unless at least one area on the system is armed. If all
areas are o the panel will not answer the call. This option would be
useful in a busy oce when due to the large volume of incomming
calls answering machine bypass may not be eective.
Tone Bypass
It is often dicult to establish a remote connection to a panel
if the customer picks up the phone or if a fax or answering
machine answers the call before the panel does.
While the ultimate solution to this problem is the use the CLI
Intelliconnect method, this requires the customer to enable CLI
via their telco provider.
When enabled, the new Tone Bypass option (MENU 5-3-4) tells
the panel to listen to every answered call and to look for a
specic sequence of DTMF tones.
The tone sequence will be sent by the remote programming
software and when the panel recognises them, it will
immediately seize the line away from the answering party and
the programming session will commence.
The feature requires SolutionLink remote programming
software version 1.03 or higher.
Remote Program Editing Only When Disarmed
Setting this option will prevent a SolutionLink RAS connection to the
panel while any are is armed.
Allow ‘User Functions’ Via Remote Access Software
Setting this option allows access to user functions via the RAS upload/
download software. If this option is not programmed, user functions
will be disabled.
Report RAS Start / End Sessions
Setting this option will cause the panel to report the start and end of
RAS programming sessions to the base station and the history log.
Comms > Remote Access >
DTMF Options
MENU 5-3-5
1 DTMF Arming Y
2 DTMF Disarming N
3 DTMF User Functions N
4 DTMF Quick Arm ([0] + [#]) Y
5 Reserved N
6 Reserved N
7 Reserved N
8 Reserved N
1) Press [MENU] + [5] + [3] + [5]. The keypad will display the
current DTMF options.

 Loading...
