BRAILLO
l
B 650 SF
148
8.3 Replacement of the paper roll
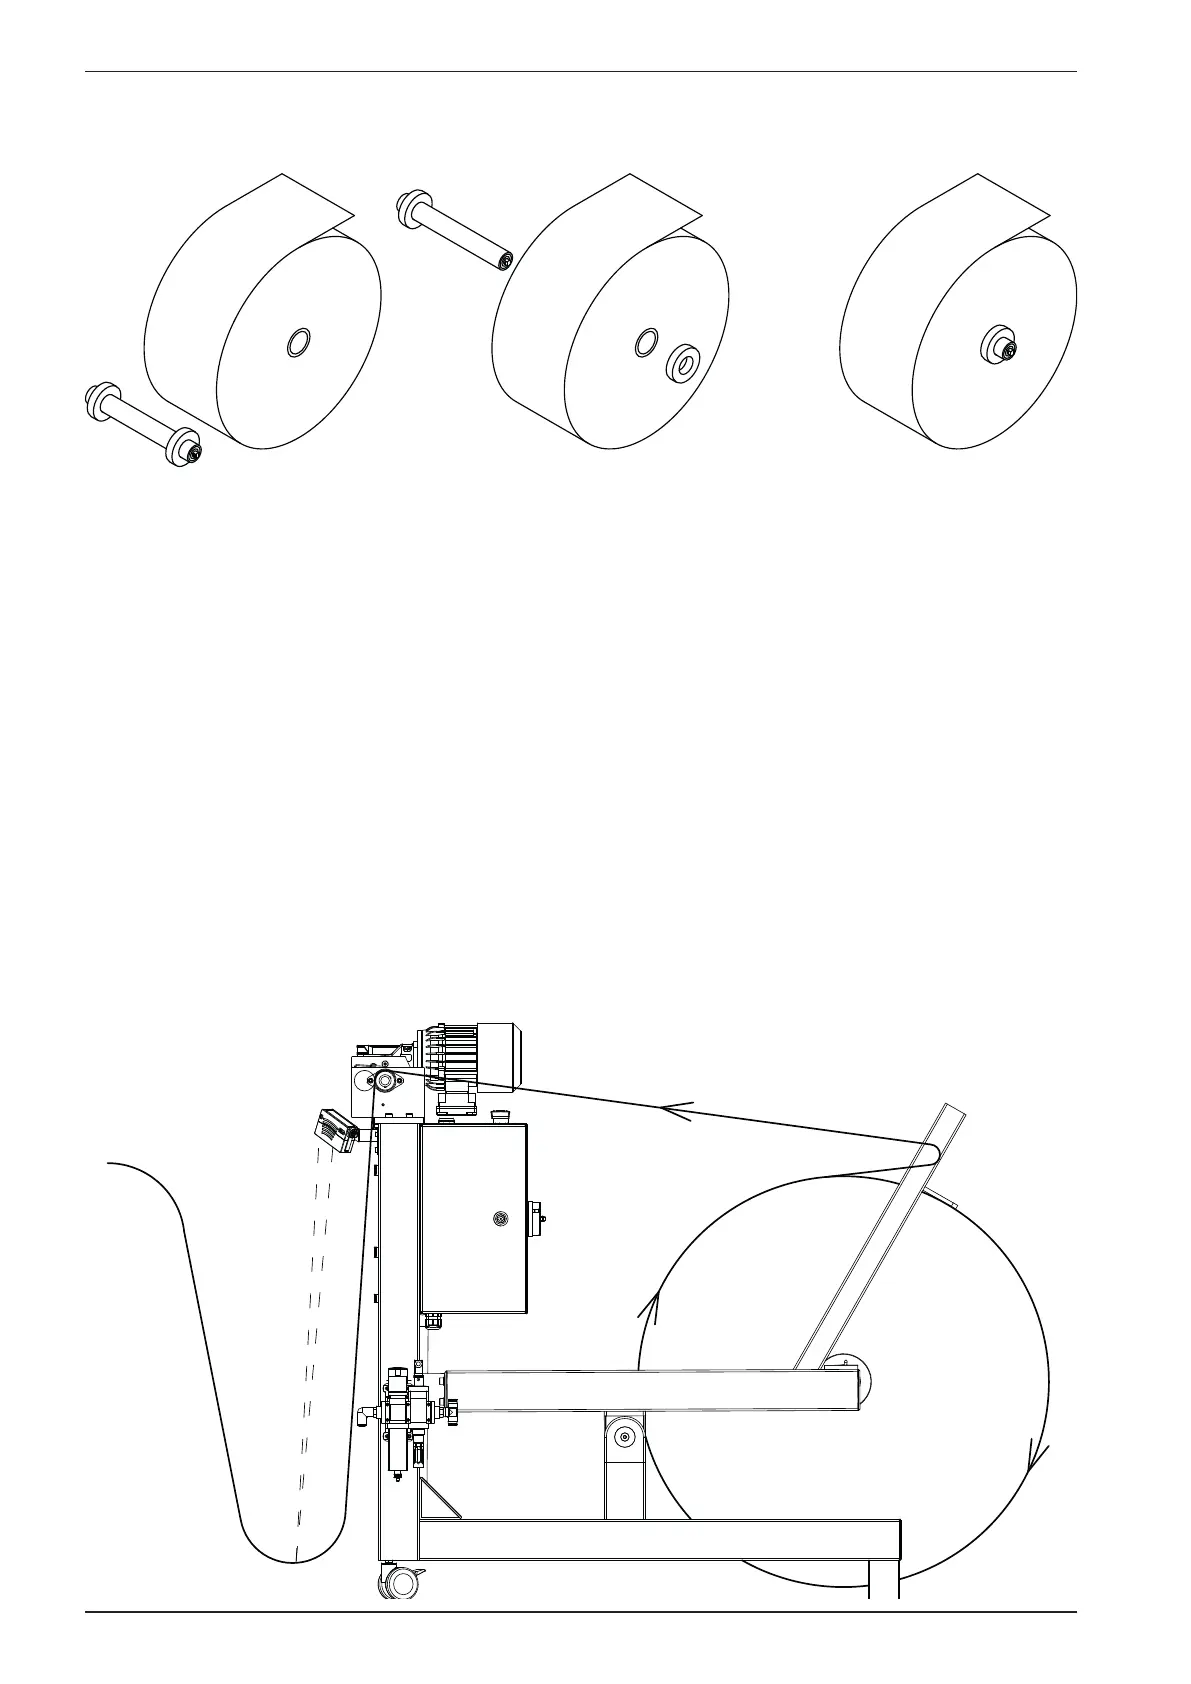
Put the shaft in the centre of the roll, and ensure that the shaft is approximately in the centre sideways.
Fasten the shaft. The roll must be positioned so that the paper is rolled off at the top. (See gure).
Place the paper roll with the shaft already fastened just behind the Paper Roll Feeder. Lift off the
correction roll with the friction bar and place aside. Use the crank to lower the roll lift until the lift is
below the shaft in the roll. Move the roll forward, make sure that the shaft is situated just above the
notches, while turning the crank to raise the roll lift. Turn the crank until the roll is lifted above the
oor. Put the correction roll with the friction bar on top of the paper roll like on the gure below.
Remove and throw away the rst rounds of paper on the paper roll (to get rid of e.g. sand, dust and dirt
after rolling the paper roll on the oor).
The paper line must go in between the friction bar and the correction roll. Ensure that the friction bar
are resting on top of the roll.
Now the paper must go through the feeder rolls. If turned on, the motor will feed some paper, and the
paper can be inserted into the Printer.
Shaft and
paper roll
Insert shaft
into paper roll
Ready for
printing
 Loading...