Brocade MLX Series and Brocade NetIron XMR Hardware Installation Guide 101
53-1002373-02
Mounting Brocade MLXe-4, -8, or -16 routers in a 4-post rack or cabinet
2
To install a Brocade MLXe-16 router, use the RMK-CAB-MLXE-16 Cabinet/4-Post Rack Mount Kit,
and refer to “Installing a Brocade MLXe-16 router in a cabinet or 4-post rack” on page 105.
Because of the weight of fully loaded routers, it is recommended that you mount the router in a rack
or cabinet before installing modules and power supplies.
You can install up to six Brocade MLXe-4 routers in a cabinet or rack using the RMK-CAB-MLXE-4
Cabinet/4-Post Rack Mount Kit. You can install up to four Brocade MLXe-8 routers in a cabinet or
rack using the RMK-CAB-MLXE-8 Cabinet/4-Post Rack Mount Kit.
Many of the parts in these rack mount kits can be adjusted to accommodate a variety of cabinet
and rack configurations.
Mounting your router in a cabinet or 4-post rack
Follow these steps to mount each Brocade MLXe-4 or Brocade MLXe-8 router in a cabinet or rack
using the Cabinet/4-Post Rack Mount Kit, starting with the lowest device first.
The kits contain a variety of screws, nuts, clip nuts, and washers, for use in the following ways:
• Use floating clip nuts in cabinets or racks with round holes.
• Use retainer nuts in cabinets or racks with square holes.
• Use the square alignment washers for both round and square holes.
Select the appropriate hardware for your cabinet or rack configuration.
1. Place routers in the rack according to their weight. For example, mount the router with the
fewest modules near the top of the rack, a router with more modules near the middle of the
rack, and a fully populated router near the bottom of the rack.
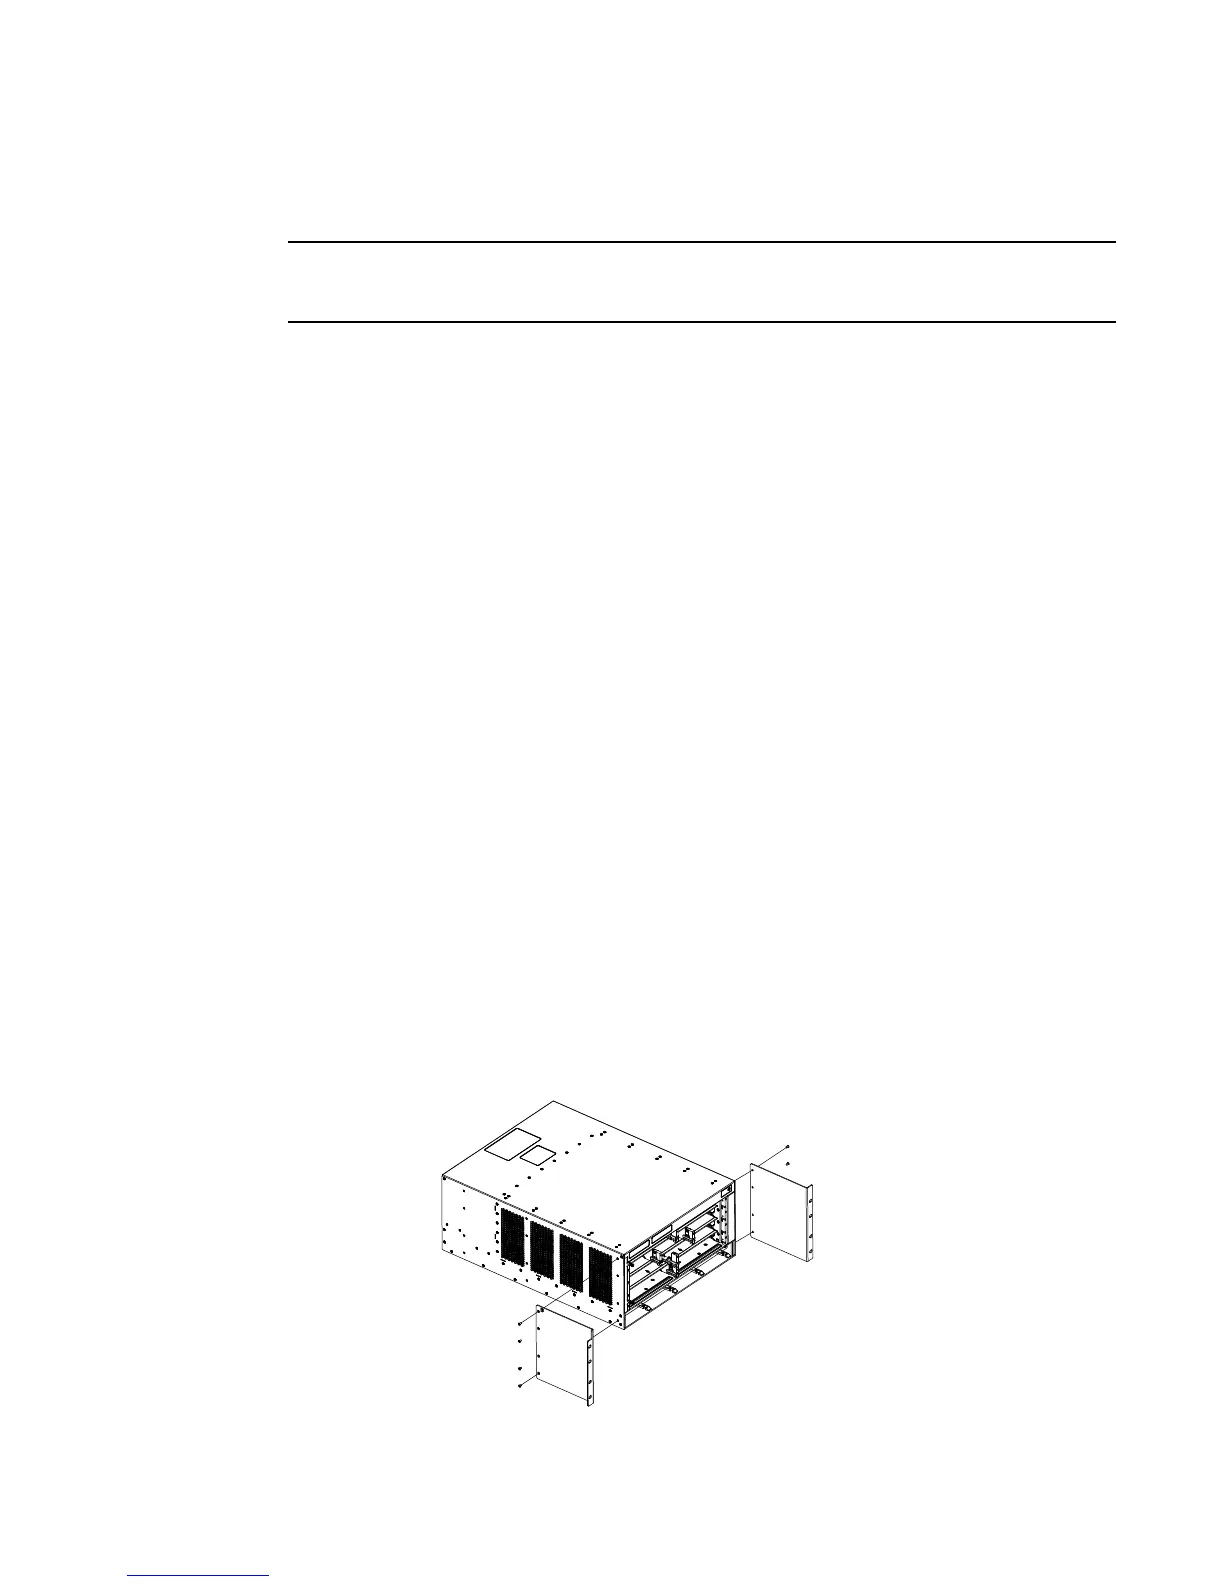
2. Remove the factory-installed mounting brackets from the chassis.
3. Attach the front mounting brackets to the chassis using eight 6-32 flat head screws.
Brackets are marked with A or B. As you face the front of the cabinet or rack, A brackets must
be installed on the left side, and B brackets are installed on the right side. Do not mix A and B
brackets. Refer to Figure 64. The process is identical for 4-slot and 8-slot routers.
FIGURE 64 Attach front mounting brackets to the router (MLXe-4 shown)
 Loading...
