Brocade MLX Series and Brocade NetIron XMR Hardware Installation Guide 257
53-1002373-02
Installing a Brocade NetIron XMR 8000 router
4
Before installing a module, have these items available:
• A large flat-blade screwdriver.
• An ESD wrist strap with a plug for connection to the ESD connector on the router.
For safety reasons, the ESD wrist strap should contain a 1 megohm series resistor.
If you are hot-swapping a module, allow a minimum of two seconds after a module (or power
supply or fan tray) has been removed before inserting a module in the same slot.
Follow these steps to install a module in the Brocade NetIron XMR 8000 router.
1. Put on the ESD wrist strap and ground yourself by inserting the plug into the ESD connector on
the router chassis.
2. Remove the module from the packaging.
3. With the ejectors in the outward position, insert the module into the slot and slide the module
along the card guides until the ejectors rotate towards the faceplate of the module.
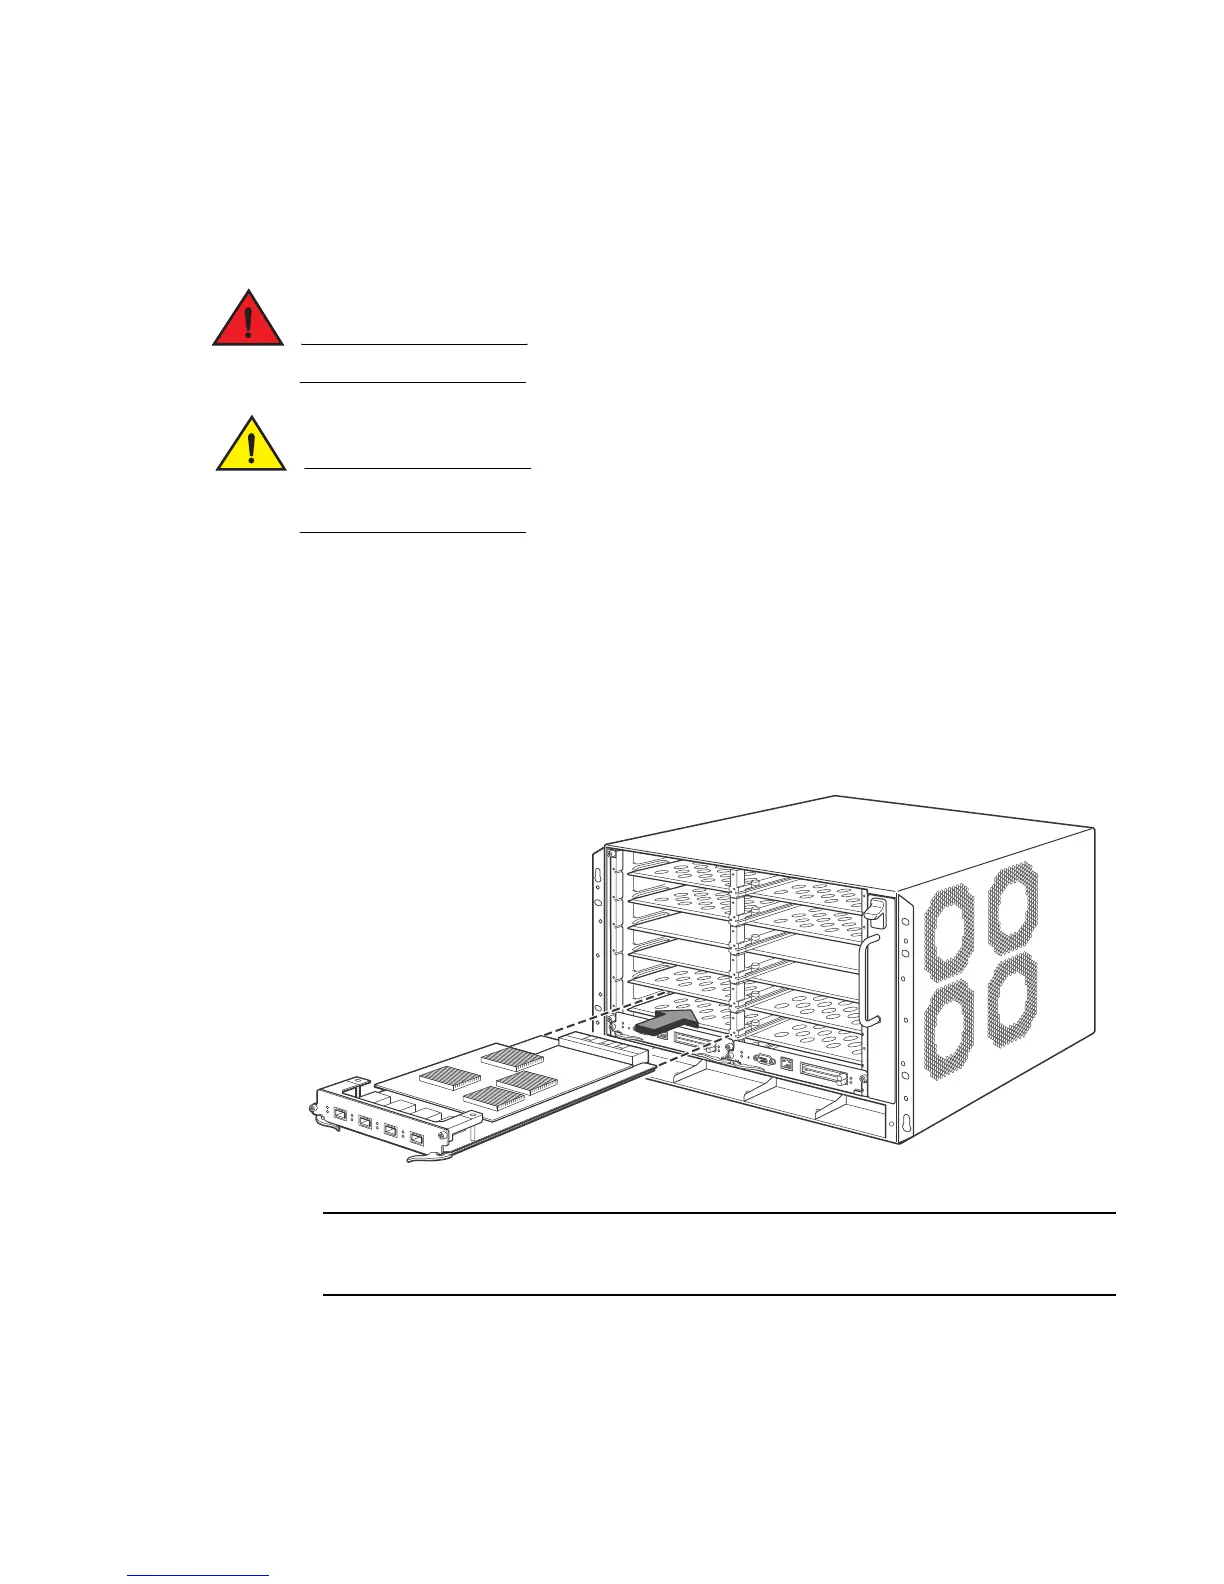
FIGURE 179 Installing a module in a Brocade NetIron XMR 8000 router
When inserting the module into the router, make sure that the faceplate doesn’t overlap with
the faceplate of an adjacent interface module.
4. Rotate the ejectors flush with the module faceplate to fully seat the module in the backplane.
Modules have a snug fit for maximum EMI protection.
5. Tighten the two screws at each end of the module faceplate by pushing them in and turning
them clockwise. Complete the tightening process using the flat-blade screwdriver.
 Loading...
