3 - 41
Front cover
Main unit
Assembly
10
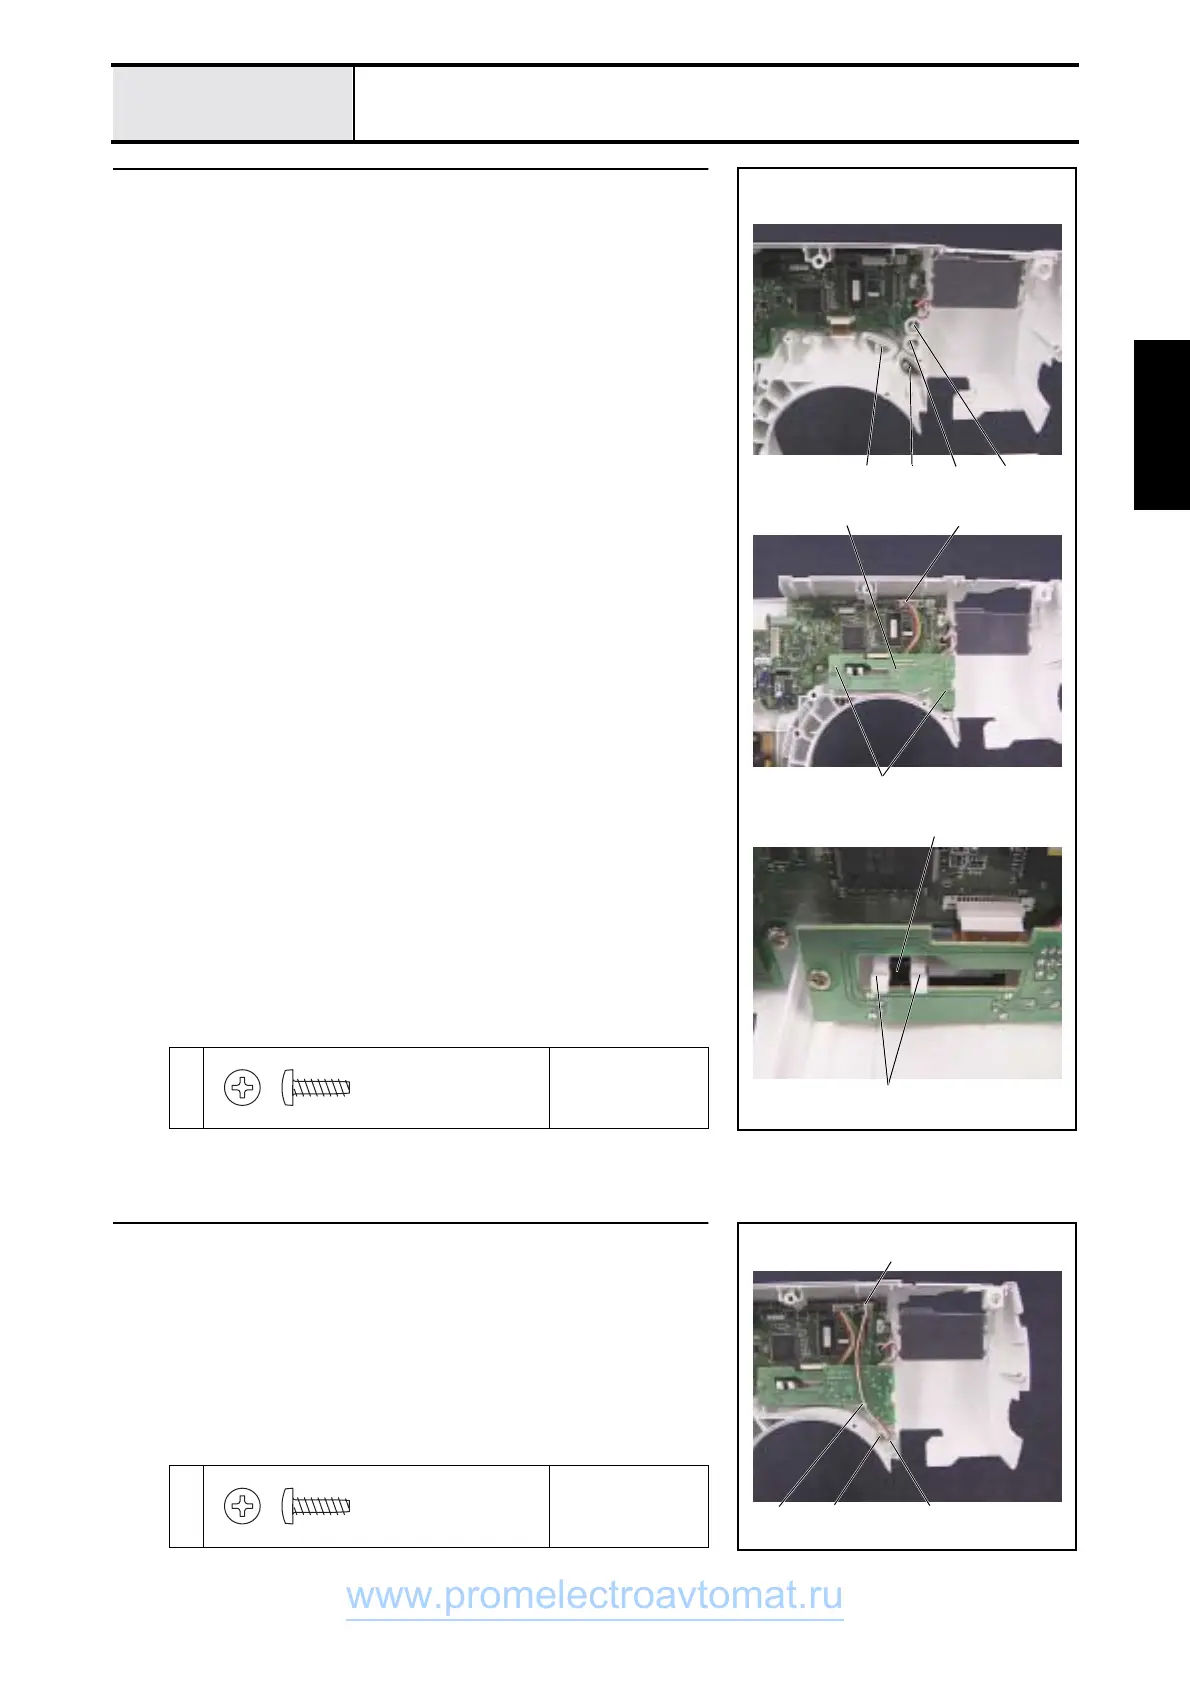
SSVR PCB assy. attachment
1. Attach the SS button 1, backstitching button 2, NP button 3 and thread
cutting button 4 to the front cover.
2. Attach the SSVR PCB assy. 5 to the front cover using screws 1 (two).
3. Attach the SSVR PCB assy. connector 6 to the main PCB assy.
*Key point
• Align SSVR PCB assy. VR1 7 with the SV key top 8.
1
Torque
0.57 - 0.78 N-m
21
6
43
5
7
8
1
Taptite, Bind B
M3X10
Color; Gold
11
LED PCB-SR assy. attachment
1. Attach the LED PCB-SR assy. 1 and lamp holder R 2 to the front cover
using screw 1.
2. Attach the LED PCB-SR assy. connector 3 to the main PCB assy.
3. Run the LED PCB-SR assy. lead wire through the cord clip 4.
1
Torque
0.57 - 0.78 N-m
1
,
2
3
14
Taptite, Bind B
M3X10
Color; Gold
www.promelectroavtomat.ru
 Loading...


