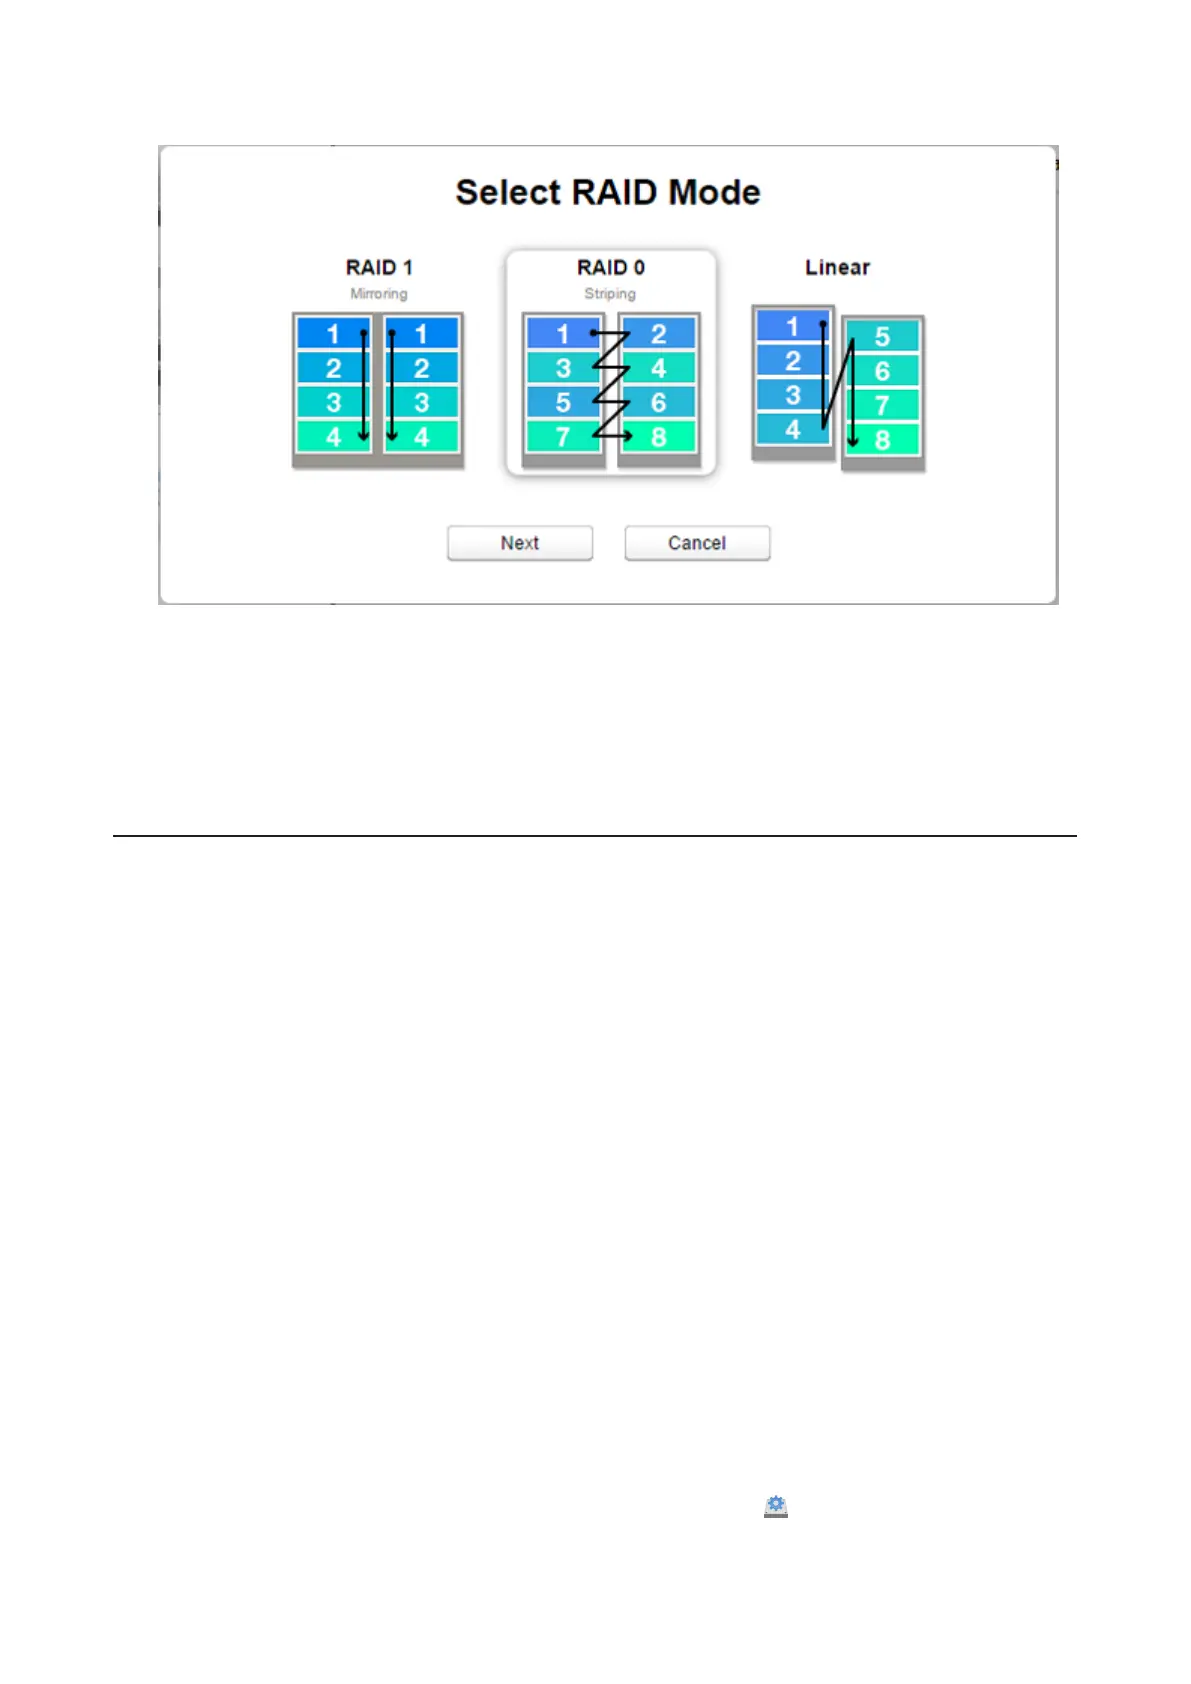
7 Select a RAID mode and click Next.
8 Click Yes.
9 RAID array creation will start. Wait until it’s done. When it’s finished, click OK, then Close.
Once the RAID array is configured, create shared folders on the array to use them. Refer to the “Folder Setup” section
in chapter 7 for the procedure.
Expanding RAID Array Capacity
If the drives in your LinkStation are in a RAID 1 array with two drives or they are in degraded mode, you can expand
the RAID array capacity without erasing the data on the drives. To expand the capacity, you should have two new
drives with capacity larger than the remaining drive.
1 Shut down the LinkStation and remove one of the drives. Do not remove both drives at the same time.
2 Insert a new drive (larger capacity than the remaining drive) and turn on the LinkStation.
3 When the power LED glows white or blinks amber, press and hold the function button on the back of the
LinkStation for 5 seconds.
4 The LinkStation will start rebuilding the RAID array. After a few minutes, the I18 message will be displayed in
NAS Navigator2. Wait until the drive finishes rebuilding; the I18 message will be extinguished.
5 After the RAID array is rebuilt, shut down the LinkStation again and remove another drive.
6 Insert another new drive and turn it on.
7 When the power LED blinks amber, press and hold the function button on the back of the LinkStation for 5
seconds.
8 The LinkStation will start rebuilding the RAID array again. Wait until the I18 message is extinguished like step 4
above.
9 After the I18 message disappears, open Settings and click Disk Manager ( ).
40
 Loading...