CS 3500 User and Installation Guide (9H4853)_Ed07 71
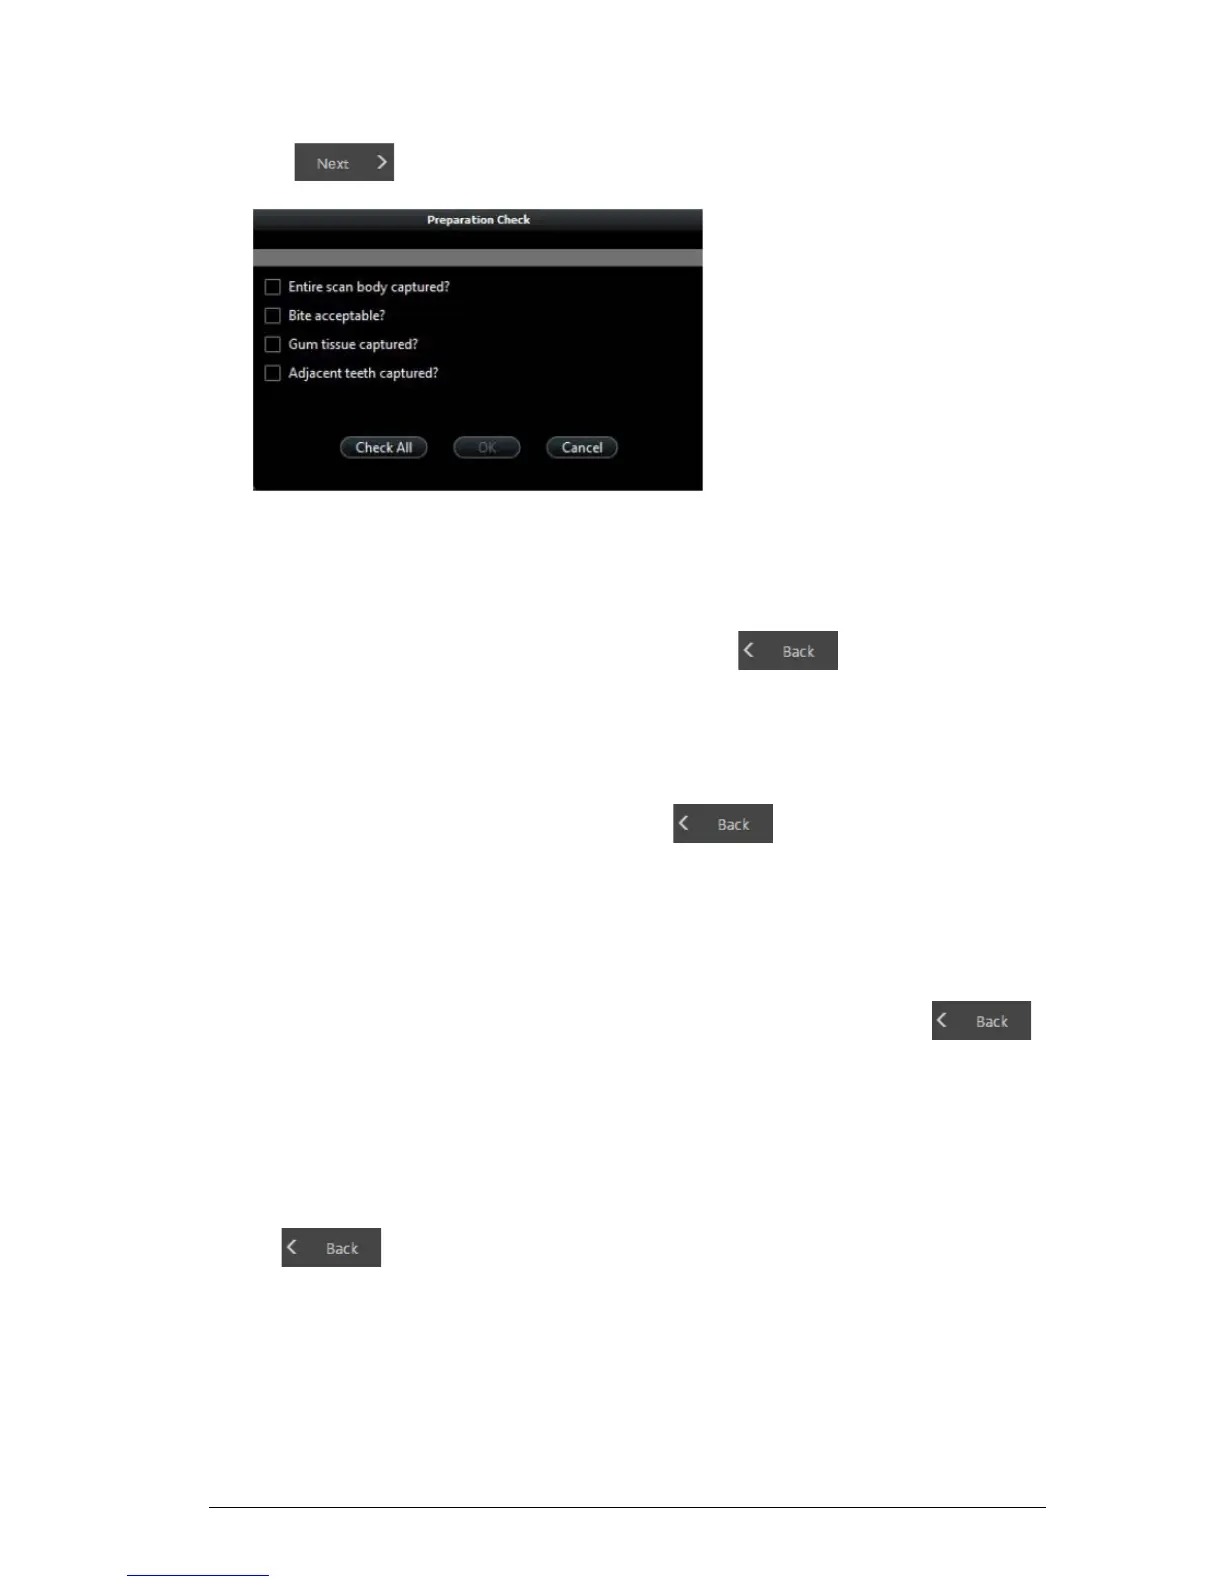
5 Click . The Preparation Check window is displayed.
6 Examine the scan body in the 3D model and do one of the following:
• If the entire scan body is visible, click the corresponding option in the Preparation Check
window.
• If the entire scan body is not visible, click Cancel. Click and re-scan the scan
body.
7 Examine the bite on the 3D model and do one of the following:
• If the bite is acceptable, click the corresponding option in the Preparation Check window.
• If the bite is not acceptable, click Cancel. Click , make the necessary
adjustments to the implant area, and then re-scan the implant area and surrounding teeth.
8 Examine the gum tissue surrounding the implant in the 3D model and do one of the following:
• If all of the gum tissue is clearly visible, click the corresponding option in the Preparation
Check window.
• If all of the gum tissue surrounding the implant is not visible, click Cancel. Click
and re-scan the affected tissue.
9 Examine the teeth adjacent to the implant in the 3D model and do one of the following:
• If the teeth are completely captured and there are no holes in the adjacent teeth, click the
corresponding option in the Preparation Check window.
• If the teeth adjacent to the implant are missing or contain holes, click Cancel. Click
and re-scan the affected teeth.