Adding the Carrier® ChillerVu™ into the i-Vu® or Field Assistant system
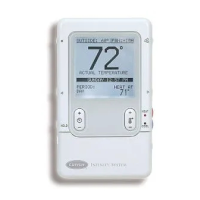
Carrier® ChillerVu™
(OPN-PSM-MPCXPE) Carrier Proprietary and Confidential CARRIER CORPORATION ©2017
Installation and Start-up Guide 35 All rights reserved
already a CCN Gateway, you cannot configure the Carrier® ChillerVu™ as another CCN Gateway.
f) Change the
number from the default (1).
g) Continue with the steps below.
1 In the i-Vu® interface, select the system in the navigation tree.
2 On the
page >
tab, enter your CCN Gateway IP address and click
.
If using the i-Vu® Pro application, and the server has more than 1 NIC, type the IP address the server
will use to connect to controllers.
3 After connecting to the Gateway, select it in the navigation tree.
4 On the
page >
tab, verify that
is checked.
The scanning time for discovering tables increases based on the number of devices. You may choose
to discover tables at a later time for a faster scan.
5 Enter the
and
ranges that encompass all your devices.
Depending on your number of devices, it could be faster to scan several small ranges.
6 Click
. When the process is complete, a message appears showing the number of control programs
found.
○ If the scan does not begin, wait a minute and try again. There may be a delay when first starting the
system.
○ If an error message appears, click on the message to view an explanation.
7 Click
to download the control programs, drivers, and parameters.
8 In the i-Vu® navigation
tree, right-click the Carrier® ChillerVu™ and select
from the drop-
down list.
9 Under
, expand
.
10 On the
tab, under
:
○ If the Carrier® ChillerVu™ will be the time broadcaster on the CCN network, check
.
○ If there is another CCN device already set as the time broadcaster, check
so the
Carrier® ChillerVu™ synchronizes its clock with the CCN network.
11 Click
.
• indicates you need to download the device by clicking
.
• Click to view a log of activity on the
page in the current session.
lets you copy
the text to paste it into another application.
• Status messages are color coded as follows:
○ Red - reports an error
○ Blue - requires action
○ Green - indicates an upload or download is in process