5
Setting the time for Clock-CAL
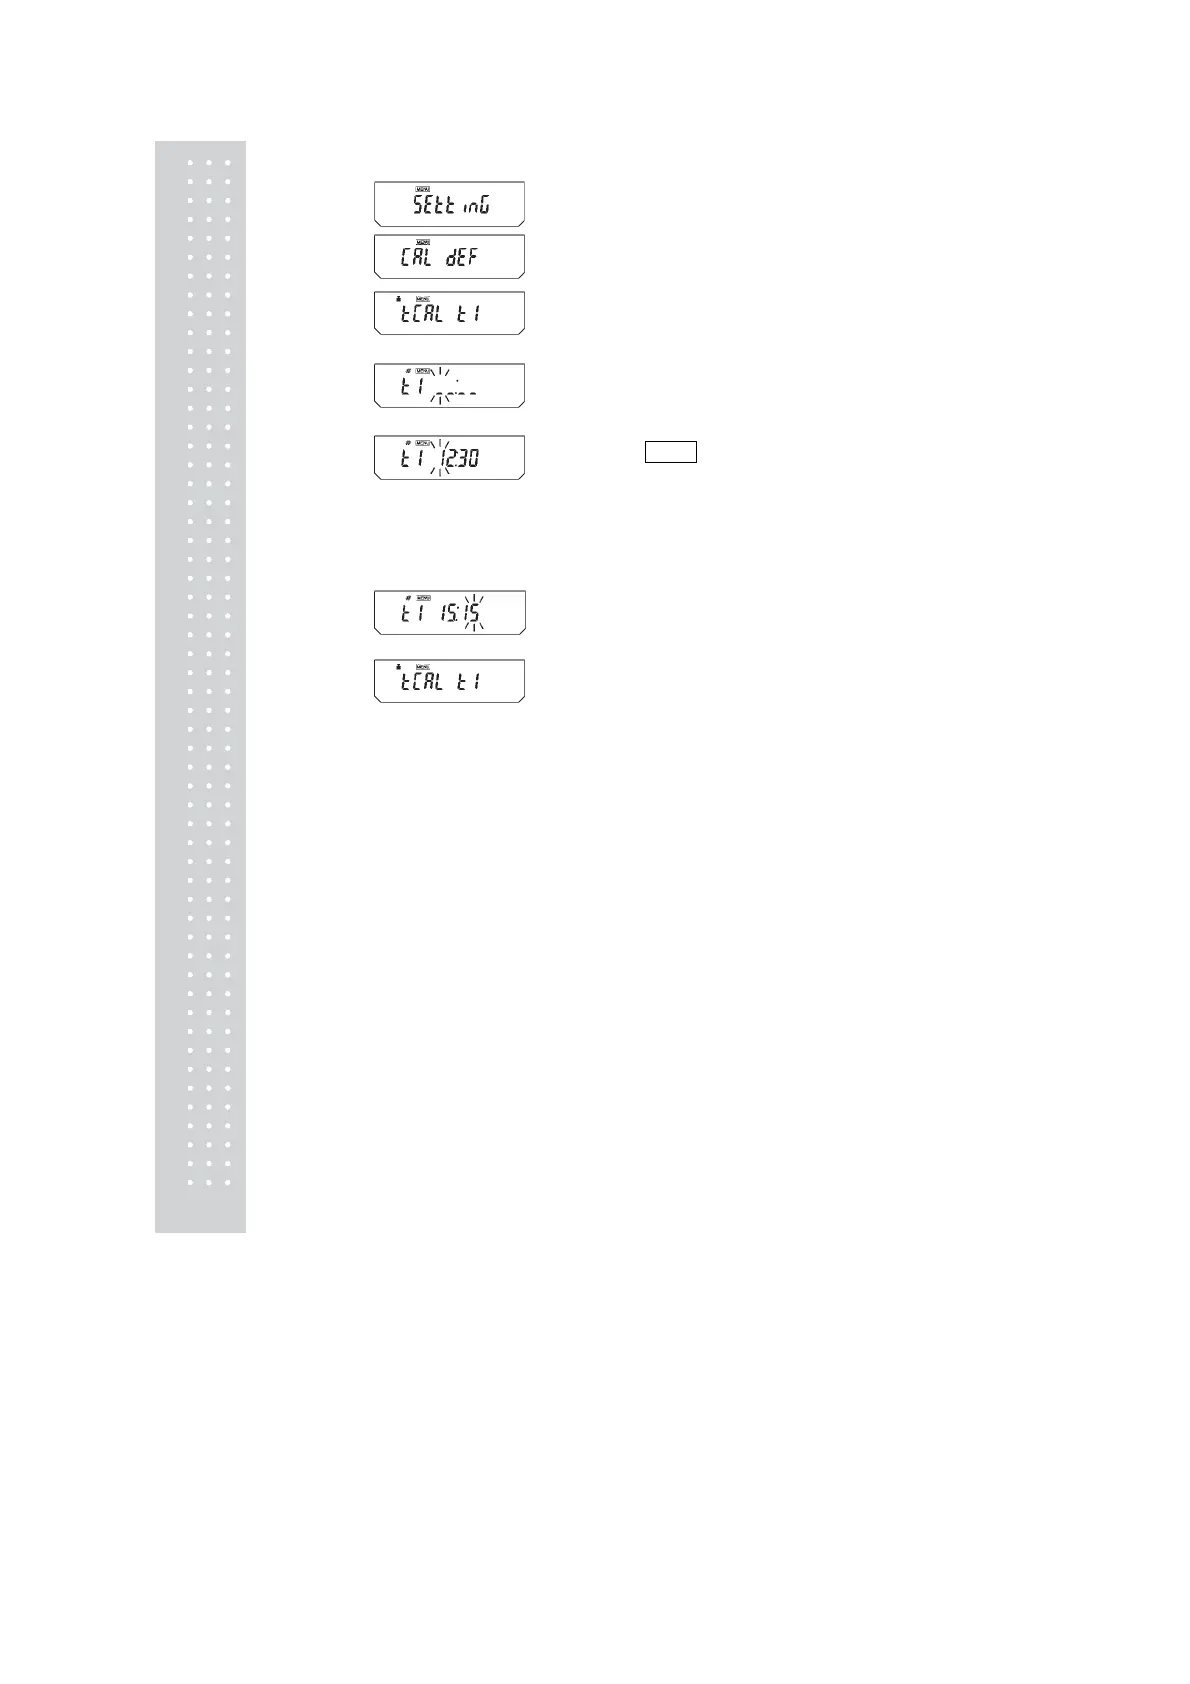
1 From mass display, press the [CAL] key
repeatedly until “SEttinG” appears. Press the
[O/T] key to display “CAL dEF”
2 Press the [CAL] key repeatedly until “tCAL t*”
appears. Press the [O/T] key to display “t*
HH:MM”. The * position shows the reference
number of the time setting, a numeral from 1 to
3. The currently set time is displayed as
“HH:MM” (HH is the hours and MM is the
minutes), with the leftmost digit blinking.
The time appears as _ _:_ _ when no time is
set. The MENU symbol, and the # symbol
appear to indicate the display is in the numerical
input mode.
3 The numeral of the blinking digit may be
changed. Pressing the [PRINT] key moves the
blinking digit one place to the right. Press the
[UNIT] key to change the value of the blinking
digit. When the [UNIT] key is pressed, the
value of the blinking digit increases by 1 at a
time. The numerals progress in this order:
0→1→2→...→9→_→0... Set the hours in the
range from 00 to 23 and the minutes from 00 to
59. Press the [POWER] key to complete the
setting. The display returns to “t CAL t *”.
4 To set another time, press the [CAL] key to
move to the next “t CAL t*” setting and set the
time in the same way.
5 After completing the setting, press the
[POWER] key to return to the mass display.
Clearing the Settings
The Clock-CAL settings “tCAL t1” to “tCAL t3”
may each be reset by using procedure 3 to set the
time to _ _:_ _.
PSC and Clock-CAL can each be set on and off independently. Weight mark appears in the
settings Check Display (see 7.4.1) when either or both of PSC and Clock-CAL are on.
(When set for 3:15 PM.)
(Example)
(For the t1 setting)
(Example)
(Example)
(When setting for the first time)
(Example)
(Showing 12:30)
 Loading...