VeriFast
TM
MicroView 1.0 – User Manual – Version 1.9
43
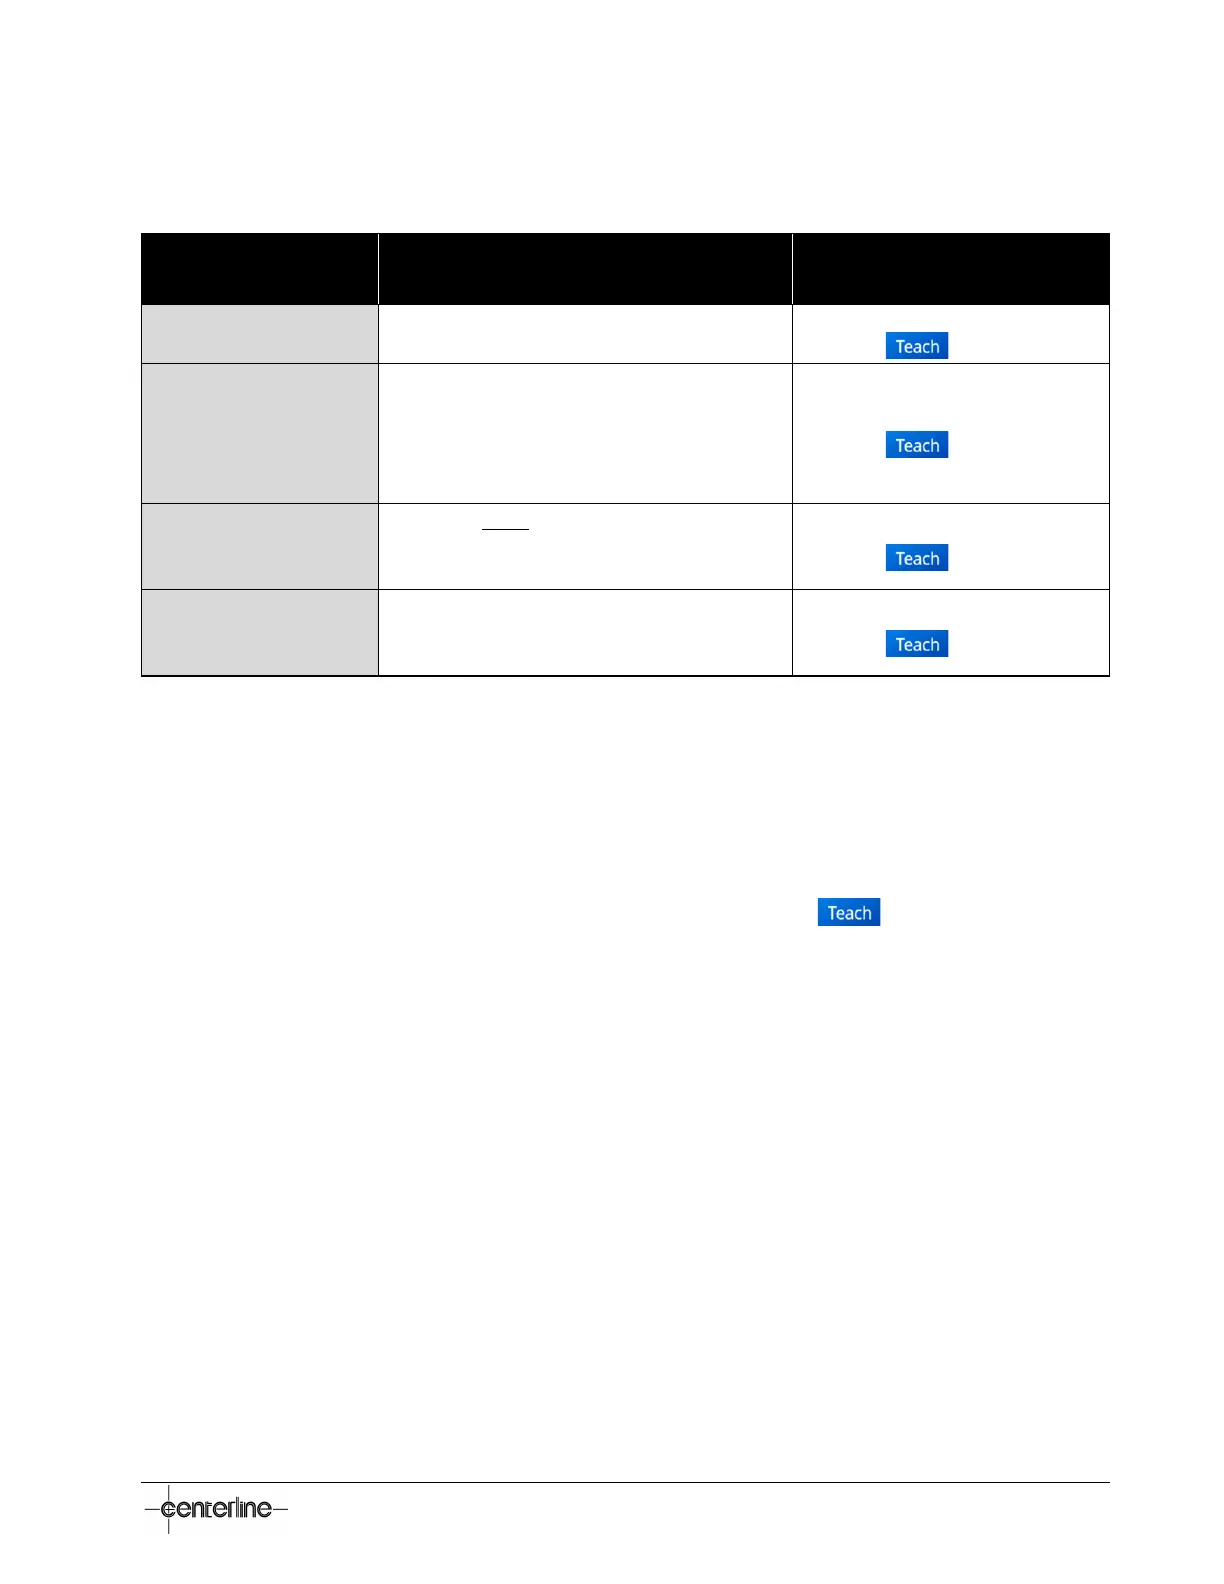
Teaching Positions for LPT
Table 10 – Teaching Positions for LPT
Position Taught *
Required Position of LVDT Pin and/or
status of equipment
How to teach
P1: Gun Opened
Weld gun fully opened
Press the (corresponding)
button.
P2: Weld Position
Correct part in place
and
Correctly orientated fastener
and
Weld gun closed
Press the (corresponding)
button.
P3: Double Nut
TWO fasteners present
and
Weld Gun closed
Press the (corresponding)
button.
P4: No Nut
No fastener present
and
Weld gun closed
Press the (corresponding)
button.
* The P1, P2, P3, P4 pin positions can be taught in any order on the standard Teach screen (i.e.,
press to select the desired parameter), and in circular order in the Step Thru Teach screen.
Teaching Positions for Generic Device
Four (4) positions (P1, P2, P3, P4) are available to teach any generic device. These positions
should be defined by the customer, based on the device specifics and the parameters that need
monitoring. To teach any of these positions, press the corresponding
button. Note that the
P1, P2, P3, P4 pin positions can be taught in any order on the standard Teach screen (i.e., press
to select the desired parameter), and in circular order in the Step Thru Teach screen.
Please review the beginning of the Teaching the MicroView section on page 42 for more details.
 Loading...