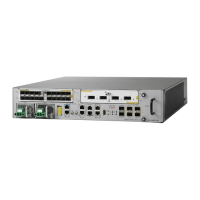
Installing the Air Plenum Kit
The air plenum kit is mounted in the rack before the Cisco ASR 9001 Router is installed. The steps for mounting
the air plenum kit in the rack are different, depending on the whether the kit is pre-assembled before mounting
it in the rack or assembled after the plenum base is mounted in the rack.
• If the air plenum kit is pre-assembled before mounting it in the rack:
The side baffles, air filter assembly, and cable management tray are attached to the plenum base outside the
rack. The plenum assembly is then installed from the rear of the 19-inch rack, or from the front or rear of the
23-inch rack.
• If the air plenum kit is assembled after the plenum is mounted in the rack:
The plenum base is first installed from the front (applicable to 19-inch rack). The side baffles, air filter
assembly, and cable management tray are then installed in the plenum base after it has been mounted in the
rack.
The cable guide is attached to the rack after the Cisco ASR 9001 Router is installed.
Note
Installing the Air Plenum Kit in a 19-inch Rack
The air plenum kit is assembled and mounted in the rack before the Cisco ASR 9001 Router is installed.
Note
To install the air plenum kit in a two-post or four-post 19-inch rack, follow these steps:
Procedure
Step 1 Place the plenum base on a flat and stable surface. Secure the left and right adapter plates to the front of the
plenum base using two customer-supplied rack-mounting screws in the top and bottom screw holes on the
plenum base.
Step 2 Lift the plenum base to the desired position in the rack. Align the screw holes on the adapter plates on the
plenum base with the mounting holes in the rack.
Step 3 Attach the plenum base to the left and right rack rails using six customer-supplied rack-mounting screws,
three on each side. Torque the screws to the weight specified for your particular rack (see the following figure).
If the front to rear spacing for the cabinet is 18.4 inches, attach the rear adapter plates for additional
support (see Step 7).
Note
Cisco ASR 9901, ASR 9001, and ASR 9001-S Routers Hardware Installation Guide
63
Unpacking and Installing the Chassis
Installing the Air Plenum Kit

 Loading...