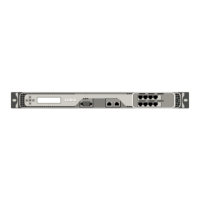
Citrix ADC MPX
5
6 match option vendor-class-identifier;
7 }
8
9
10 subnet 192.168.2.0 netmask 255.255.255.0 {
11
12 option routers10.217.242.1;
13 option domain-name”jeffbr.local”;
14 option domain-name-servers8.8.8.8;
15 default-lease-time 21600;
16 max-lease-time 43200;
17 subclass ”citrix-1” ”citrix-NS” {
18
19 vendor-option-space auto;
20 option auto.key ”citrix-NS”;
21 }
22
23 pool {
24
25 allow members of ”citrix-1”;
26 range 192.168.2.120 192.168.2.127;
27 option subnet-mask 255.255.255.0;
28 }
29
30 }
1. Open Server Manager and make sure DHCP service is running.
2. Open DHCP Manager, click DHCP, and select IPv4.
3. To configure Vendor Class as “..citrix-Ns” right click on IPv4 and select Define Vendor
Classes. Add a new class by specifying a display name, description, and “..citrix-NS” as the
ASCII value . Click OK.
4. Create a scope to configure IP range, subnetwork, DNS server, WIN server, default Gateway, and
excluded IP address range. To create a new scope, in the IPv4 list, right-click Scope Options
and enter a name and description. Click Next.
5. Provide an IP address range and subnet mask corresponding to the interface IP address bound
to the Server. Click Next.
6. To exclude an IP address, add it in Add Exclusion and Delay. Click Next.
7. Add a lease duration and click Next.
8. Select “Yes, I want to configure these options now” and click Next.
© 1999-2019 Citrix Systems, Inc. All rights reserved. 131

 Loading...