Advanced operation 8
October 2013 GB 55 /80
Hour Meters
Hrs to next Service
Setting Range
OK
Cancel
Fig. 8-6: Input menu "Hours to next Service"
1 Tap the <Number buttons> to enter the service
interval.
Corrections can be made with the <Back> but-
ton.
The <Cancel> button can be used to cancel
setting of the service interval. The previously
active setting is used.
2
Tap the <OK> button.
✓ The service interval is set.
– The entered value is saved.
–
The menu "Hour Meters" is displayed.
– The time set until the next service is dis-
played on the button <Hours to next Ser-
vice>.
8.5 Data logging
The controller has a data recording (data logger)
function by recording of data to an SD-Card. This
function can be used to monitor and store various
compressor parameters.
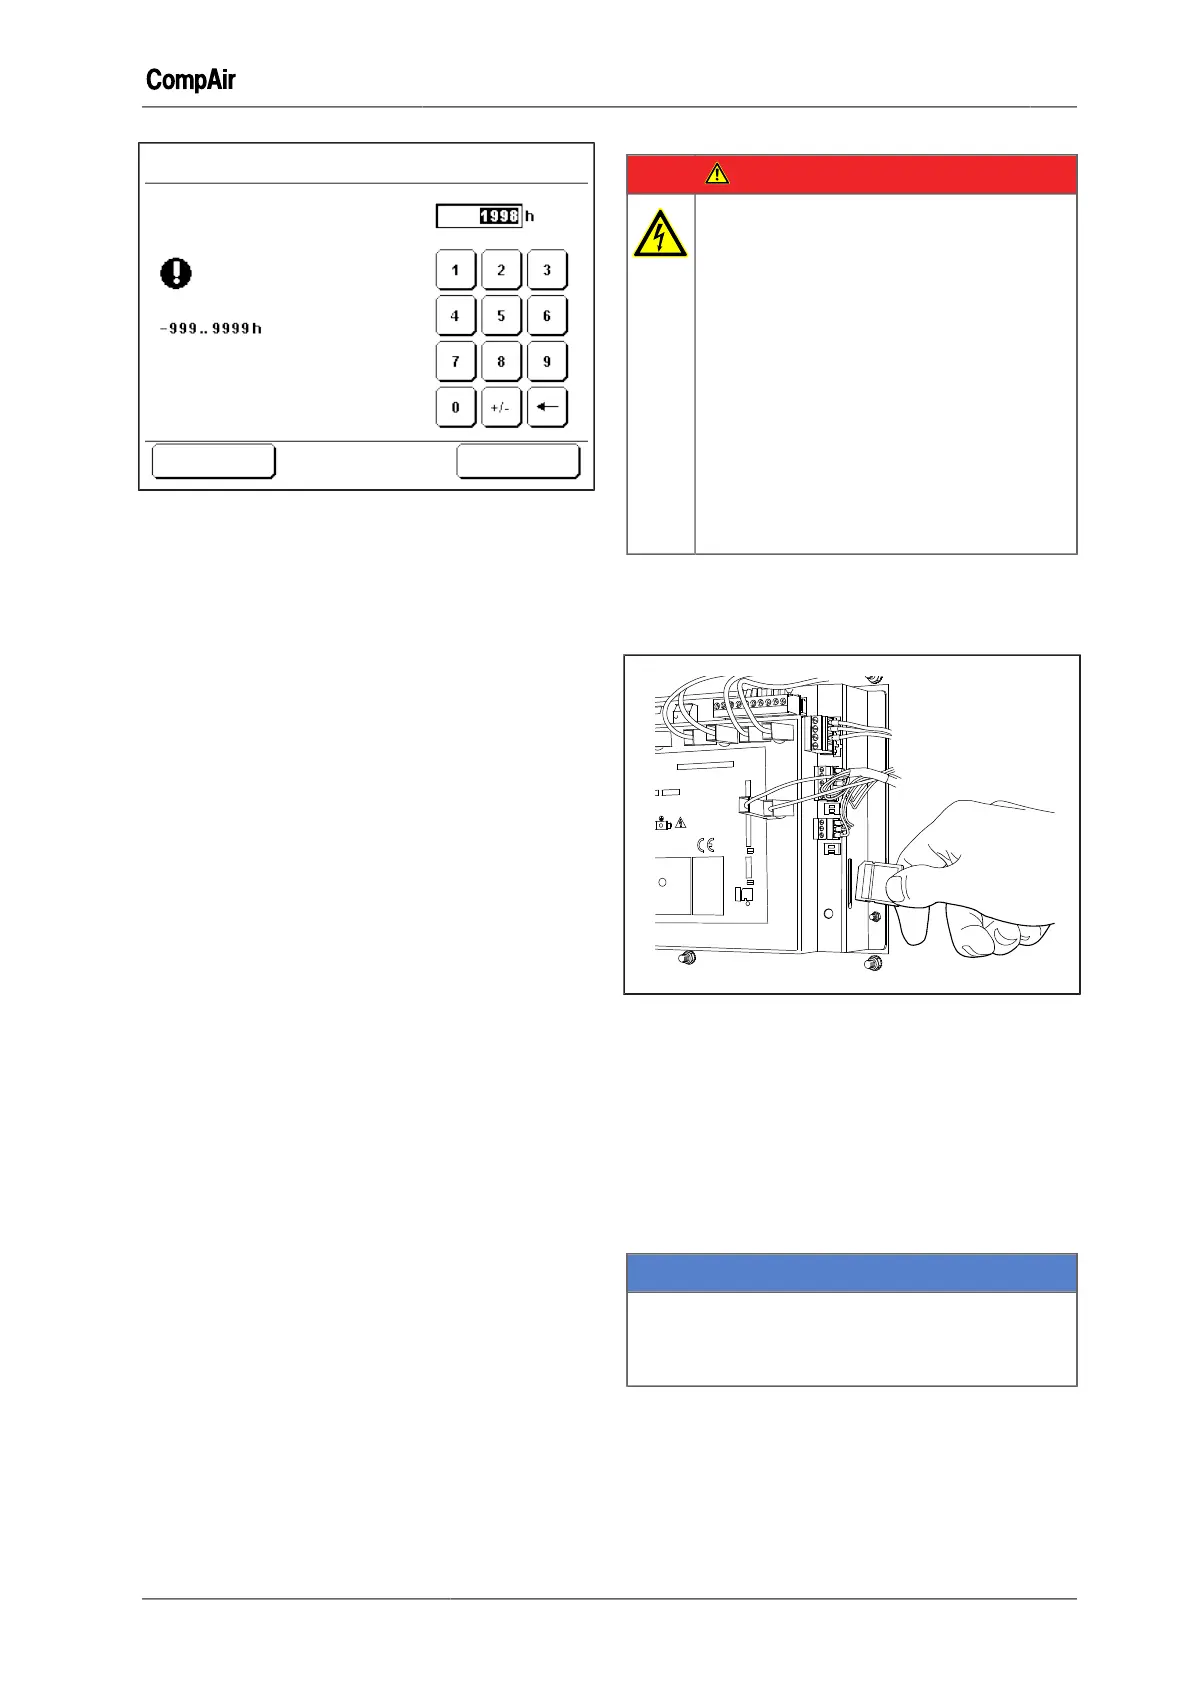
Inserting and removing an SD-Card
The SD card slot is located on the back of the con-
troller.
DANGER
Electric shock
Life-threatening electric shock
➯
Work on the electrical equipment
must only be carried out by autho-
rised electricians or electrical techni-
cians.
➯
With the speed-controlled types (
RS ) there is a risk of electric shocks
due to charged capacitors!
Switch the compressor to a zero
volts state and wait 10 minutes be-
fore touching any electrical parts.
➯
Checking the DC bus voltage.
1 Switch the main switch OFF.
2 Open the switch cabinet door and swing suffi-
ciently open.
Fig. 8-7: Inserting and removing an SD-Card
3 Clear the SD-Card write protection.
4 Insert the SD-Card in the correct position.
5 Press the SD-Card in fully.
6 Close the switch cabinet door.
To remove the SD-Card, press the inserted
SD card in fully. The SD-Card is unlocked and
ejected.
NOTICE
Data loss
➯
Ensure that data recording is switched OFF
before the SD-Card is removed.
Starting and stopping data recording
Starting data recording
1
Tap the <Settings> tab.
2
Tap button <SD-Card>.
3
Tap button <Record Data>.

 Loading...