Configuration 5
October 2013 GB 35 /80
5
Press buttons <+> and <-> to set the start and
end times.
6
Tap button <Day of the Week>, to specify the
weekdays on which the time setting should be-
come effective.
Button <Delete Channel> causes all entries to
be discarded.
Data entry is cancelled by tapping the button
<Cancel>. The functionality previously allocated
to the timer control channel is used.
7
Tap the <OK> button.
– The entries are saved.
–
The menu "Timer Start/Stop" appears.
8
Tap the <OK> button.
✓ The timer control is programmed for the exam-
ple.
– The on times are saved.
–
The menu "Timer Start/Stop" appears with
the confirmed entries.
p2 Pressure Band Schedule
1
Tap the <Settings> tab.
2
Tap the <Timer Control...> button.
3
Tap button <Timer Pressure Band p2>.
4
Tap button <p2 Pressure Band Schedule>.
–
The screen "p2 Pressure Band Schedule"
appears.
Timer Pressure Band p2
Start/Stop Schedule
Off
OK
Off
Off
Off
Off
Off
Off
Mo.
Tu.
We.
Th.
Fr.
Sa.
Su.
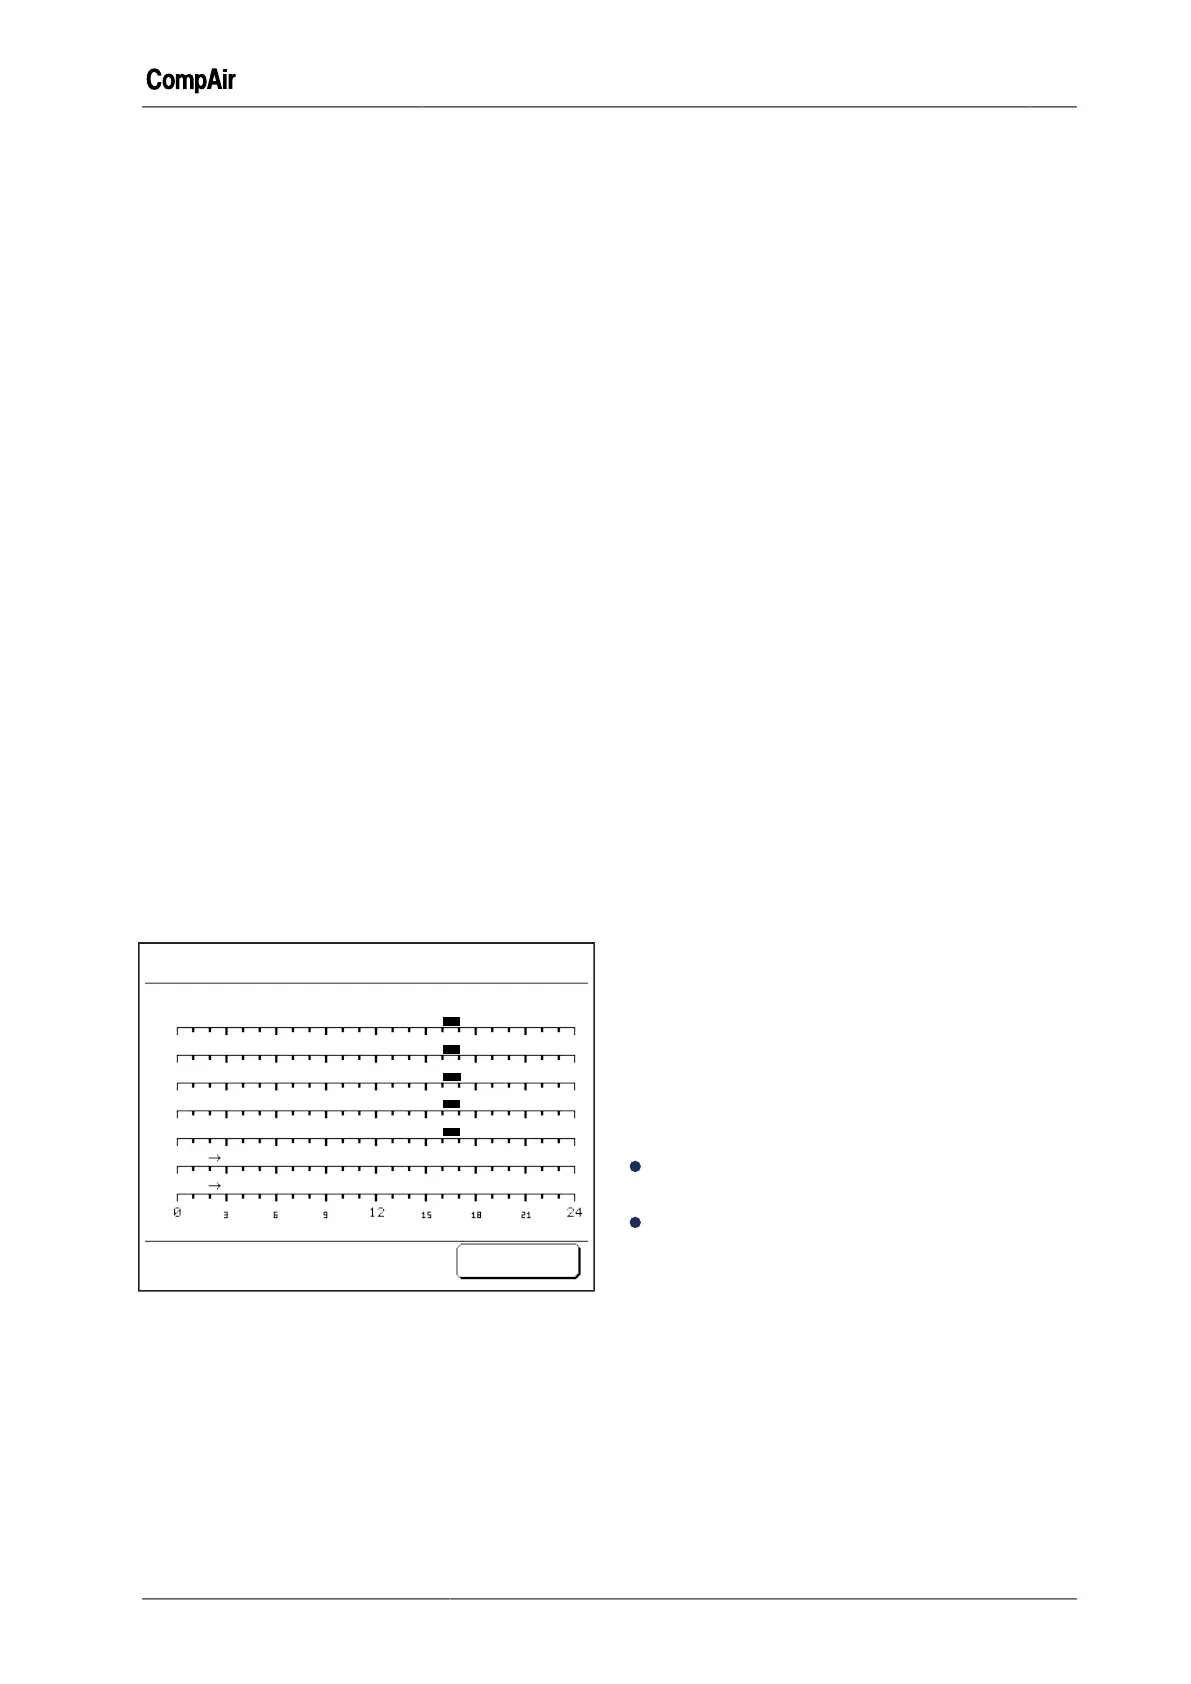
Fig. 5-32: Summary of the timer control channel settings
(condition after programming)
Along the X-axis, the overview shows the hours of
each day between 0:00 and 24:00 and the days of
the week along the Y-axis. The highlighted areas
show the timer channels which have been pro-
grammed (time windows).
5.5.3.5 Activating the timer control for opera-
tion in pressure band p2
Activating Timer Pressure Band p2
1
Tap the <Settings> tab.
2
Tap the <Control...> button.
3
Tap the <arrow keys> until the button <p2
Timer Enabled> is visible.
4
Tap the button <p2 Timer Enabled>.
–
The menu "p2 Timer Control Enabled" ap-
pears.
5
Tap button <On>.
The <Cancel> button can be used to cancel en-
abling of timer control operation. The previously
active setting is used.
6
Tap the <OK> button.
✓ Timer control for pressure band p2 is activated.
–
The menu "Control" appears.
–
"On" is now displayed on the button <p2
Timer Enabled>.
–
Likewise it is indicated in the menu "Home"
that the p2 timer control is activated (if in the
time window).
Tapping the button <Off> in the menu "p2 Timer
Enabled" causes p2 timer control to be deacti-
vated again.
7 Press the start button < I >.
– The compressor is switched ON (placed in
operation).
– The compressor runs in pressure band p2, if
it is in the p2 time window and the p2 condi-
tions are fulfilled.
p2 conditions
The compressor will always revert to the p1 pres-
sure band by default unless:
a scheduled p2 event is currently active (in the
time window) and
the p2 timer control has been activated in the
"Control" menu.
If both of these conditions are fulfilled, the con-
troller switches to pressure band p2.
5.5.4 Programming dryer pre-run time
The controller can be programmed so that the
compressor is only started after a certain lead
time, whether during manual or remote starting. In
this way an external dryer can reach its optimum
operating temperature.
The minimum pre-run time is detailed in the dryer
operating instructions.

 Loading...