3 - Maintenance instructions 17
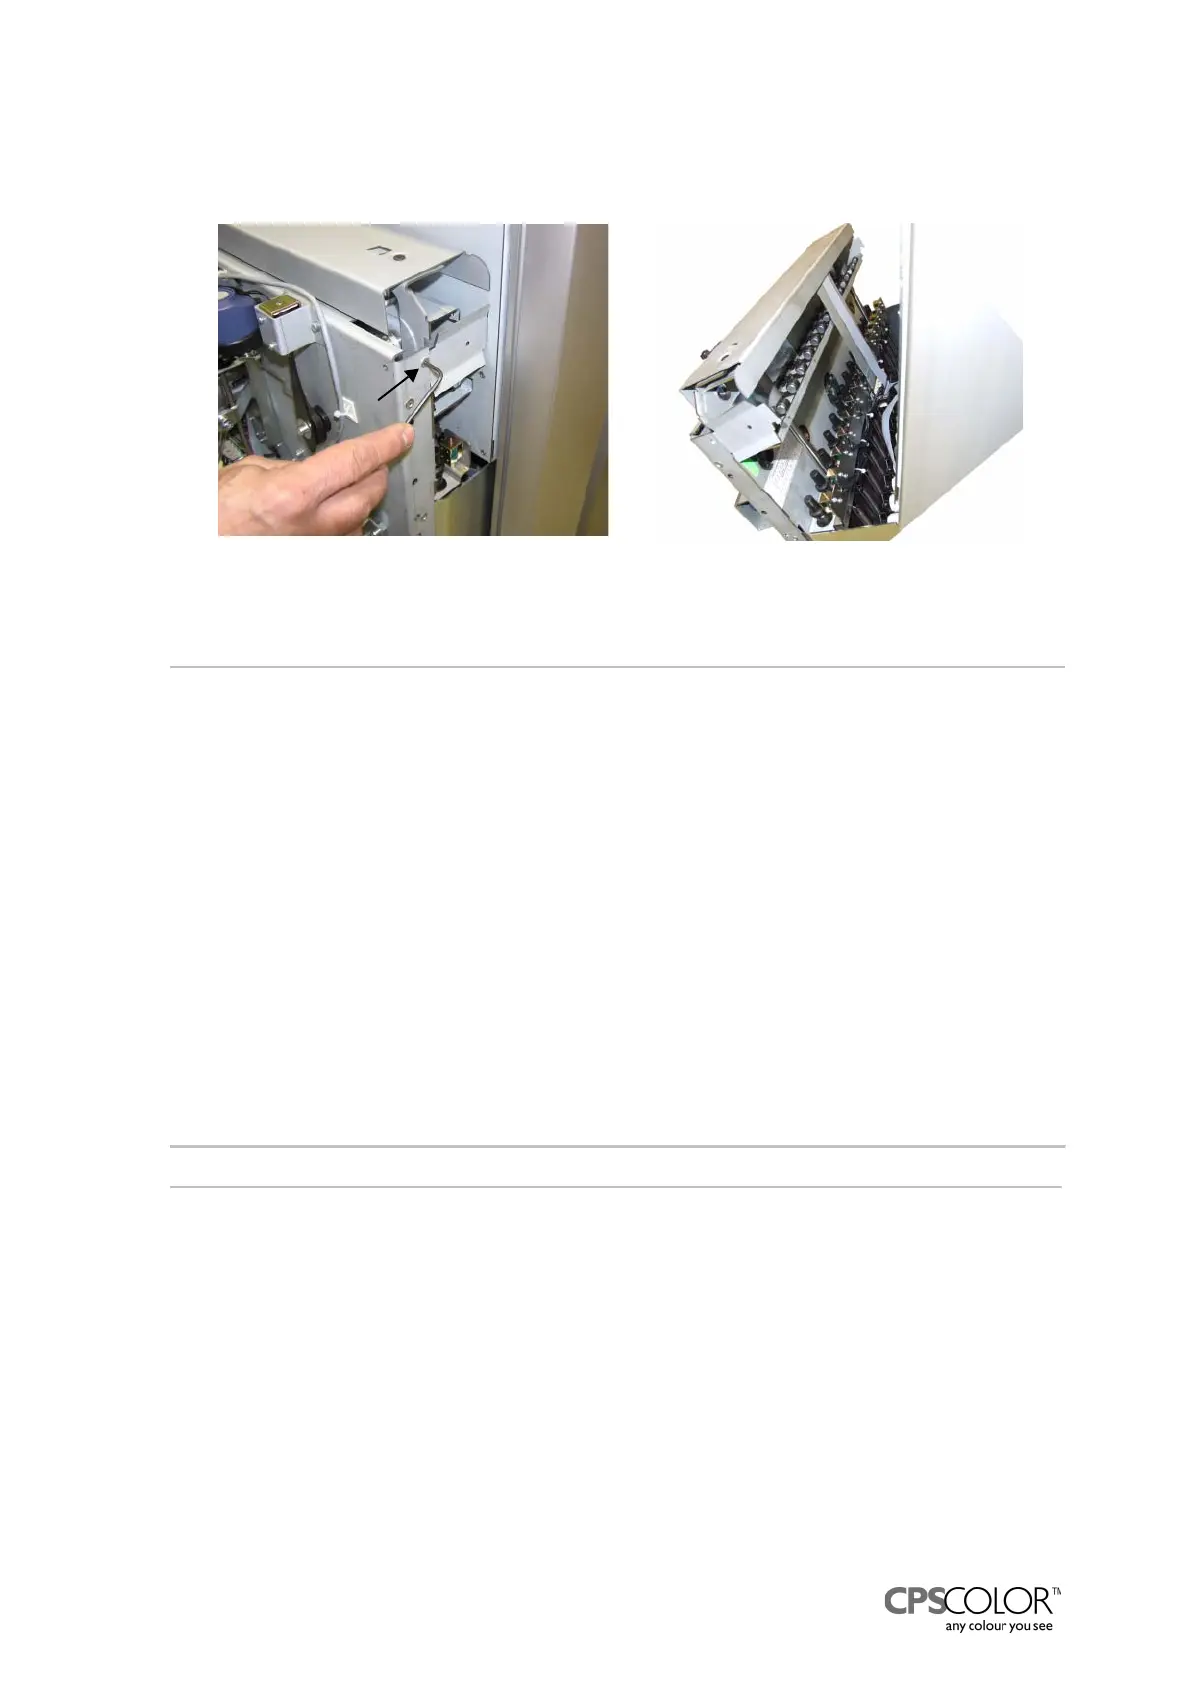
5. Lift both catches (figure 30) on the sides of the dispensing module away from the groove in
the front plate of the rack for canisters.
=> the top of the dispensing module tilts forward, like in figure 31.
3.4 Changing the solenoid rail assembly
Tools required:
• 3 mm Allen key
Procedure
1. Switch off the COROB
TM
D300 and unplug the mains cable from the outlet.
2. Remove front casing, see instructions on page 15.
3. Remove the hydraulic can table, see “3.2 Removing the can table during service”.
4. Tilt the dispensing module forward according to “3.3 Tilting the dispensing module” .
5. Disconnect the flat cable from the interface board B, see figure 9 on page 6.
6. Open the Allen screws on both ends of the solenoid rail, see figure 32.
7. Remove the solenoid rail and install a new one.
8. Check that the horizontal part of the solenoid rail is on same level with the top of the hinge on
the side of the dispensing module, see figure 33.
If the rail is too low the plastic hooks do not reach the piston rods when the solenoid is
activated.
9. Adjust the rail by bending it, if necessary, so that all the solenoids are aligned.
NOTE!: The solenoids must be in straight line in order to hit the plastic hooks!
10. Fasten the rail with screw in place.
11. Assemble the COROB
TM
D300 in opposite order.
C
a
t
c
h
Figure 31: The dispensing module is
tilting forward.
Figure 30: The catch that locks the
dispensing module is fastened with one
screw.