3 - Maintenance instructions 37
NOTE!: Check that all the piston rods are lifted up at least 1cm.
3. Release the dispensing bar that is open the self-locking pliers.
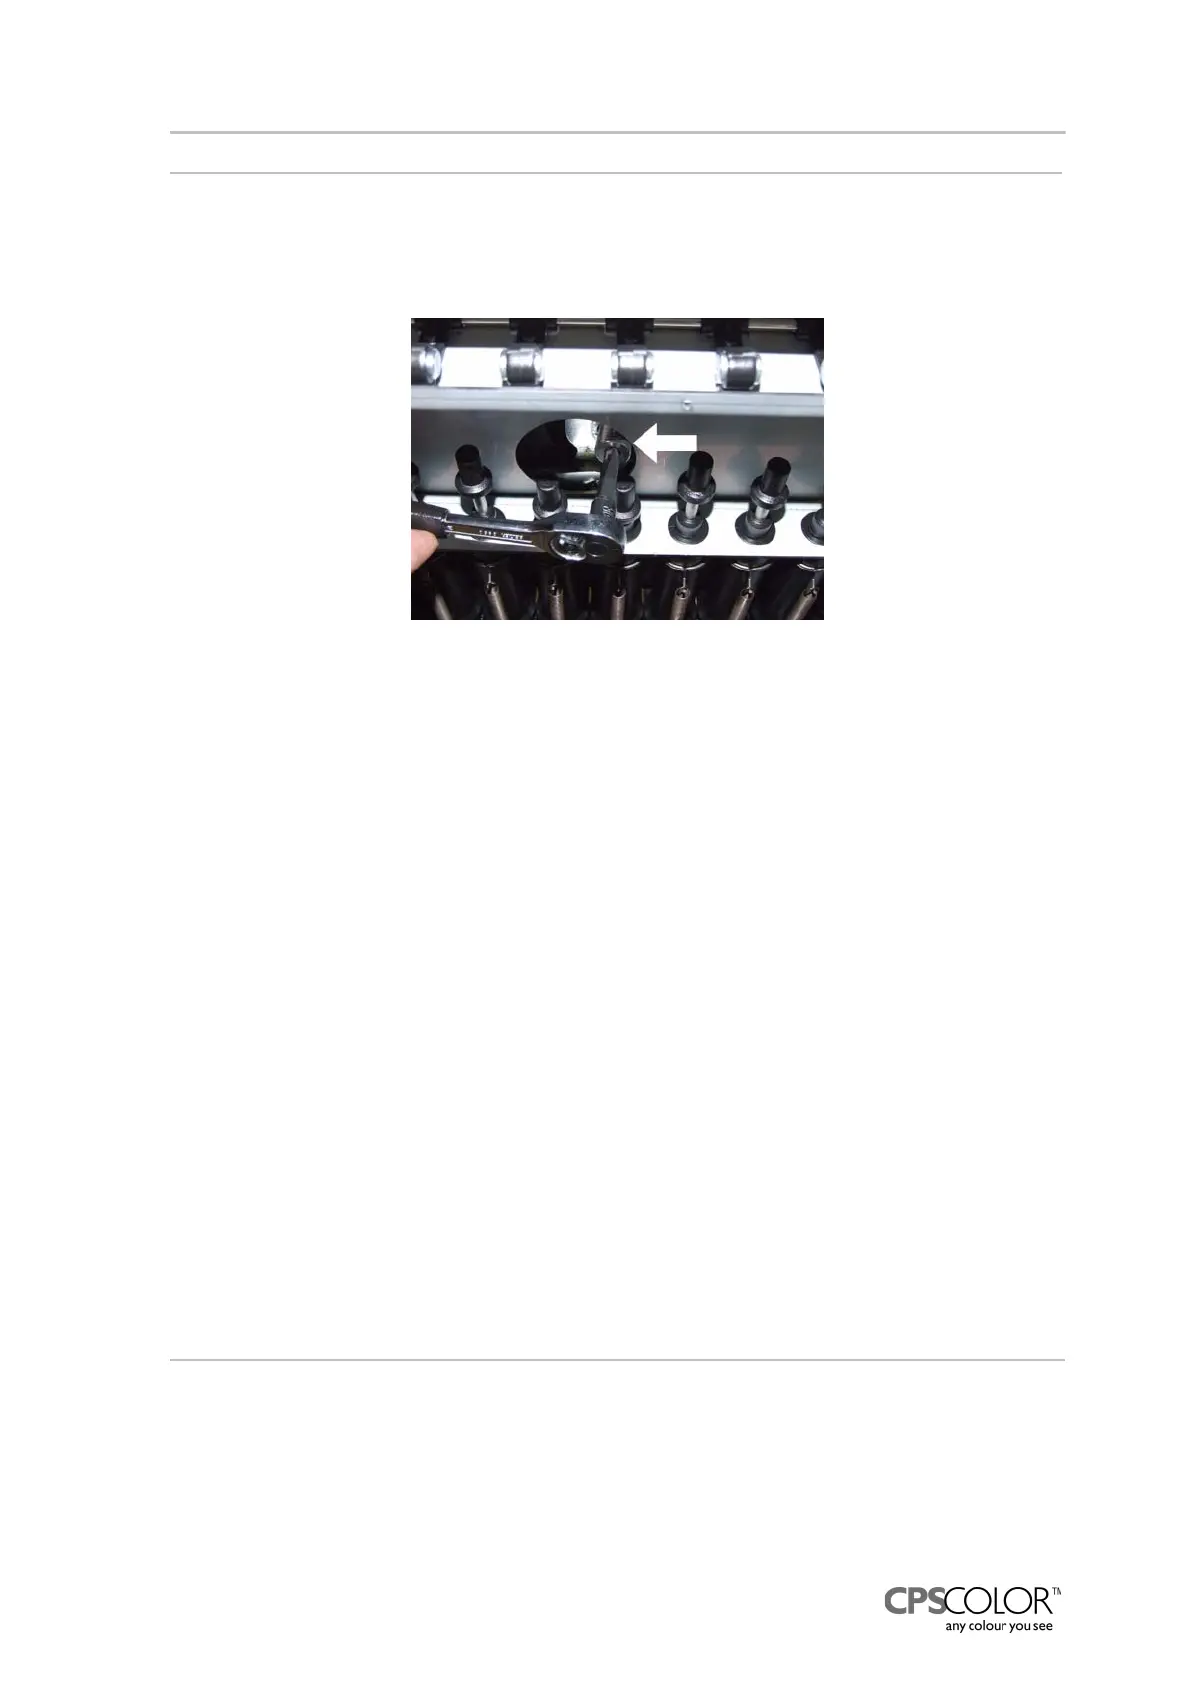
4. Screw the nut in place behind the dispensing module.
Tighten so that you press the set wrench against the back panel to make sure that the
actuator does not move.
5. Lift the dispensing module up so that it hinges on the catches.
6. Fasten the motor bedstead with four screws (longer ones below) in place.
7. Connect the pulse sensor’s cable to the motor.
8. Connect the nozzle closer’s cable to the connecting board.
9. Put the ON OFF switch and air pump wires back to supports.
10. Fasten the 0 sensor back in place.
11. Connect the motor’s wires to the connecting board.
12. Lift up the nozzle closer mechanism and fasten it with two screws.
Tighten the screws while lifting the support and pushing it little right.
13. Tilt the dispensing module.
14. Lift up the dispensing bar.
15. Fasten the solenoid rail in position, see “Changing the solenoid rail assembly” on page 17.
16. Fasten the cable tray and the cover in position.
17. Lift the dispensing module back and lock with screws in position.
18. Fasten the water reservoir’s holder in position, connect the hoses to it.
19. Put the processor board in position.
20. Fasten the can table, the front casing back in postion and attach the water reservoir.
21. Start the COROB
TM
D300
22. Test the pulse and the 0 sensors:
(Koecdriver: D300 tests, see “Encoder and zero sensor test” on page 45)
3.12.2The stirring motors
There is a stirring motor under each colorant canister. You need to change the stirring motor if
stirring is not working.
Tools required:
• PH1 and PH2 Crosshead screwdriver
Figure 83: Press the wrench against the back
panel (white arrow), when you tighten the
nut.