36 3 - Maintenance instructions
COROB
TM
D300
15. Tilt the dispensing module forward according to instruction “Tilting the dispensing module” on
page 16.
16. Remove the cover from the top of the dispensing bar, see figure 79.
17. Remove the cable tray behind the dispensing module, see figure 80.
18. Lock the dispensing bar to upper position for example with self-locking pliers.
19. Remove the solenoid rail (See “Changing the solenoid rail assembly” on page 17) to make
sure the solenoids stay undamaged.
20. Remove the nut of the motor’s driving crank behind the dispensing module, see figure 81.
21. Put a long screwdriver behind the motor bedstead and wrench the crank out from the motor
shaft. The figure 82 shows where to place the screwdriver.
22. Disconnect the pulse sensor’s cable from the motor.
23. Open the three screws that fasten the motor to the motor bedstead and unfasten the motor.
Fastening the dispensing motor
Procedure:
1. Fasten the dispensing motor to the motor bedstead.
2. Make sure that the actuator’s shaft is seen throw the hole behind the dispensing module.
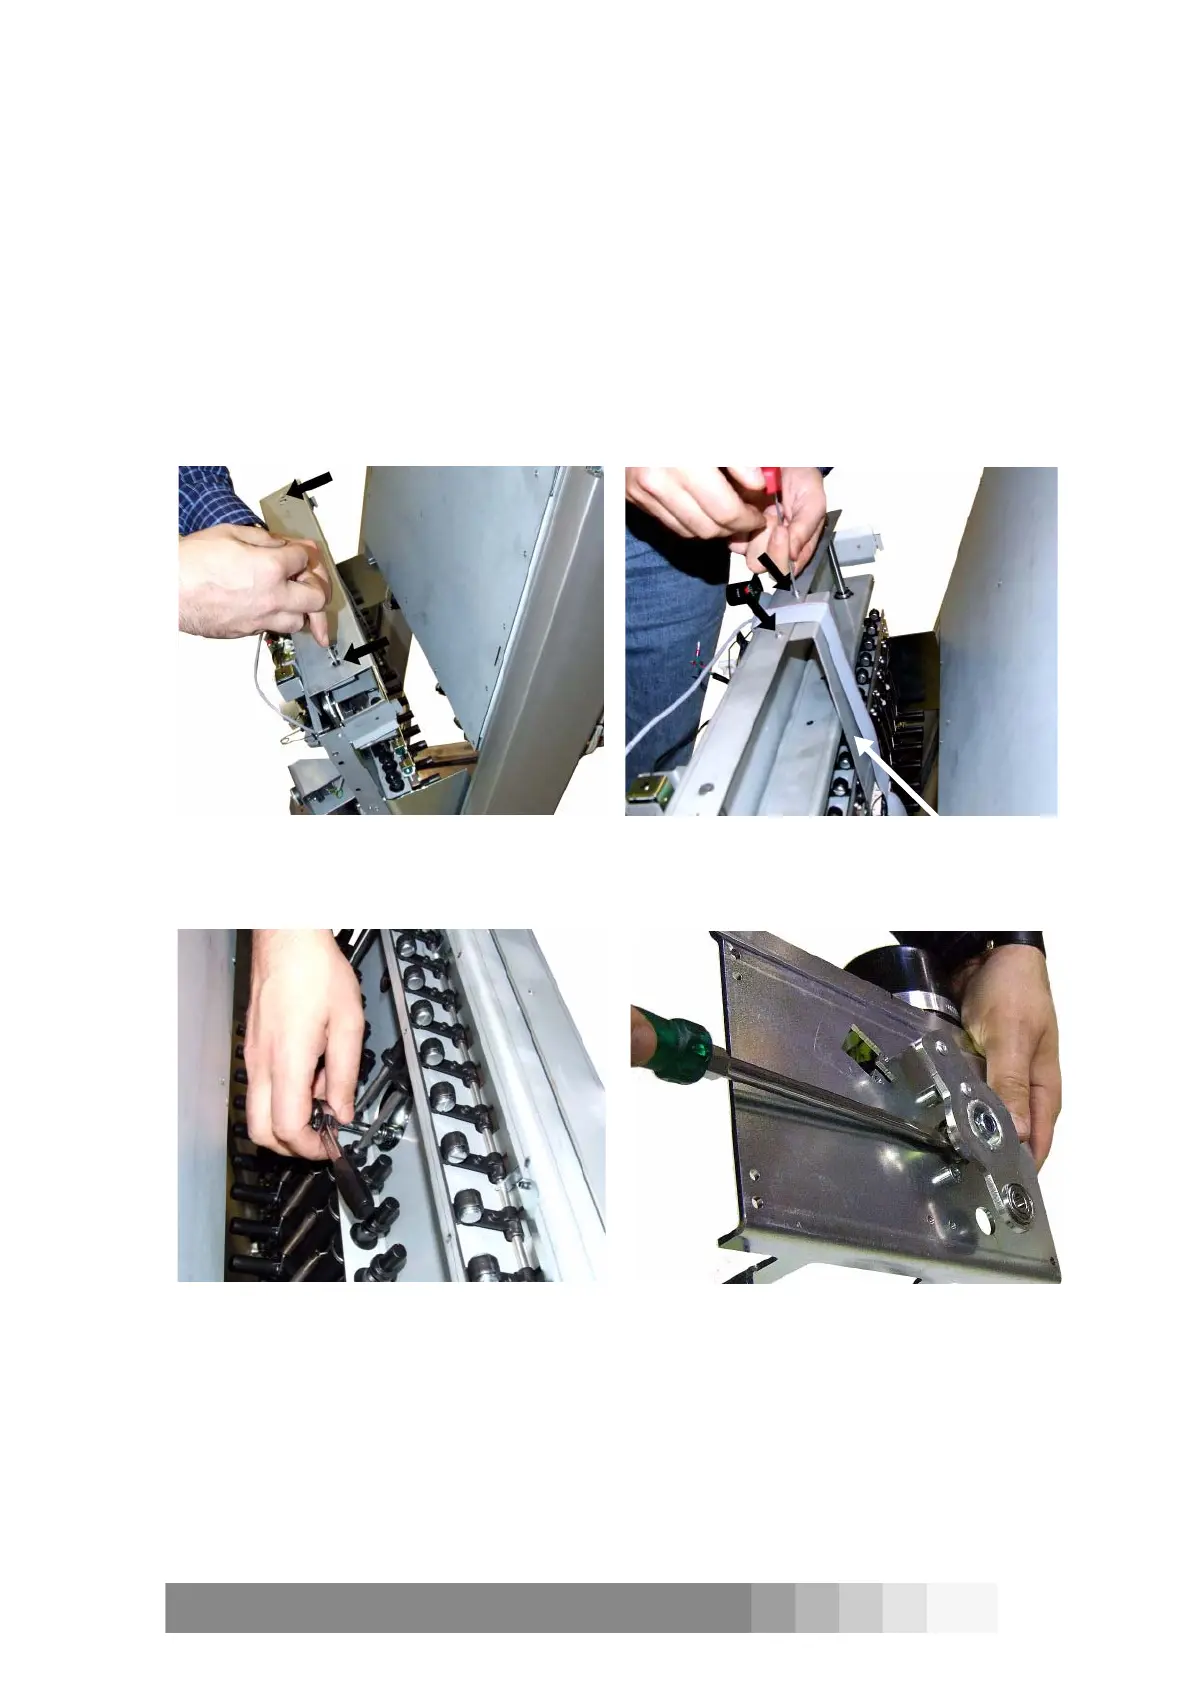
Figure 79: The cover of the motion plate is
fastened with two screws (arrows).
Figure 80: The cable tray that protects the
cable is fastened with two screws to the motion
plate (arrows).
Figure 81: Use a socket wrench to remove the
nut of the motor’s driving crank.
Figure 82: Put a screwdriver between the
actuator and the motor bedstead.