3 - Maintenance instructions 35
2. Remove the front casing according to instructions on page 15.
3. Remove the can table, see “Removing the can table during service” on page 15.
4. Disconnect the hoses from the angle joints of the water reservoir holder.
5. Remove the reservoir’s holder which is fixed with two M8 screws to motor bedstead.
6. Remove the processor board.
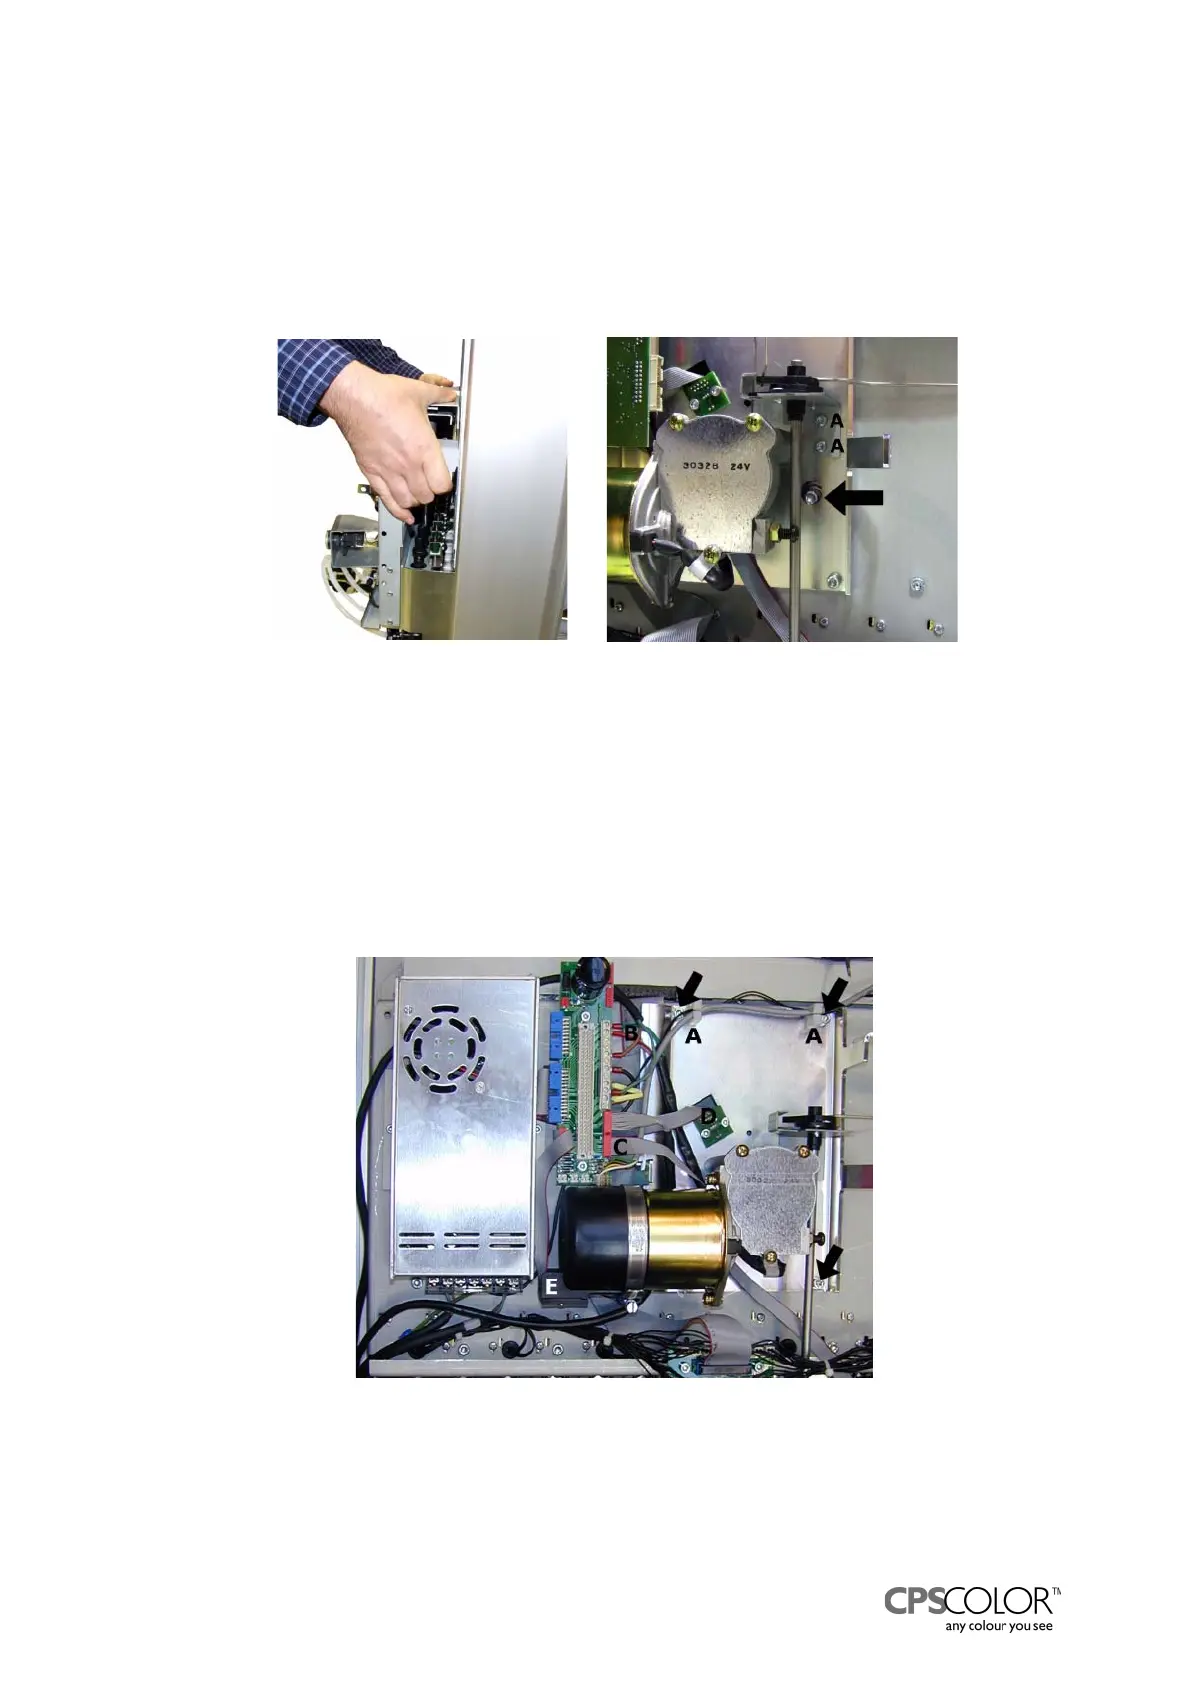
7. Lift manually the dispensing bar to upper position
=> the screw of the crank mechanism moves to the hole in the motor bedstead.
8. Remove the ON-OFF switch and air pump wires from supports, letter A in figure 78.
9. Disconnect the dispensing motor wires (B in figure 78) from the connecting board.
NOTE! Remember the places of the wires!
10. Disconnect the flat cable of the nozzle closer sensor (C in figure 78) from the connecting
board.
11. Disconnect the 0 sensor (D in figure 78) from the motor bedstead.
12. Remove the support that holds the nozzle closer moving mechanism: open two screws (A in
figure 77)
13. Open the screw of the crank mechanism, marked with an arrow in figure 77.
14. Open the four fixing screws of the motor bedstead, marked with arrows in figure 78.
Figure 76: Lift up the dispensing
bar manually.
Figure 77: The screw of the crank
mechanism is behind the hole in the
motor bedstead.
Figure 78: The disconnecting wires and cables are
marked with letters, also the motor bedstead’s fixing
screws are marked with arrows to the figure.