Cygnus DIVE Operating Manual M2-DIVE-M-ENG_Iss5.docx
Page 27 of 118
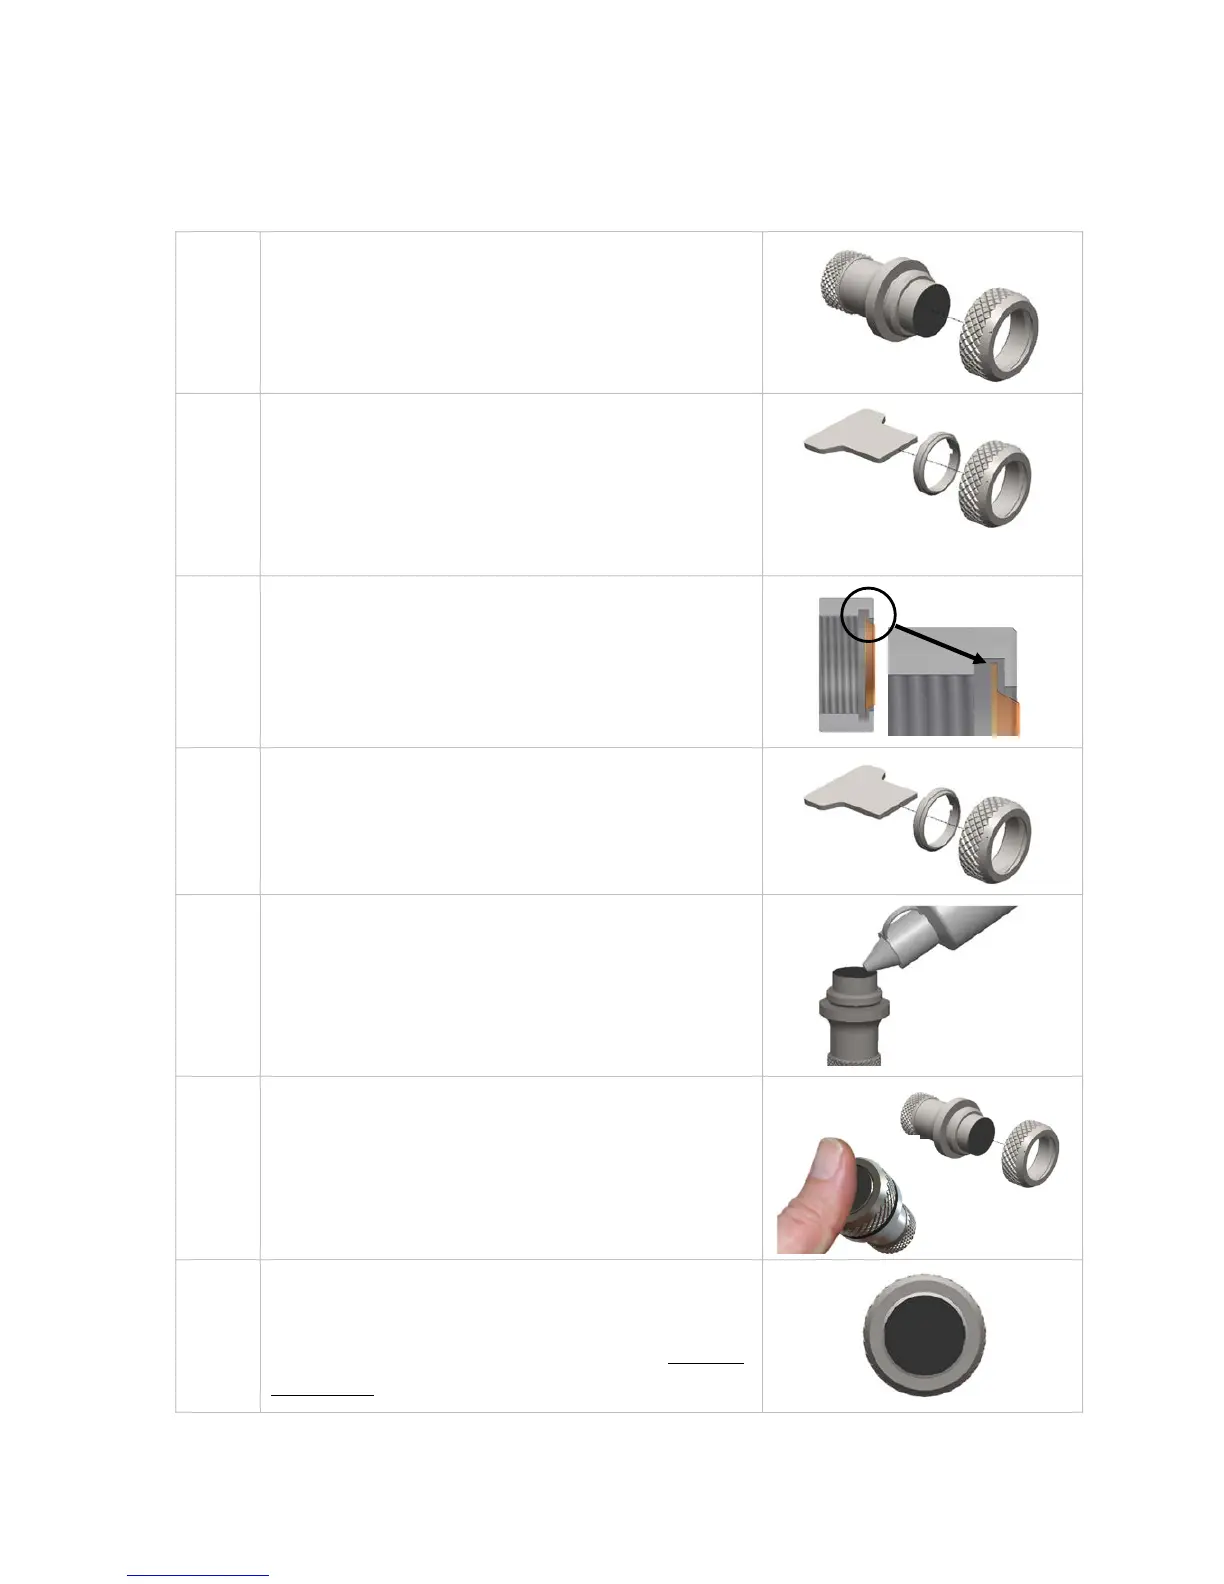
Changing the Protective Membrane on Single
Element Probes
1.
the Locking Ring from inside the
Knurled Ring. The old membrane
can then be removed and
discarded.
3.
Place a new membrane into the end
of the Knurled Ring ensuring it
locates in the groove.
Screw the Locking Ring back inside
the Knurled Ring and tighten with
the Membrane Key.
Place a few drops of Membrane
Couplant on to the probe face.
the Knurled Ring back onto
the probe. Use your thumb to
squeeze the couplant from under
the membrane as you tighten the
Knurled Ring down.
You should see the membrane has
a very thin film of couplant between
itself and the probe face with no air
bubbles.