measuring cast iron.
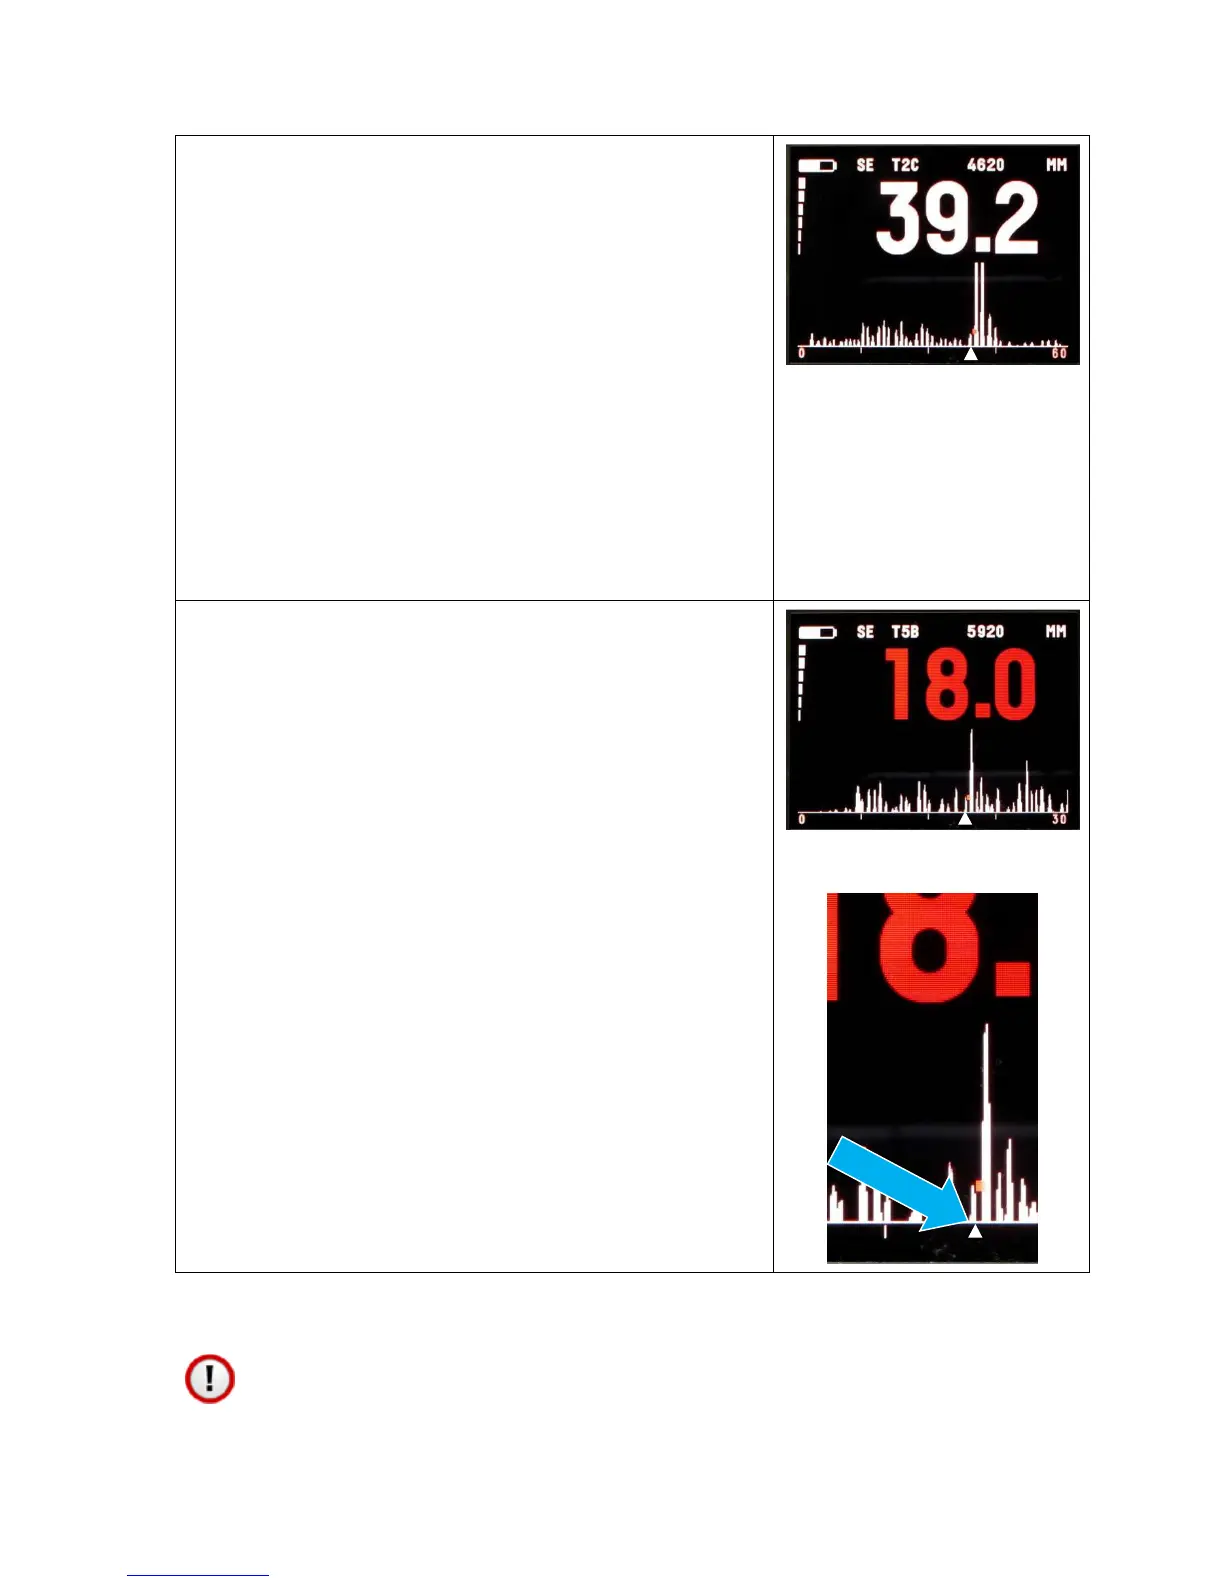
This A-Scan shows a good clear ultrasound
signal with a distinctive back-wall echo.
Even though there are small echoes before
the back-wall peak, the arrow is correctly
placed under the start of the biggest echo
peak.
The measurement value of 39.2 is stable
and yellow in colour.
ultrasound signal.
There are lots of echoes and it’s not very
clear which is the correct back-wall echo.
It is probably the biggest peak ¾ of the
way across the A-scan graph – but the
gauge may not detect this.
You can use the A-scan to check that the
gauge has identified the correct peak
which is marked by the arrow.
If it looks right and the arrow is in the
correct position then you can decide to use
the thickness measurement.
If it looks wrong then try another location.

 Loading...