153D-Link ShareCenter DNS-320L User Manual
Section 4 - Conguration
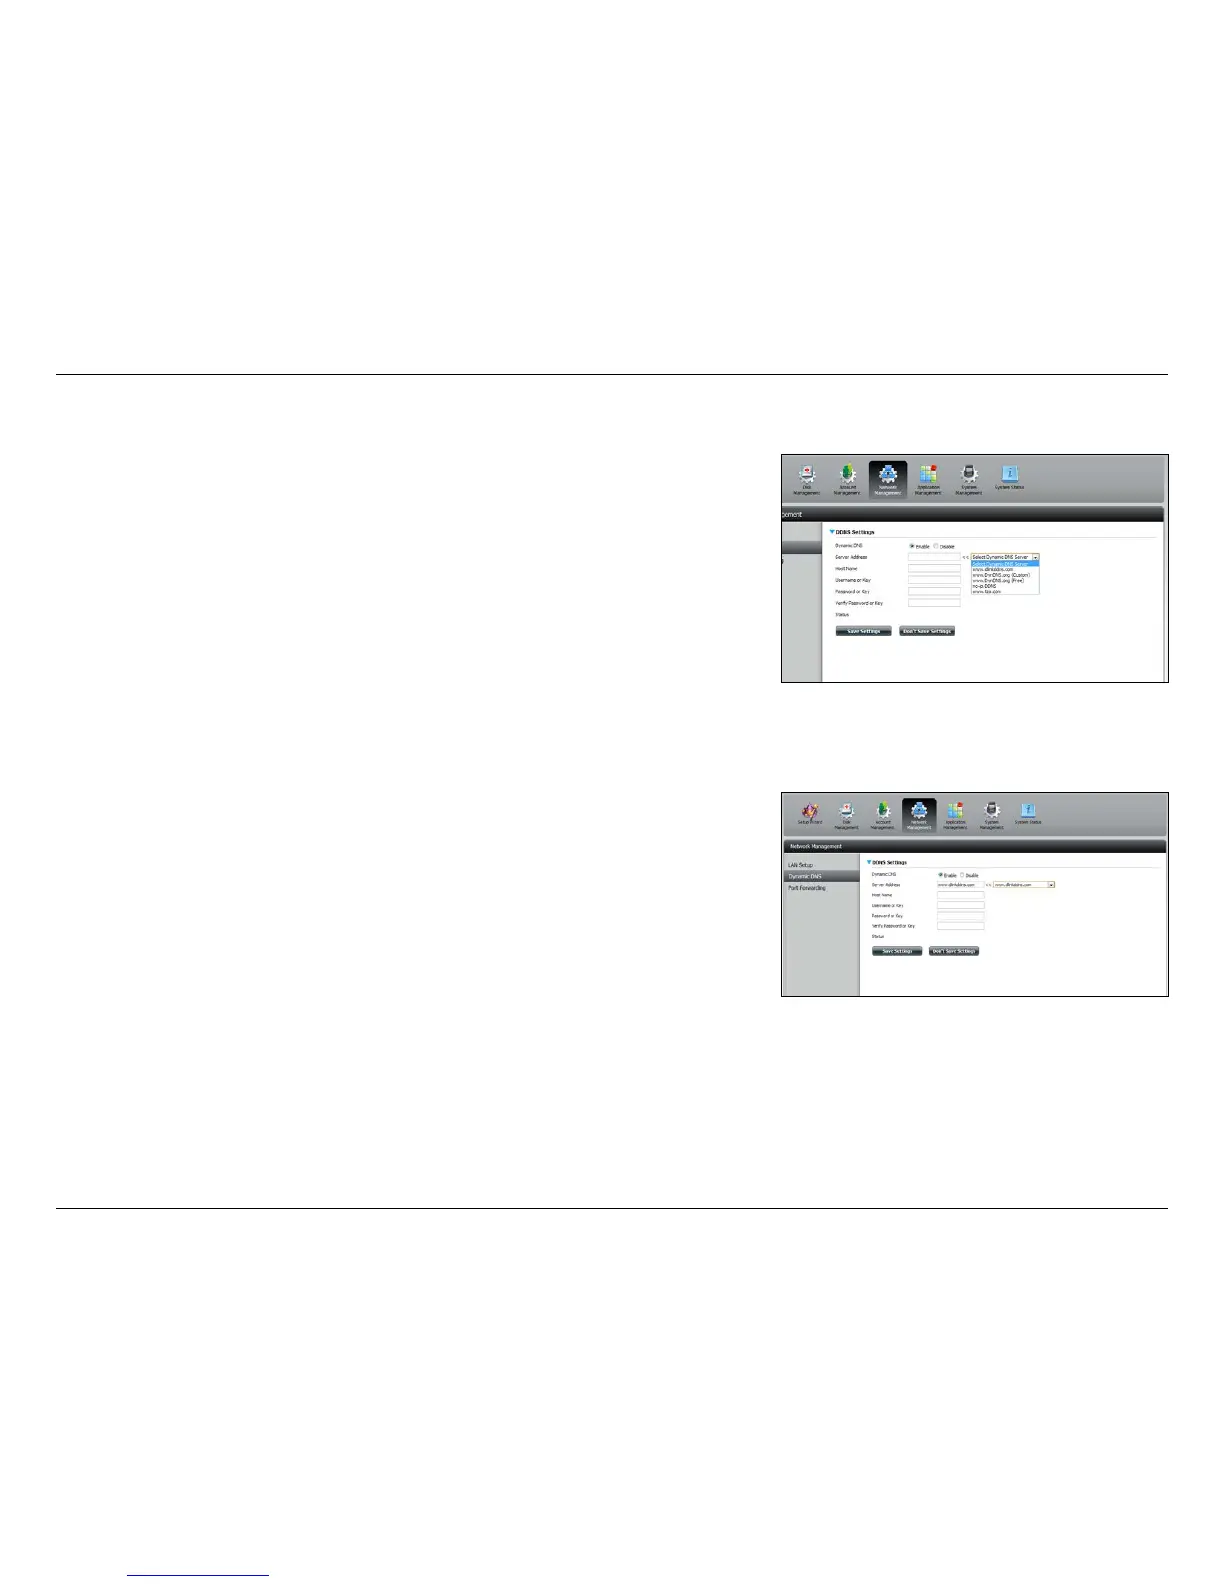
DDNS
The DDNS feature allows the user to host a server (web, FTP, game server, etc…)
using a domain name that you have purchased (www.yourdomain.com) with
your dynamically assigned IP address. Most Internet service providers assign
dynamic (changing) IP addresses. Using a DDNS service provider, your friends
can enter your domain name to connect to your server regardless of your IP
address.
Go to Network Management >> Dynamic DNS.
Select Enable or Disable.
Select a DDNS server from the combo box on the right
hand-side, and click << to automatically populate the elds.
You can also type in the server address manually.
Enter your DDNS host name.
Enter your DDNS username or key.
Enter your DDNS password or key.
Re-enter your password or key.
Displays your DDNS status.
DDNS:
Server
Address:
DDNS:
Username
or Key:
Password of
Key:
Verify:
Status: