EasyManuals Logo

D-Link DNS-320L User Manual

D-Link DNS-320L
407 pages
To Next Page IconTo Next Page
To Previous Page IconTo Previous Page
Page #54 background imageLoading...
Page #54 background image
48D-Link ShareCenter DNS-320L User Manual
Section 3 - Installation
Mapping a Drive
You can map a volume on your DNS-320L using Windows Explorer in Windows 7.
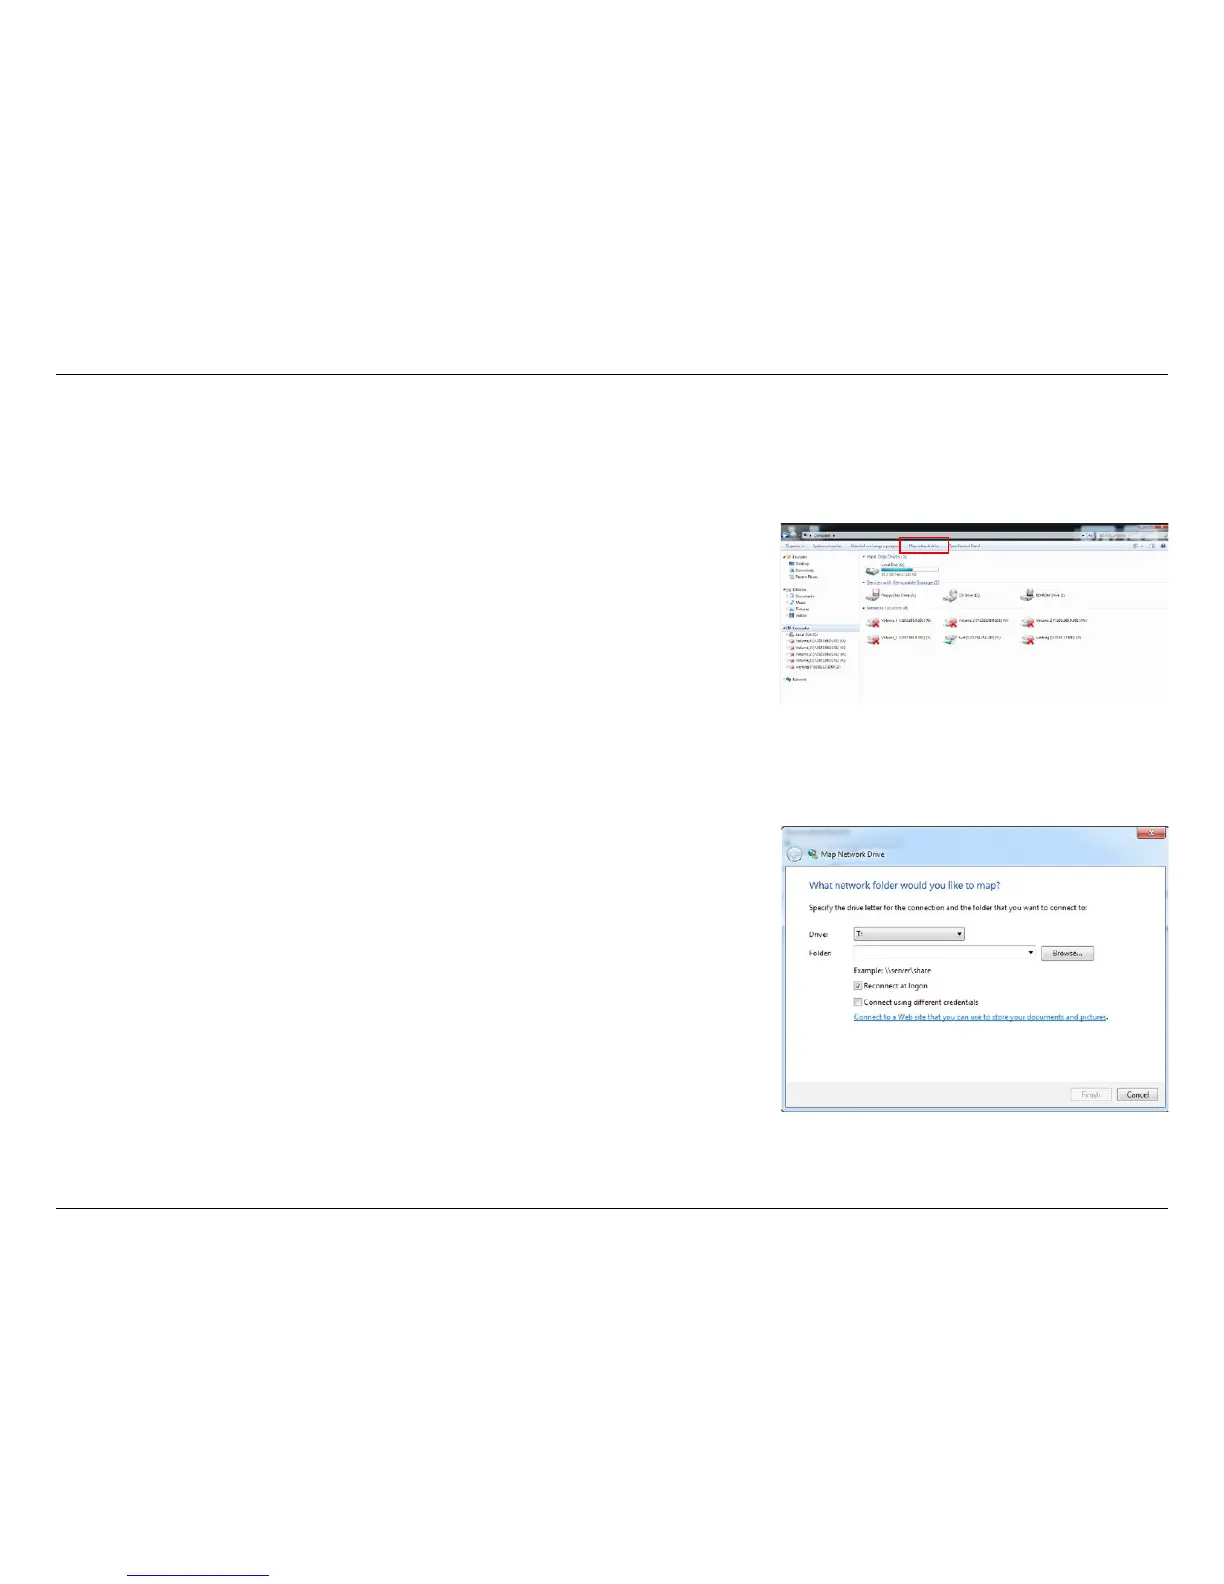
Open My Computer by clicking on the icon on your desktop, or press the
Windows key and the letter E on your keyboard at the same time.
The right-side panel displays a list of your hard drives, removable storage,
and network locations. If you do not have any network locations, this may be
the rst time you set up a network drive. Begin by clicking on Map Network
Drive.
The Map Network Drive screen will appear. Choose a letter from the drop
down menu to map the new drive to. Click Browse to nd the NAS volume
you wish to map on your network.

Table of Contents

Other manuals for D-Link DNS-320L

Questions and Answers:

Question and Answer IconNeed help?

Do you have a question about the D-Link DNS-320L and is the answer not in the manual?

D-Link DNS-320L Specifications

Power IconPower
power supplyExternal DC 12 V / 3 A
power saving modeAuto power recovery
scheduled power offSupported
Operating Environment IconOperating Environment
operating temperature32 to 104 ˚F (0 to 40 ˚C)
storage temperature-4 to 158 ˚F (-20 to 70 ˚C)
humidity5% to 90% non-condensing
Ports & Interfaces IconPorts & Interfaces
ethernet port1 x 10/100/1000 Gigabit
usb port1 x USB 2.0
connection to UPSSupported through USB port
Weight and Dimensions IconWeight and Dimensions
weight0.25 lbs
dimensions3.54” x 5.68” x 7.6”
dimensions (mm)90 x 144.3 x 193.3 mm

Related product manuals