EasyManua.ls Logo

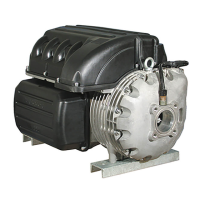
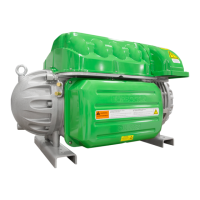
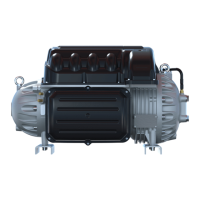
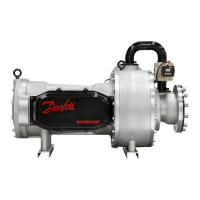
Danfoss Turbocor TT300

Danfoss Turbocor TT300
132 pages
To Next Page IconTo Next Page
Loading...
Danfoss Turbocor® Twin-Turbine
Centrifugal Compressors
TT & TG Series Compressors
Service Manual
http://turbocor.danfoss.com
®

Table of Contents

Questions and Answers:

Danfoss Turbocor TT300 Specifications

General IconGeneral
ModelTT300
Cooling Capacity300 kW
Motor TypePermanent Magnet Synchronous Motor
LubricationOil-free
Compressor TypeCentrifugal
RefrigerantR134a

Summary

Proprietary Notice

Copyright, Limitations of Liability and Revision Rights

Outlines copyright, liability limitations, and revision rights for the manual.

Introduction

1.1 Purpose

Explains the manual's purpose and intended audience.

1.2 Organization

Describes the manual's structure and section breakdown.

1.3 Commitment to Quality

States the company's commitment to quality and customer satisfaction.

1.4 Safety Summary

Provides an overview of safety precautions and hazard identification.

1.4.1 Danger Notification

Explains danger notifications and their significance for safety.

1.4.2 Caution Notification

Explains caution notifications and their significance for safety.

1.4.3 Note

Explains the use and format of notes in the manual.

1.5 Precautions

Covers general safety precautions for personnel and equipment.

1.6 Refrigerant Type

Details the types of refrigerants used with the compressors.

1.6.1 R134 aR513 A

Specifies refrigerants for TT series compressors.

1.6.2 R1234 ze

Specifies refrigerants for TG series compressors.

1.7 Electrical Isolation of the Compressor

Explains the critical steps for isolating electrical power before service.

1.8 Handling Electronic Static Devices

Covers precautions for handling static-sensitive electronic components.

1.8.1 ESD ProtectionGrounding

Details ESD protection and grounding procedures for safe handling.

1.9 DC Bus Test Harness Installation and Removal

Instructions for installing and removing the DC bus test harness.

1.9.1 Installation of the DC Bus Test Harness

Step-by-step guide for installing the DC bus test harness.

1.9.2 DC Bus Test Harness Use

How to use the DC bus test harness to measure voltage.

1.9.3 Removal of the DC Bus Test Harness

Steps to disconnect and remove the DC bus test harness.

Compressor Fundamentals

2.1 Main Fluid Path

Describes the path of refrigerant through the compressor stages.

2.2 Motor and Power Electronics Cooling

Explains how the motor and power electronics are cooled.

2.2 Motor and Power Electronics Cooling

Details serial and split cooling methods for motor and electronics.

2.3 Capacity Control

Explains methods used for compressor capacity control.

2.4 Compressor Energy and Signal Flow

Outlines the flow of energy and signals within the compressor.

Compressor Components

3.1 Component Identification

Identifies major compressor components and their locations.

3.2 Compressor - Removal and Installation

Provides steps for removing and installing the compressor.

3.2.1 Refrigerant Containment

Safety procedure for isolating and recovering refrigerant before service.

3.2.2 Compressor - Removal

Detailed steps for removing the compressor from its installation.

3.2.3 Compressor - Installation

Detailed steps for installing a new or reconditioned compressor.

3.2.3.1 Compressor Replacement Considerations for Motor Cooling Adapter

Specific considerations for replacing the motor cooling adapter.

3.3 3-Phase Main Voltage Input Terminal Block

Describes the terminal block where 3-phase AC voltage is supplied.

3.3.1 Function

Explains the function of the main voltage input terminal block.

3.3.2 Connections

Details how the AC power is routed to the SCRs and Soft Start board.

3.3.3 Verification

Procedures for verifying the 3-phase AC input.

3.3.3.1 3-Phase AC Input Verification

Steps to verify the main 3-phase AC input.

3.3.3.2 Connecting the AC Input Cable

How to securely connect the AC input cable.

3.3.3.3 Verifying the 3-Phase AC Input

How to measure AC input voltage and verify readings.

3.3.4 Removal and Installation

Steps for removing and installing the terminal block.

3.3.4.1 Terminal Block Removal (TT350 TT400 TT500 TT700 TG310 TG390 TG520)

Specific steps for removing the terminal block on certain models.

3.3.4.2 Terminal Block Removal (TT300 TG230)

Specific steps for removing the terminal block on TT300/TG230 models.

3.3.4.3 Terminal Block Installation (TT350 TT400 TT500 TT700 TG310 TG390 TG520)

Specific steps for installing the terminal block on certain models.

3.3.4.4 Terminal Block Installation TT300 TG230

Specific steps for installing the terminal block on TT300/TG230 models.

3.4 Soft Start Board

Introduces the Soft Start Board and its function.

3.4.1 Function

Explains the function of the Soft Start Board in limiting in-rush current.

3.4.2 Connections

Shows the connection points on the Soft Start Board.

3.4.3 Verification

Procedures for verifying Soft Start voltages and fuses.

3.4.3.1 Verifying Soft Start Voltages

Steps to verify the voltages related to the Soft Start Board.

3.4.3.2 Verifying Soft Start Fuses

Steps to test the Soft Start fuses for continuity.

3.4.4 Removal and Installation

Steps for removing and installing the Soft Start Board.

3.4.4.1 Removing the Soft Start

Detailed steps for removing the Soft Start Board.

3.4.4.2 Installing the Soft Start

Detailed steps for installing the Soft Start Board.

3.5 Silicon-Controlled Rectifier

Explains the SCR module and its function in AC to DC conversion.

3.5.1 Function

Describes the role of SCRs in converting AC voltage to DC for the Inverter.

3.5.2 Connections

Shows the connections to the SCR modules.

3.5.3 Verification

Procedures for verifying SCR module functionality.

3.5.3.1 Diodes Verification

Steps to verify the diodes within the SCR module.

3.5.3.2 Gates Verification

How to verify the gate resistance of the SCRs.

3.5.3.3 SCR Temperature Sensor Verification

How to verify the SCR temperature sensor resistance.

3.5.4 Removal and Installation

Steps for removing and installing SCRs and their temperature sensor.

3.5.4.1 SCR Removal

Detailed steps for removing the SCR modules.

3.5.4.2 SCR Temperature Sensor Removal

Steps to remove the SCR temperature sensor.

3.5.4.3 SCR Installation

Steps to install the SCR modules.

3.5.4.4 SCR Temperature Sensor Installation

Steps to install the SCR temperature sensor.

3.6 DC Bus

Describes the DC bus components and their function.

3.6.1 Function

Explains the role of DC bus components like capacitors, bus bars, and resistors.

3.6.2 Connections

Shows the DC bus connections.

3.6.3 Verification

Procedures for verifying DC bus voltage, bleed resistors, and snubber capacitors.

3.6.3.1 DC Bus Voltage Verification

How to verify the DC bus voltage.

3.6.3.2 Bleed Resistor Verification

Steps to verify the resistance of bleed resistors.

3.6.3.3 Snubber Capacitor Verification

How to measure the capacitance of snubber capacitors.

3.6.4 Removal and Installation

Steps for removing and installing DC bus components.

3.6.4.1 DC Bus Removal

Detailed steps for removing the DC bus assembly.

3.6.4.2 DC Bus Installation

Detailed steps for installing the DC bus assembly.

3.7 Inverter

Describes the Inverter (IGBT) and its function.

3.7.1 Function

Explains how the Inverter generates AC output voltage for the motor.

3.7.2 Connections

Shows the Inverter's connection points.

3.7.3 Verification

Procedures for verifying Inverter diodes.

3.7.3.1 Inverter Verification

Steps to verify the Inverter diodes' functionality.

3.7.4 Removal and Installation

Steps for removing and installing the Inverter and IGBT Control Card.

3.7.4.1 IGBT Control Card Removal

Steps to remove the IGBT Control Card (where applicable).

3.7.4.2 IGBT Control Card Installation

Steps to install the IGBT Control Card.

3.7.4.3 Inverter Removal

Detailed steps for removing the entire Inverter assembly.

3.7.4.2 Inverter Installation

Detailed steps for installing the Inverter assembly.

3.8 Motor

Describes the motor specifications and protection.

3.8.1 Function

Explains the motor's function as a permanent magnet synchronous motor.

3.8.1.1 Stator

Describes the stator's role in generating force for the shaft.

3.8.1.2 Rotor

Describes the rotor's design and its synchronous characteristic.

3.8.2 Motor Protection

Details motor protection mechanisms, including overheat cutouts.

3.8.3 Connections

Shows how to identify motor connections.

3.8.4 Verification

Procedures for verifying stator insulation, resistance, and thermistor.

3.8.4.1 Stator Insulation Verification

How to test stator insulation integrity.

3.8.4.2 Stator Resistance Verification

Steps to verify stator winding resistance.

3.8.4.3 Stator Thermistor Resistance Verification

How to verify the stator thermistor's resistance.

3.9 High-Voltage DCDC Converter

Describes the HV DC/DC Converter and its function.

3.9.1 Function

Explains the converter's role in providing voltage to the Backplane.

3.9.2 Connections

Shows the input and output connections for the HV DC/DC Converter.

3.9.3 Verification

Procedures for verifying HV DC/DC converter input/output voltages and resistances.

3.9.3.1 Input Voltage Verification

How to verify the input voltage to the converter.

3.9.3.2 Output Voltage Verification

How to verify the output voltages from the converter.

3.9.3.3 Input Resistance Verification

Steps to verify input resistance of the converter.

3.9.3.4 Output Resistance Measurement

How to measure output resistance of the converter.

3.9.4 Removal and Installation

Steps for removing and installing the HV DC/DC Converter.

3.9.4.1 HV DCDC Converter Removal

Detailed steps for removing the HV DC/DC Converter.

3.9.4.2 HV DCDC Converter Installation

Detailed steps for installing the HV DC/DC Converter.

3.10 Backplane

Describes the Backplane and its role.

3.10.1 Function

Explains the Backplane's function as a power and signal distribution hub.

3.10.2 Backplane Connections and Test Points

Identifies Backplane connections and test points.

3.10.2.1 LED Locations

Shows the locations of status LEDs on the Backplane.

3.10.2.2 Backplane Verification

Procedures for verifying Backplane voltage and resistance.

3.10.3 Removal and Installation

Steps for removing and installing the Backplane.

3.10.3.1 Backplane Removal

Detailed steps for removing the Backplane.

3.10.3.2 Backplane Installation

Detailed steps for installing the Backplane.

3.11 Serial Driver

Describes the Serial Driver and its function.

3.11.1 Function

Explains the Serial Driver's role in controlling solenoids and LEDs.

3.11.2 Connections

Shows how the Serial Driver connects to the Backplane.

3.11.3 Verification

Procedures for verifying Serial Driver voltages.

3.11.3.1 Input Voltage Verification

How to verify input voltages to the Serial Driver.

3.11.3.2 Output Voltage Verification

How to verify output voltages from the Serial Driver.

3.11.4 Removal and Installation

Steps for removing and installing the Serial Driver.

3.11.4.1 Serial Driver Removal

Detailed steps for removing the Serial Driver.

3.11.4.2 Serial Driver Installation

Detailed steps for installing the Serial Driver.

3.12 Solenoids and Actuators

Describes the solenoids and actuators for cooling.

3.12.1 Function

Explains the function of solenoids in controlling refrigerant flow.

3.12.2 Connections

Shows how solenoids are secured and connected.

3.12.3 Verification

Procedures for verifying solenoid actuator coil resistance.

3.12.3.1 Resistance Measurement of Cooling Solenoid Actuator Coils

How to measure the resistance of solenoid actuator coils.

3.12.3.2 Output Voltage to Solenoids

How to verify the output voltage supplied to the solenoids.

3.12.3.3 Cooling Path Blockage Inspection

How to inspect cooling paths for blockages.

3.12.4 Removal and Installation

Steps for removing and installing solenoids and actuators.

3.12.4.1 Solenoid Removal

Detailed steps for removing solenoids and actuators.

3.12.4.2 Solenoid Installation

Detailed steps for installing solenoids and actuators.

3.13 IGV

Describes the Inlet Guide Vanes (IGV) assembly.

3.13.1 Function

Explains the IGV's function in controlling compressor capacity.

3.13.2 Connections

Shows the IGV assembly connections.

3.13.3 Verification

Procedures for verifying IGV stepper motor and operation.

3.13.3.1 IGV Stepper Motor Verification

Steps to verify the IGV stepper motor's resistance.

3.13.3.2 IGV Operation Verification

How to verify IGV operation using the SMT tool.

3.13.4 Removal and Installation

Steps for removing and installing the IGV assembly.

3.13.4.1 IGV Removal

Detailed steps for removing the IGV assembly.

3.13.4.2 IGV Installation

Detailed steps for installing the IGV assembly.

3.14 BMCC

Describes the Bearing Motor Compressor Controller (BMCC).

3.14.1 Function

Explains the BMCC's role as the central processor.

3.14.2 Connections

Shows BMCC connections to the Backplane.

3.14.3 Verification

Procedures for verifying BMCC power supply and communication.

3.14.3.1 BMCC Power Supply Verification

How to verify the BMCC's power supply voltages.

3.14.3.2 BMCC Communication Verification

Steps to verify BMCC communication with the SMT.

3.14.4 Removal and Installation

Steps for removing and installing the BMCC.

3.14.4.1 BMCC Removal

Detailed steps for removing the BMCC.

3.14.4.2 BMCC Installation

Detailed steps for installing the BMCC.

3.15 Compressor Interface Module

Describes the Compressor Interface Module (CIM) or I/O Board.

3.15.1 Function

Explains the CIM's function in user control and status reporting.

3.15.2 Connections

Shows the ports and jumper locations on the CIM.

3.15.3 Verification

Procedures for verifying CIM functionality.

3.15.3.1 Determining if Compressor Interface Module is Draining Energy

How to check if the CIM is draining excessive power.

3.15.3.2 Compressor Interface Module Communication Verification

Steps to verify CIM communication with the compressor.

3.15.3.3 Interlock Verification

How to verify the system interlock circuit.

3.15.4 Removal & Installation

Steps for removing and installing the CIM.

3.15.4.1 Compressor Interface Module Removal

Detailed steps for removing the CIM.

3.15.4.2 Compressor IO Board Installation

Detailed steps for installing the Compressor I/O Board.

3.16 Bearing Pulse Width Modulator Amplifier

Describes the Bearing PWM Amplifier.

3.16.1 Function

Explains the PWM Amplifier's role in supplying current to bearing coils.

3.16.2 Connections

Shows the PWM connection port and feed-through differences.

3.16.3 Verification

Procedures for verifying PWM amplifier functionality.

3.16.3.1 Verify if the Bearing PWM Amplifier is Draining Energy

How to check if the PWM Amplifier is draining energy.

3.16.3.2 Verify Functionality Of The Five Output Channels

How to verify the PWM's five output channels.

3.16.3.3 Verify Functionality Of The Five Diode Sets

How to verify the functionality of the PWM's five diode sets.

3.16.4 Removal and Installation

Steps for removing and installing the PWM Amplifier.

3.16.4.1 PWM Amplifier Removal

Detailed steps for removing the PWM Amplifier.

3.16.4.2 PWM Amplifier Installation

Detailed steps for installing the PWM Amplifier.

3.17 Magnetic Bearings

Describes magnetic bearings and their function.

3.17.1 Function

Explains how magnetic bearings levitate the shaft.

3.17.2 Connections

Shows the PWM connectors for bearing power feed throughs.

3.17.3 Verification

Procedures for verifying bearing coil integrity.

3.17.3.1 Bearing Coil Verification

How to check bearing coil insulation and resistance.

3.17.3.2 Bearing Current Verification

How to verify bearing amperages during operation.

3.18 Bearing Sensors

Describes bearing sensors and their connections.

3.18.1 Function

Explains how bearing sensors provide shaft orbit information.

3.18.2 Connections

Shows how bearing sensors connect to the Backplane.

3.18.3 Verification

Procedures for verifying bearing sensor resistance.

3.18.3.1 Bearing Sensor Resistance Verification

How to verify bearing sensor resistance and ground readings.

3.19 Cavity Temperature Sensor

Describes the cavity temperature sensor.

3.19.1 Function

Explains the cavity sensor's role in measuring motor-cooling gas temperature.

3.19.2 Connections

Shows how the cavity temperature sensor connects to the Backplane.

3.19.3 Verification

Procedures for verifying the cavity temperature sensor.

3.19.4 Removal and Installation

Steps for removing and installing the cavity temperature sensor.

3.19.4.1 Cavity Temperature Removal

Detailed steps for removing the cavity temperature sensor.

3.19.4.2 Cavity - Temperature Sensor Installation

Detailed steps for installing the cavity temperature sensor.

3.20 PressureTemperature Sensor

Describes the suction and discharge pressure/temperature sensors.

3.20.1 Function

Explains the function of pressure/temperature sensors in monitoring compressor operation.
3.20.2 Connections

Shows how the pressure/temperature sensors connect to the Backplane.

3.20.3 Verification

Procedures for verifying pressure/temperature sensors and their cables.

3.20.4 Removal and Installation

Steps for removing and installing pressure/temperature sensors.

3.20.4.1 PressureTemperature Sensor Removal

Detailed steps for removing the sensors.

3.20.4.2 PressureTemperature Sensor Installation

Detailed steps for installing the sensors.

Troubleshooting

4.1 Alarm and Fault Indications

Explains how alarms and faults indicate operating conditions.

4.1.1 Alarm Types

Lists and describes different types of compressor alarms.

4.1.2 Fault Types

Categorizes and describes critical and non-critical compressor faults.

4.1.2 Fault Types

Lists various compressor fault types and their descriptions.

4.1.2 Fault Types

Lists motor and bearing fault types.

4.2 Troubleshooting With the Service Monitoring Tools Software

How to use the SMT software for troubleshooting.

4.2.1 Compressor Fault Troubleshooting

Detailed fault analysis using SMT tools.

4.2.2 Motor FaultsSystem Status

Interpreting motor faults and system status messages.

4.2.2 Motor FaultsSystem Status

Lists bearing status types and their descriptions.

4.2.3 Bearing Status

Describes bearing status indicators during operation.

4.3 Bearing Calibration

When and how to perform bearing calibration.

4.3.1 When to Calibrate the Bearings

Conditions and reasons for performing bearing calibration.

4.3.1.1 Calibration When Commissioning

Calibration for initial setup and comparison.

4.3.1.2 Regular Maintenance Calibration

Calibration performed during routine maintenance.

4.3.1.3 Calibration when Troubleshooting

When calibration is needed for troubleshooting.

4.3.1.4 BMCC Change

Calibration required after BMCC replacement.

4.3.2 Performing a Calibration

Steps involved in performing a bearing calibration.

4.3.2.1 Before Performing a Calibration

Prerequisites before starting calibration.

4.3.2.2 Calibration

The actual calibration steps and validation.

4.3.3 After Calibration is Complete

Options after calibration completion (Validate, Save, Report).

4.3.3.1 Validate

How to validate calibration data by levitating the shaft.

4.3.3.2 Save to EEPROM

How to save calibration values to EEPROM.

4.3.4 Create a Calibration Report

Steps to create a calibration report.

4.3.5 Calibration Report Analysis

How to interpret calibration report data.

4.4 Compressor Connection Status Indications

Explains different compressor connection status indicators.

4.5 System and Compressor Level Troubleshooting

Troubleshooting at system and compressor levels.

4.5.1 Compressor Voltage Troubleshooting

Steps to troubleshoot compressor voltage issues.

4.5.1 Compressor Voltage Troubleshooting

Steps to troubleshoot compressor voltage issues.

4.5.2 Determining the Cause of an Energy Drain

How to identify components draining energy.

4.5.2.1 Determining if Serial Driver is Draining Energy

Steps to check if the Serial Driver is draining energy.

4.5.2.2 Determining if BMCC is Draining Energy

Steps to check if the BMCC is draining energy.

4.5.2.3 Determining if PWM is Draining Energy

Steps to check if the PWM is draining energy.

4.5.2.4 Determining if Inverter is Draining Energy

Steps to check if the Inverter is draining energy.

4.5.2.5 Determining if Compressor IO Board is Draining Energy

Steps to check if the Compressor I/O Board is draining energy.

4.5.3 Determining the Cause of Blown Soft Start Fuses

Troubleshooting steps for blown Soft Start fuses.

4.5.4 Troubleshooting an Open Interlock

How to troubleshoot an open interlock circuit.

4.5.5 Troubleshooting the Inverter

Steps to troubleshoot Inverter faults.

Maintenance

5.1 Preventive Maintenance Tasks

Lists regular maintenance tasks for optimal performance.

5.2 Moisture Prevention Measures

Recommendations to prevent condensate infiltration in electrical connections.

5.2.1 Required Items

Lists consumables needed for moisture prevention.

5.2.1.1 Service Side Disassembly

Steps for disassembling the service side for maintenance.

5.2.1.1 Service Side Disassembly

Steps for removing solenoid coils.

5.2.1.1 Service Side Disassembly

Steps for applying dielectric grease.

5.2.1.2 Service Side Assembly

Steps for reassembling the service side after maintenance.

5.2.1.3 Top Side

Steps for top-side maintenance and component cleaning.

Appendix A AcronymsTerms

Table 26 - AcronymsTerms

Glossary of product-specific acronyms and terms.

Appendix B Compressor Troubleshooting Flowcharts

Figure 108 - Compressor Operation Troubleshooting Flowchart

Flowchart for troubleshooting compressor operation issues.

Figure 109 - Compressor Voltage Troubleshooting Chart 1

First part of a flowchart for voltage troubleshooting.

Figure 110 - Compressor Voltage Troubleshooting Chart 2

Second part of a flowchart for voltage troubleshooting.

Appendix C Compressor Test Sheet

Compressor Test Sheet Data

Table detailing test points, expected values, and verification sections.

Related product manuals