CR805 Retransfer Card Printer Installation and Administrator’s Guide 39
a. In the IP address field, enter the value for the static IP address that you set on the front
panel of the printer. Give the last section of the IP address a value that is at least plus one
from the address on the printer front panel.
b. In the Subnet mask and Default gateway fields, enter the subnet mask and default
gateway address that you entered on the front panel of the printer.
c. When you finish entering values for IP address, subnet mask, and gateway address, click
OK.
6. Test the printer to verify that it can communicate with the computer using the IP address.
Run several test cards to make sure that the printer is functioning properly. Refer to “Print a
Test Card”.
7. Power off the printer and disconnect it from the computer.
8. Connect the printer to the network and power it on.
9. Log in to Printer Manager and configure the printer based on your requirements. Refer to
Chapter 3: "Printer Manager” for complete information about using Printer Manager.
Print a Test Card
The printer includes a test card that prints without using a driver or other source of card data. Use
it to verify that the printer is printing correctly. Make sure that cards are in the input hopper and
all supplies are loaded before you begin. Refer to “Install Supplies” on page 20 for complete
information.
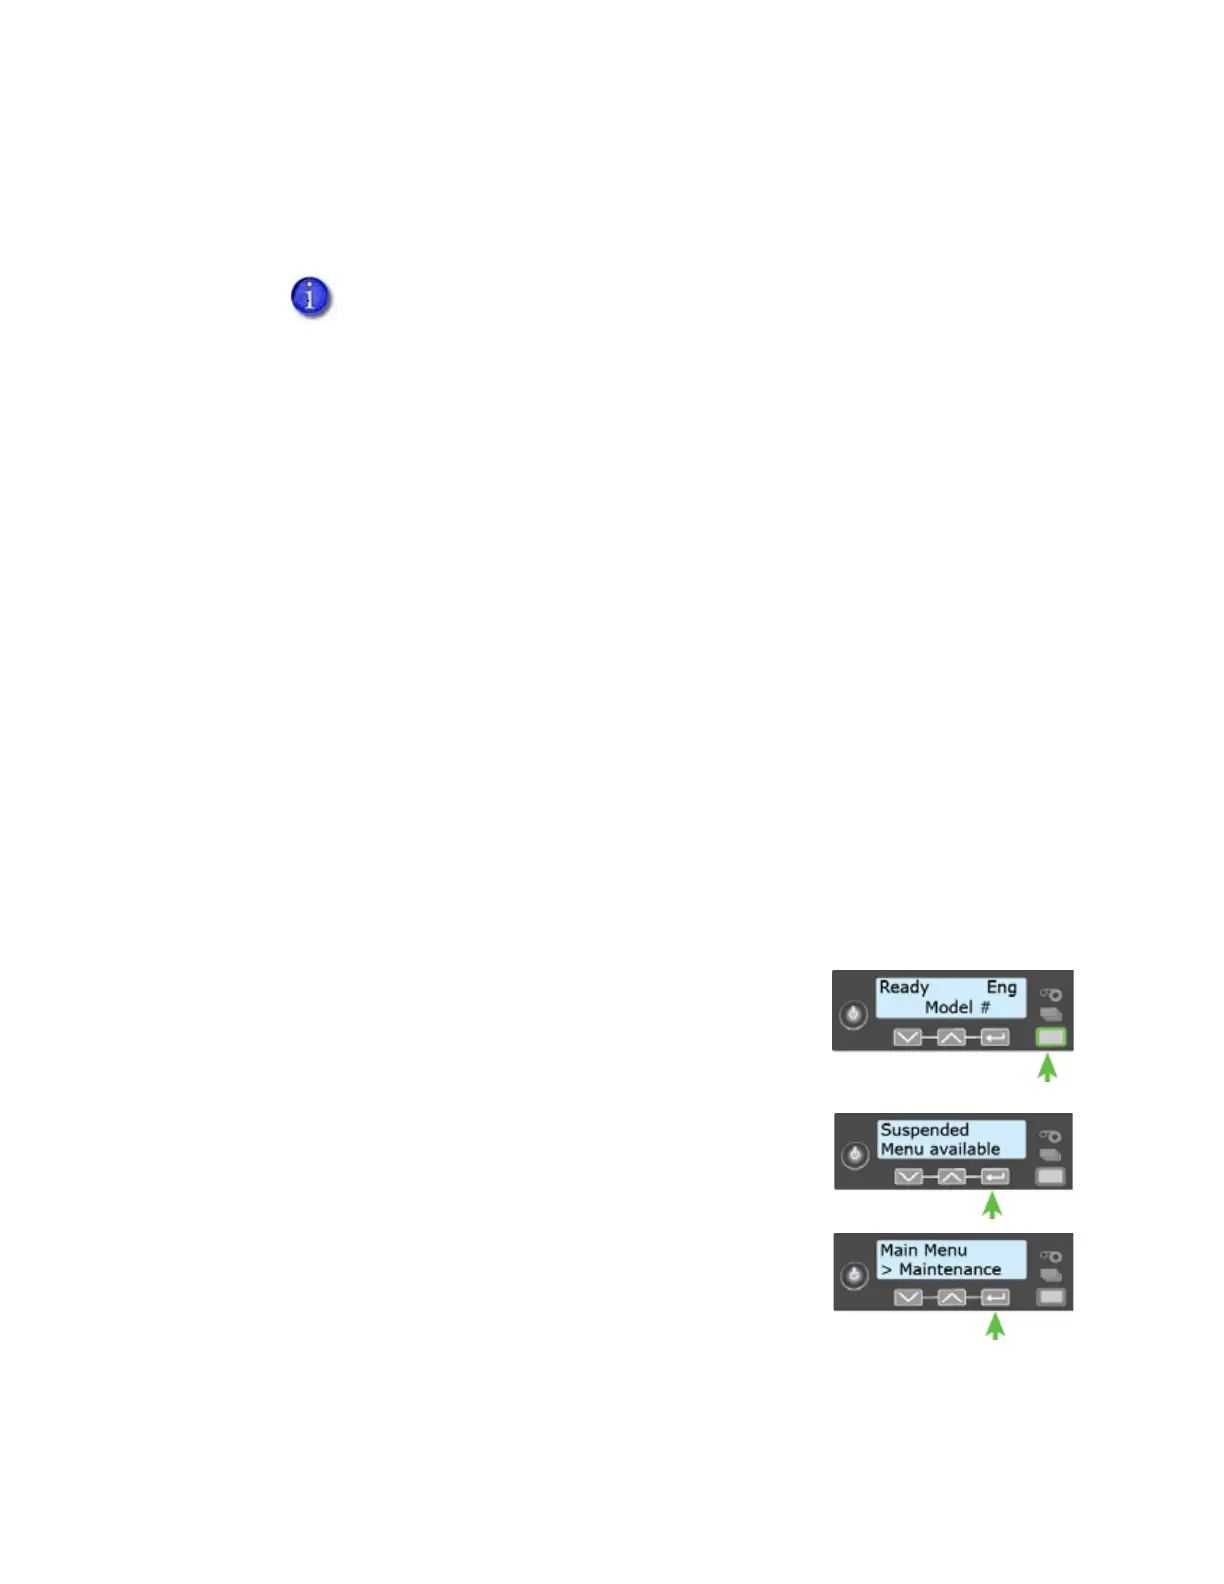
1. Begin with the printer Ready. The U
SER button shows steady
green.
2. Press the U
SER button to display Suspended on line 1 of the LCD
panel.
3. Press E
NTER to enter the menu system.
4. Press E
NTER to enter the Maintenance menu.
For example, if the IP address that is set on the front panel of the printer is
172.17.1.113, enter the address as 172.17.1.114 on the computer.