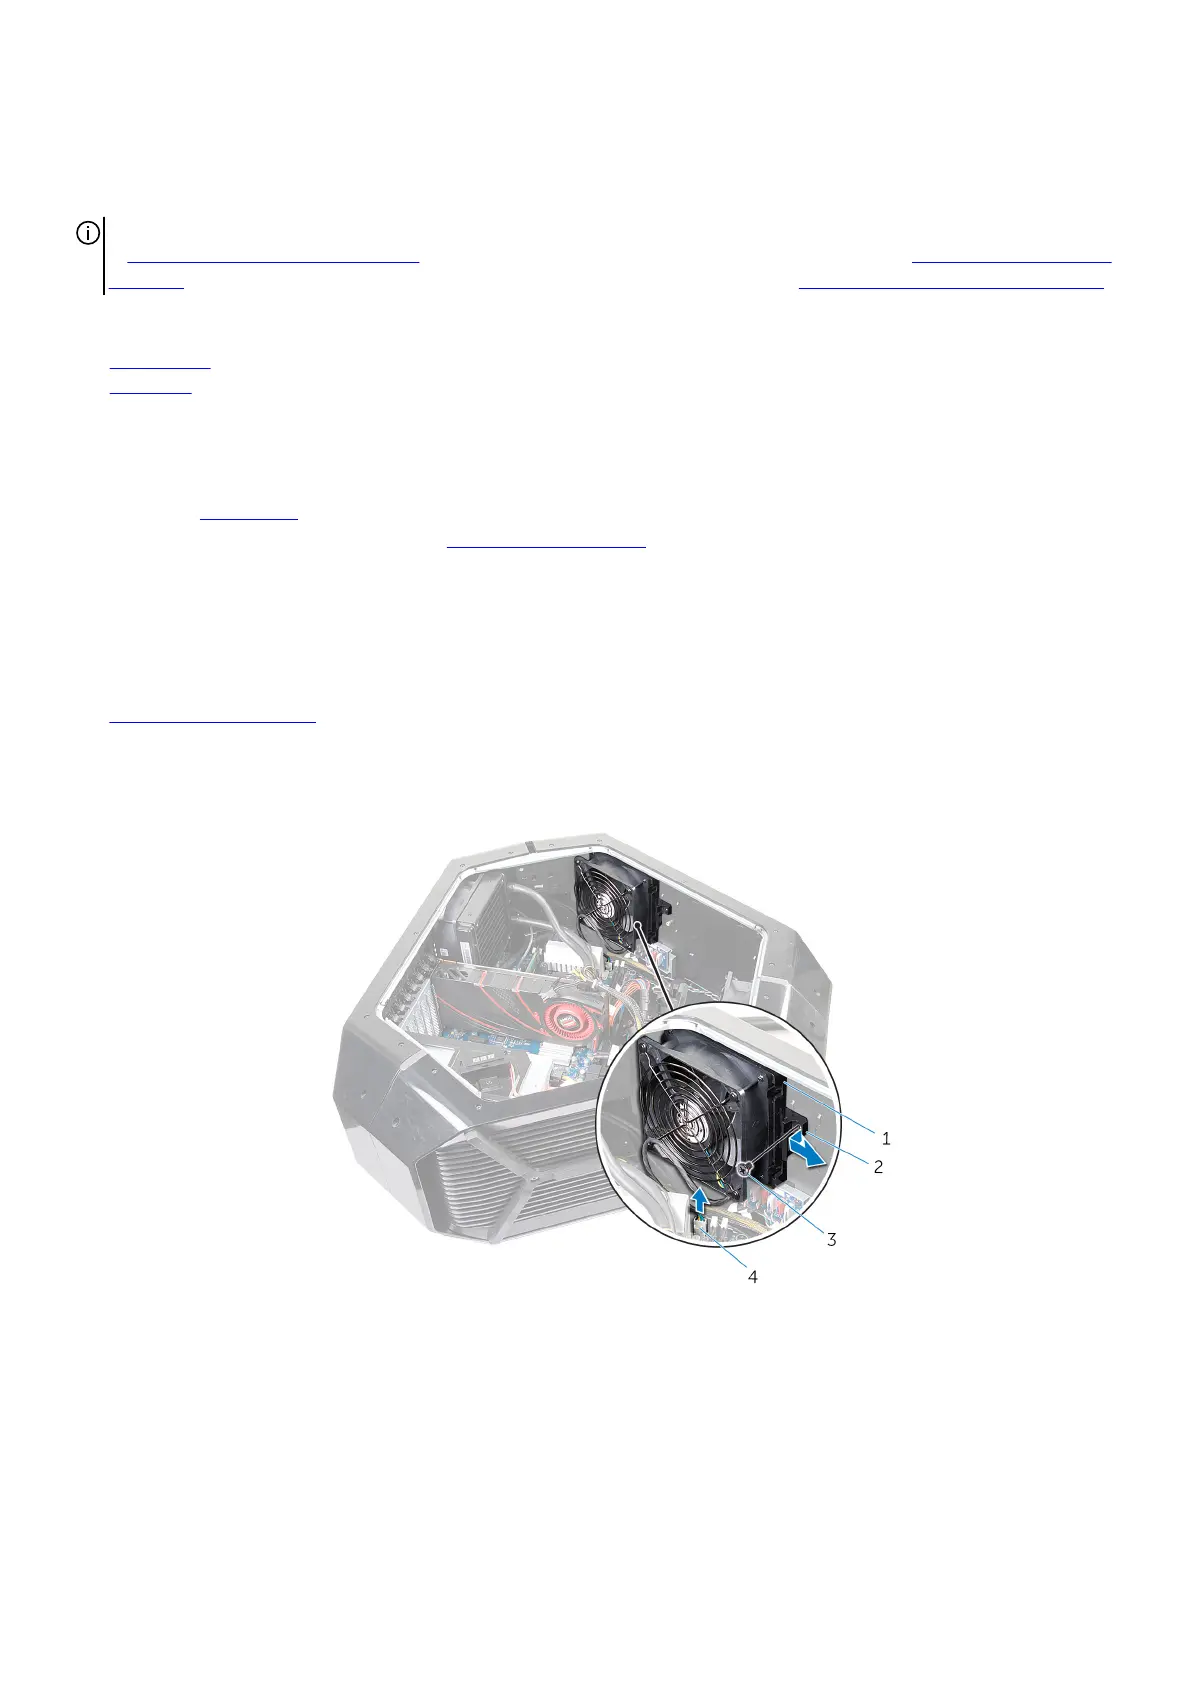
Removing the top fan
NOTE: Before working inside your computer, read the safety information that shipped with your computer and follow the steps
in Before working inside your computer. After working inside your computer, follow the instructions in After working inside your
computer. For more safety best practices, see the Regulatory Compliance home page at www.dell.com/regulatory_compliance.
Topics:
• Prerequisites
• Procedure
Prerequisites
1. Remove the stability foot.
2. Remove the left and right side-panels. See “
Removing the side panels”.
Procedure
1. Lay the chassis on the right side.
2. Disconnect the top-fan cable from the connector on the system board. For more information on the top-fan cable connector, see
“system-board components”.
3. Remove the screw (#6-32x6) that secures the top fan on the chassis.
4. Pull the release tab away from the chassis and move the top fan towards the right side.
5. Lift the top fan out of the chassis.
1.
top fan 2. release tab
3. screw 4. memory-fan cable
63