Figure 31. Installing the powered graphics card
Steps
1. Using a screwdriver, remove the fixed PCIe blanking plate from the chassis.
NOTE: This step is applicable only when the powered graphics card is being installed for the first time.
NOTE: To remove the fixed PCIe blanking plate, insert a flat-head screwdriver in the hole of the cover, push the
blanking plate to release it, and then lift the blanking plate off the chassis.
NOTE: Ensure to keep the PCIe blanking plate safe for future use.
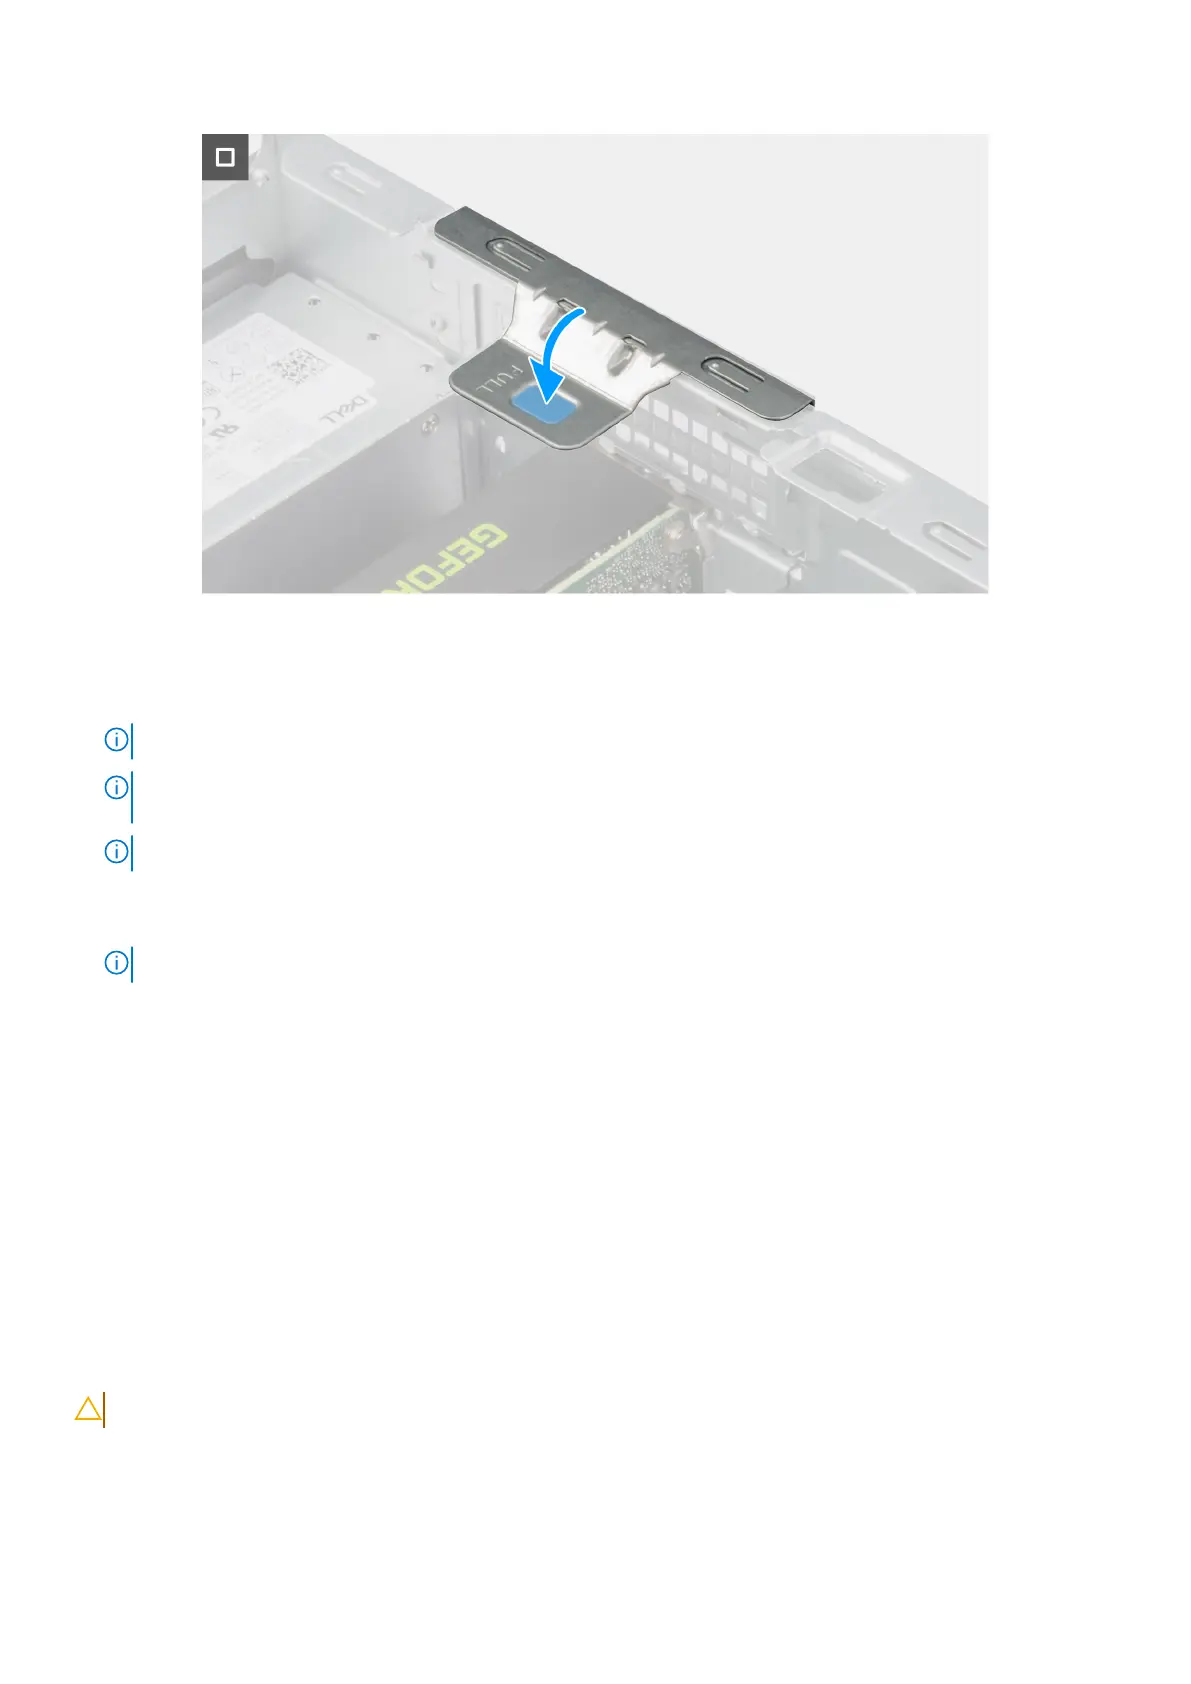
2. Lift the pull tab on the PCIe door outwards to open the PCIe door.
3. Remove the two PCIe blanking plates from the slots on the chassis.
NOTE: Ensure to keep the PCIe blanking plates safe for future use.
4. Align the notch on the powered graphics card with the tab on the PCIe card connector (SLOT2) on the system board.
5. Gently press down on the powered graphics card till the tab on the PCIe connector locks in place.
6. Connect the power cable to the connector on the powered graphics card.
7. Close the PCIe door and press it gently until it clicks in place on the chassis, to secure the powered graphics card.
Next steps
1. Install the side cover.
2. Follow the procedure in After working inside your computer.
Media-card reader
Removing the media-card reader
CAUTION: The information in this removal section is intended for authorized service technicians only.
Prerequisites
1. Follow the procedure in Before working inside your computer.
2. Remove the side cover.
60
Removing and installing Customer Replaceable Units (CRUs)