10 EVOLUTION 1 SYSTEM MANUAL Issue 1.1 20 Dec 2006
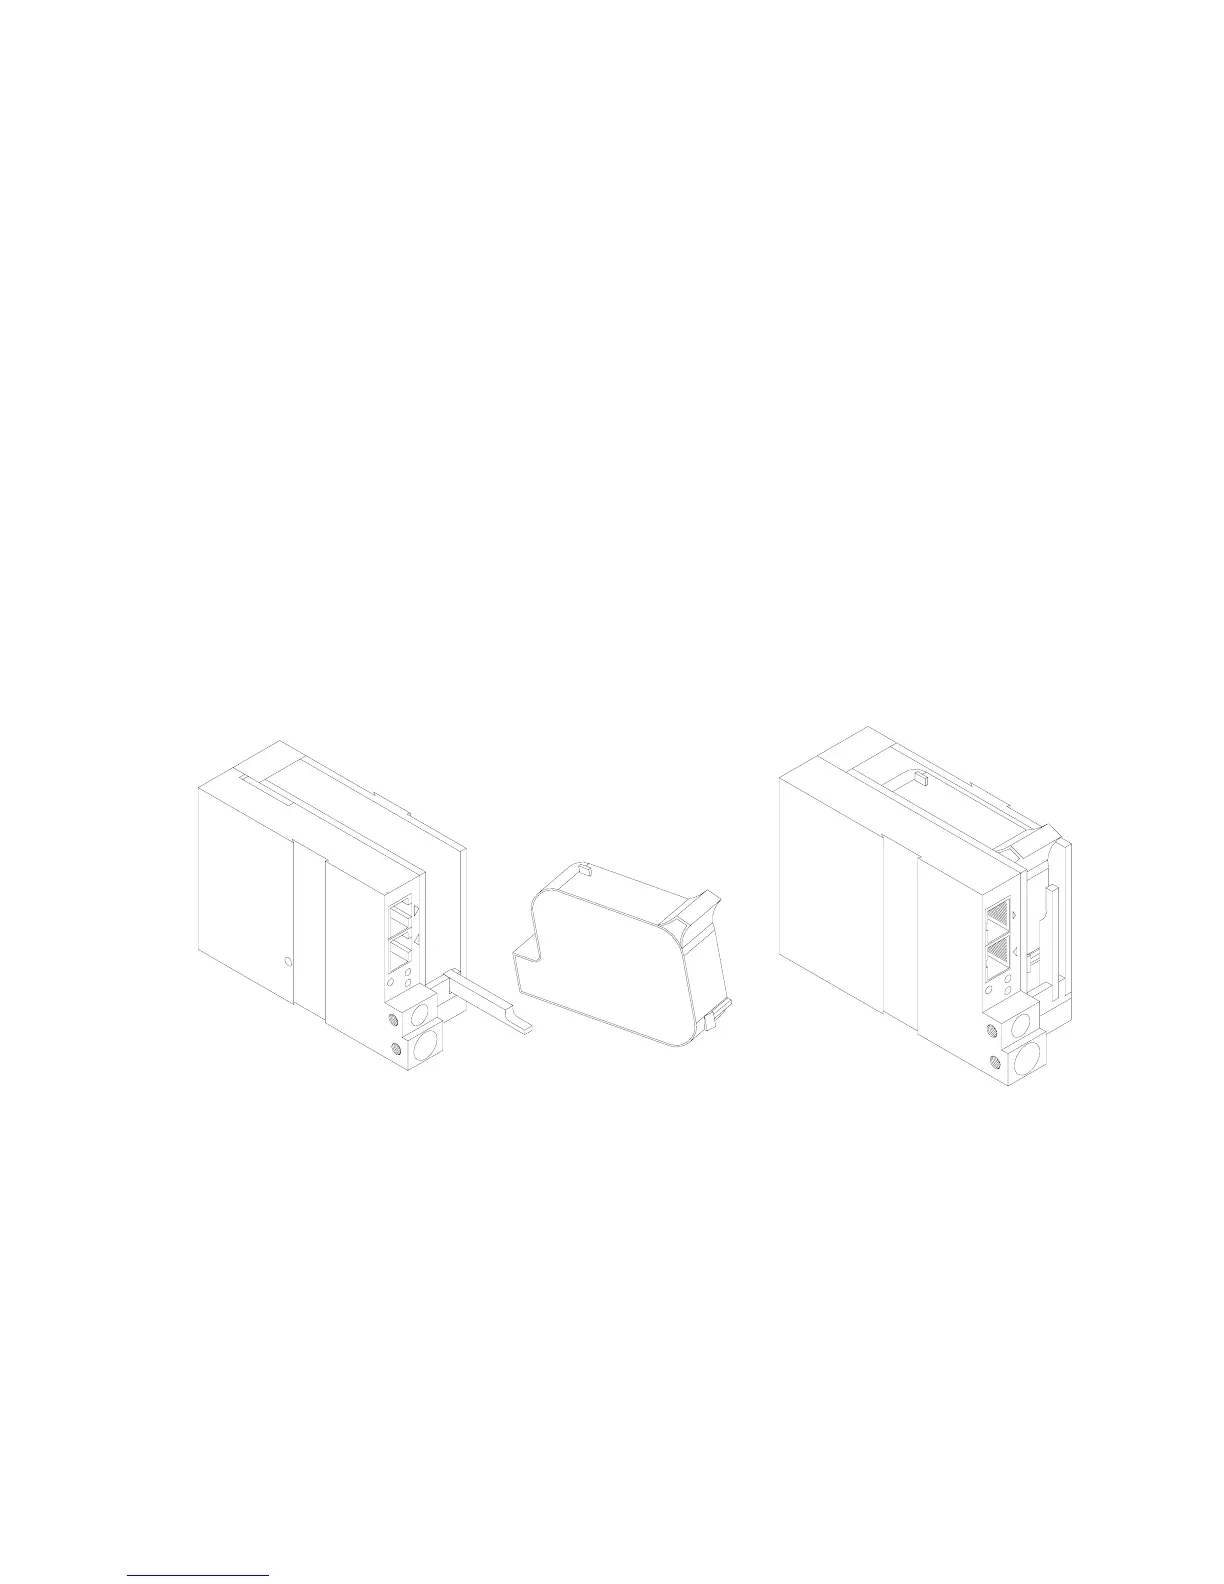
INSTALLING THE PRINT CARTRIDGE
Remove the protective film from the face of the print head and retain the film.
This protective film may be re-applied to store partially used cartridges. If it is
necessary to remove the print head and store for a long period of time, it is best
to re-apply the plastic film, and place the cartridge in a closeable plastic bag.
Rotate the Print Head Release mechanism to the rear of the print head so that it
is free for insertion of the print cartridge. Push the print cartridge in and down to
insert it into the print carriage. Gently lift the locking arm and press forward
against the print cartridge. A snap will be felt as the locking mechanism presses
the cartridge into the correct position.
NOTE: EACH PRINT CARTRIDGE HAS BEEN PROFILED
AT THE FACTORY. THIS PROCEDURE DETERMINES
THE OPTIMAL OPERATING CHARACTERISTECS FOR
EACH INDIVIDUAL CARTRIDGE. USING ANY OTHER
PRINT CARTRIDGE WILL HAVE UNDESIRABLE
RESULTS.
NOTE: WHEN A NEW CARTRIDGE IS INSTALLED,
BOTH THE RED AND GREEN LIGHT WILL FLASH
TWICE INDICATING A CORRECT INSTALLATION.
THE USER MUST REMEMBER TO RESET THE INK
LEVEL UNDER THE F4 FUNCTION KEY MENU.