EasyManuals Logo

Digital Projection E-Vision 6800 3D Series User Manual

Digital Projection E-Vision 6800 3D Series
68 pages
To Next Page IconTo Next Page
To Previous Page IconTo Previous Page
Page #11 background imageLoading...
Page #11 background image
page 5
Digital Projection E-Vision 6800 3D Series
Installation and Quick-Start Guide
CHANGING THE LENS, LAMPS AND COLOR WHEEL
Rev A January 2015
Changing The Lens, Lamps And Color Wheel
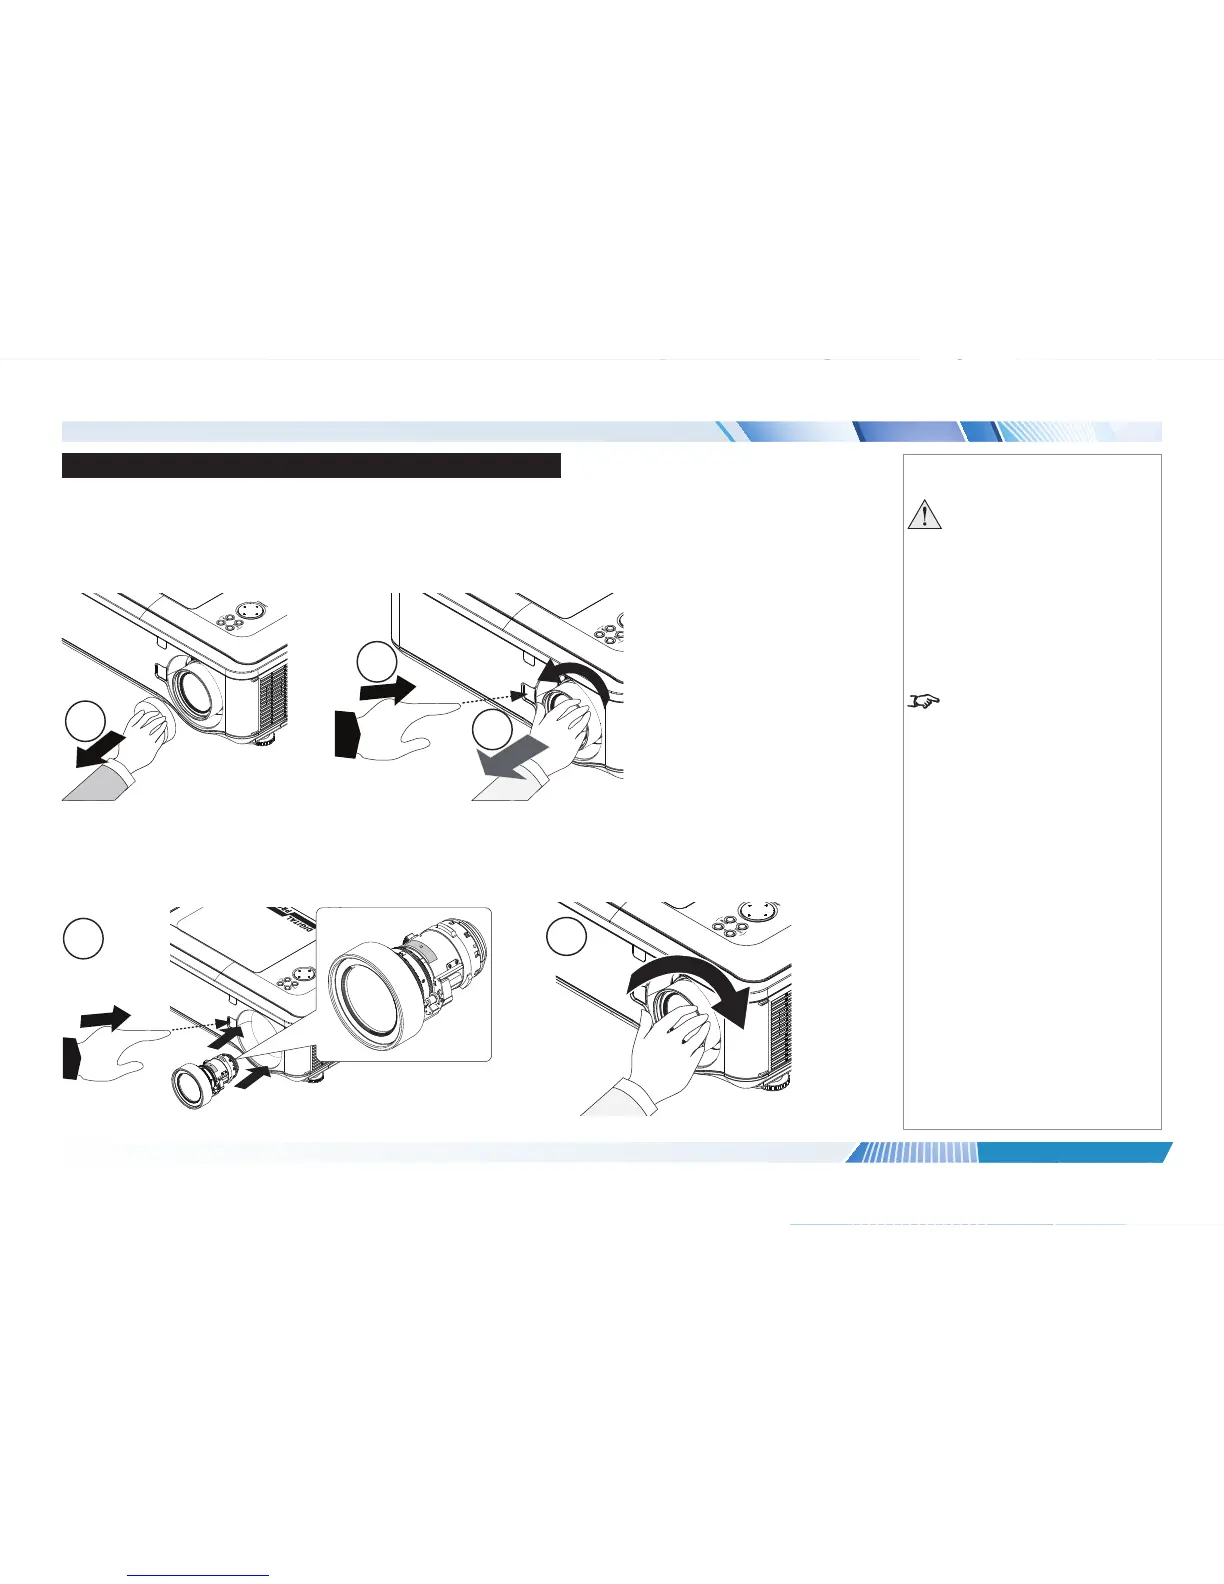
Removing the lens
1. Remove the lens cap.
2. Push in the lens release lever, and turn the lens anti-clockwise.
3. Remove the lens.
Fitting the lens
1. Position the lens so that the label marked ‘O’ is at the top, push in the lens release lever and and gently insert the lens all the way into the
lens mount.
2. Turn the lens clockwise until it clicks into place.
1
2
Notes
Always allow the lamp to cool for
5 minutes before:
- disconnecting the power
- moving the projector
The projector lens is shipped
separately.
1
2
3

Table of Contents

Questions and Answers:

Question and Answer IconNeed help?

Do you have a question about the Digital Projection E-Vision 6800 3D Series and is the answer not in the manual?

Digital Projection E-Vision 6800 3D Series Specifications

General IconGeneral
BrandDigital Projection
ModelE-Vision 6800 3D Series
CategoryProjector
LanguageEnglish

Related product manuals