Positioning The Screen And Projector
1. Install the screen, ensuring that it is in the best position for viewing by your audience.
2. Mount the projector, ensuring that it is at a suitable distance from the screen for the image to ll the screen. Set the adjustable feet so that
the projector is level, and perpendicular to the screen.
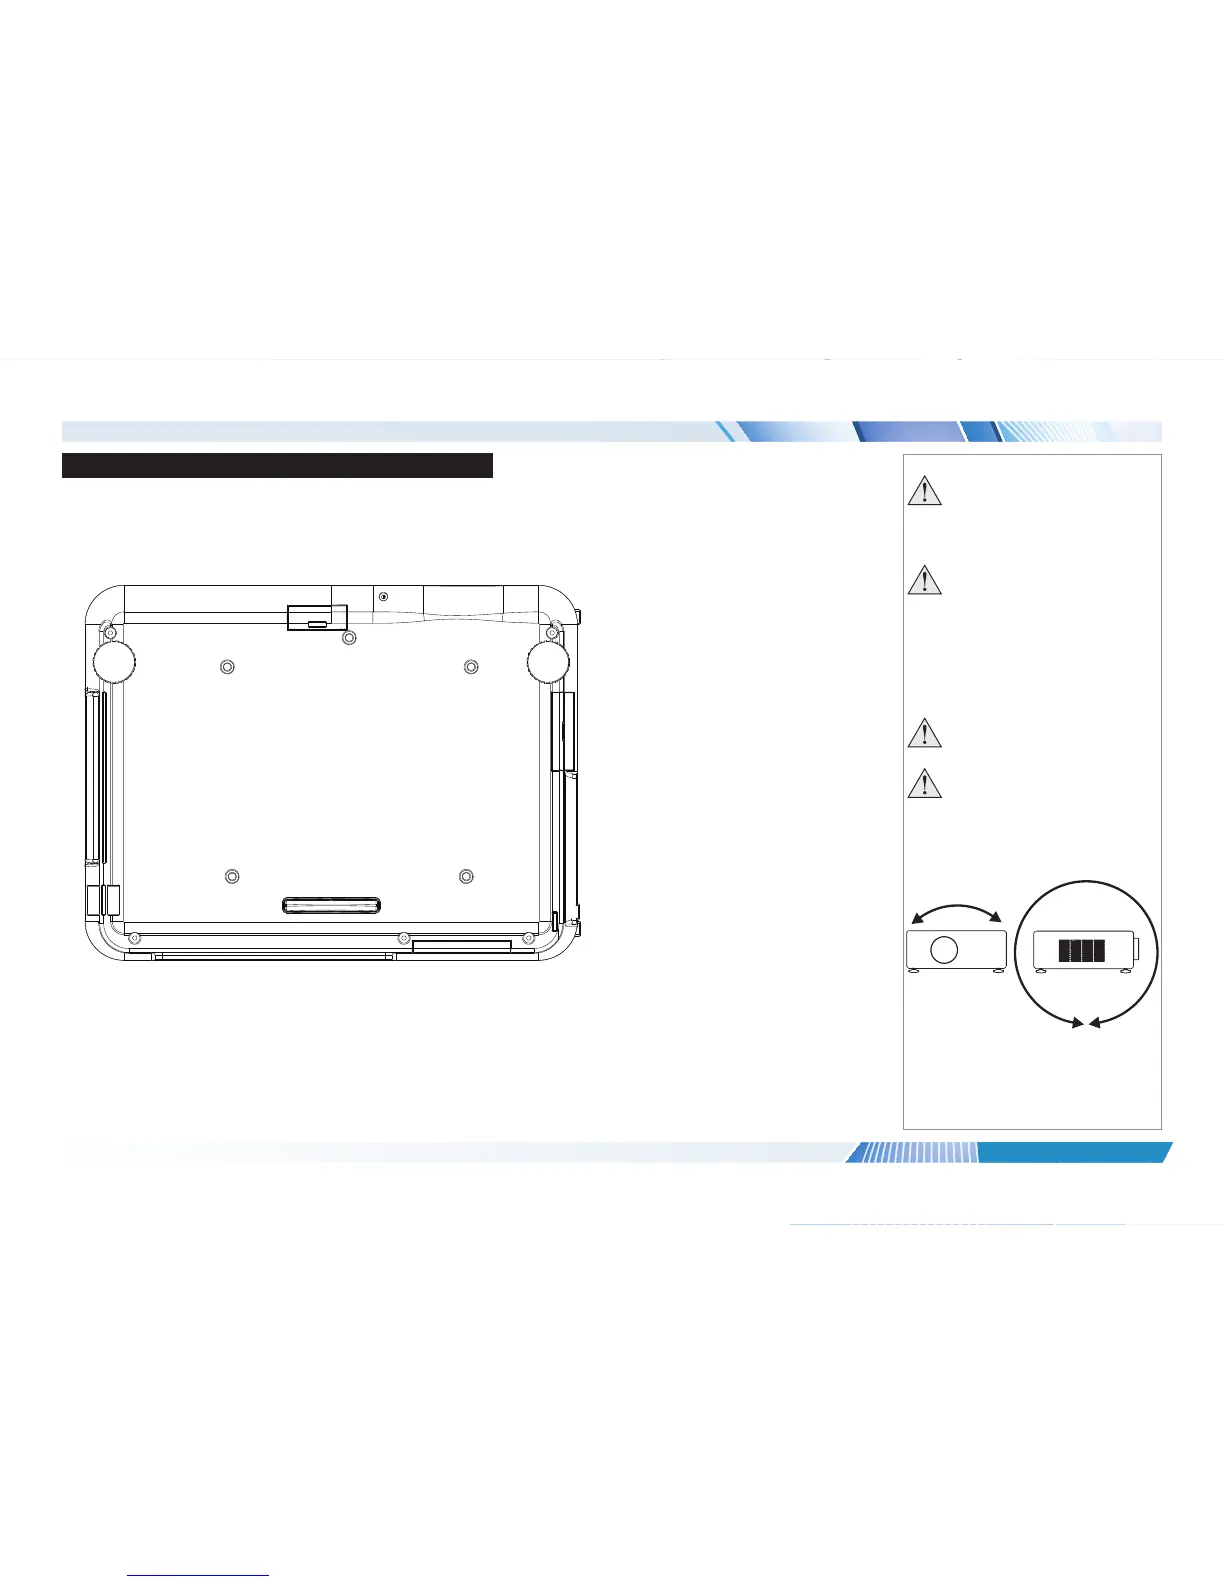
Alternatively, ve M4 bolts (max length 12 mm [0.5 in]) can be used to attach the projector to a ceiling mount (optional accessory,).
Location of the ceiling mount holes at the bottom of the projector
1
2
3
4 5
Notes
Always allow the lamp to cool for
5 minutes before:
- disconnecting the power
- moving the projector
Ensure that there is at least
50cm (20in) of space between the
ventilation outlets and any wall,
and 10cm (4in) on all other sides.
If ceiling mounting, ensure there
is 30cm (12in) of space between
the projector and ceiling.
Do not stack the projectors.
Do not tilt the projector more than
±10° from side to side when in
use, as this may cause serious
lamp failure, damage the lamp
module and cause extra cost on
replacement.
±10°
±360°

 Loading...


