CLUTCH DISC
REMOVAL
(1) Remove transmission.
(2) Remove clutch inspection cover 2 screws.
(3) Remove bell housing bolts (6). Remove bell
housing from engine (Fig. 7).
(4) Mark clutch cover (pressure plate) and flywheel
to maintain their same relative positions when rein-
stalling clutch assembly.
(5) Insert Clutch Disc Aligning Tool through the
clutch disc hub to prevent the clutch disc from falling
and damaging the facings.
(6) Loosen clutch cover (pressure plate) attaching
bolts, one or two turns at a time, in a crisscross pat-
tern. This will release spring pressure evenly and
avoid clutch cover damage.
(7) Remove the clutch cover (pressure plate)
assembly and disc from flywheel. Handle carefully to
avoid contaminating the friction surfaces.
CLEANING
Clean flywheel face with crocus cloth or 400-600
grade sandpaper, then wipe the surface with mineral
spirits. If the surface is severely scored, heat checked
or warped, replace the flywheel.
CAUTION: Never machine the flywheel face. If fly-
wheel surface is bad the flywheel must be replaced.
Wipe the friction surface of the pressure plate with
mineral spirits.
INSTALLATION
NOTE: If the flywheel is to be replaced or removed
apply thread sealer to the flywheel retaining bolts
when installing. This will prevent engine oil from
leaking onto the clutch.
(1) Mount clutch assembly on flywheel (Fig. 8),
being careful to properly align dowels and the align-
ment marks made before removal. If new clutch or
flywheel is installed, align cover balance spot as close
as possible to flywheel balance orange spot. Apply
pressure to the alignment tool. Lightly tighten the
clutch cover bolts enough to hold the disc in position.
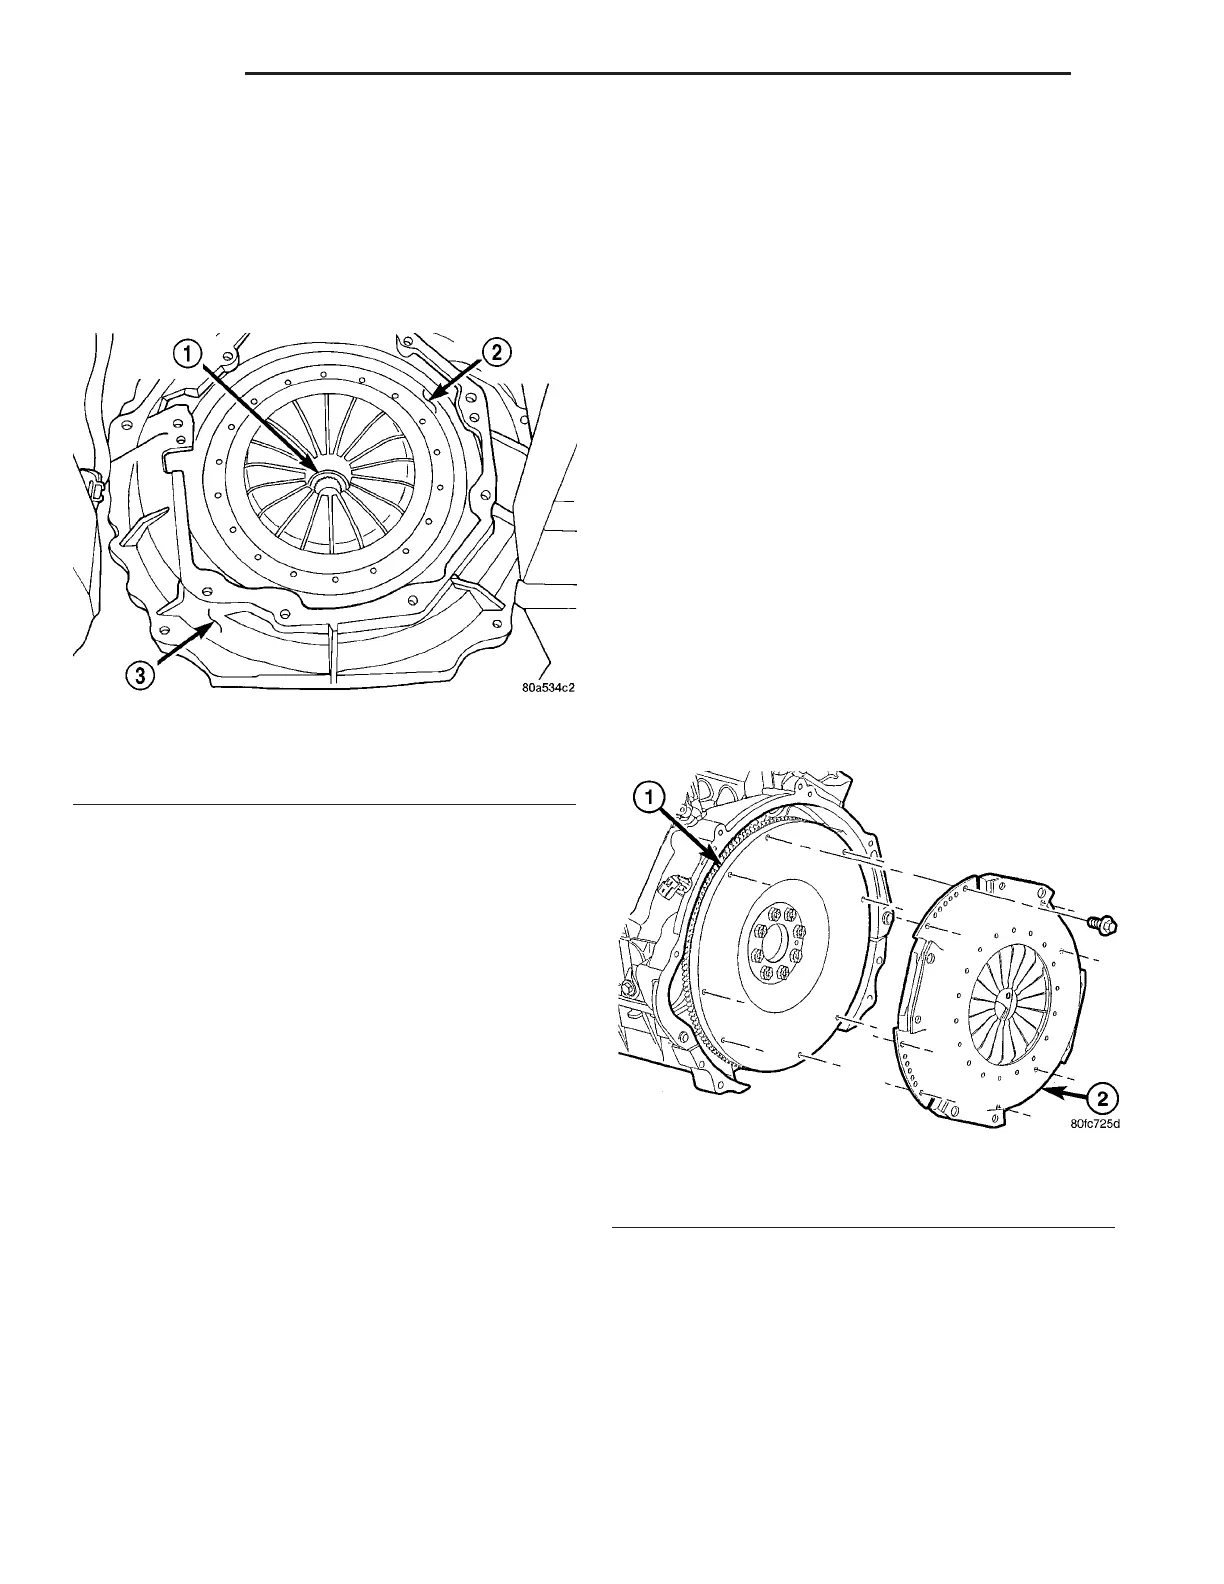
Fig. 7 CLUTCH BELLHOUSING
1 - CLUTCH DISC
2 - PRESSURE PLATE
3 - BELL HOUSING
Fig. 8 CLUTCH ASSEMBLY
1 - FLYWHEEL
2 - PRESSURE PLATE
6 - 8 CLUTCH ZB