15 | Examples of settings
D-ISC 100 x xx2
179
The adjustable values for the start and end values of the output
range (signal range) are
not
% values! Rather the values relate
to the physical unit of the measured value.
Setting the signal range
Here also there are two methods of performing the setting. This
example describes only the setting of the signal range by ac-
cessing the analogue output (≙method A in Section 15.10 Ex-
amples: Assignment of the analogue output (current output)
[}173]).
D‑ISC100 menu path:
Standard display (menu1) Channelsetup (menu4) Chan-
nelsetup (menu4.1)
Modules (M)(menu4.3.1) e.g. Ana-
logue output (menu4.3.AO0; internal)
Status (menu4.3.AO0.1)
[Specific parameter] (menu 4.3.AO0.4)
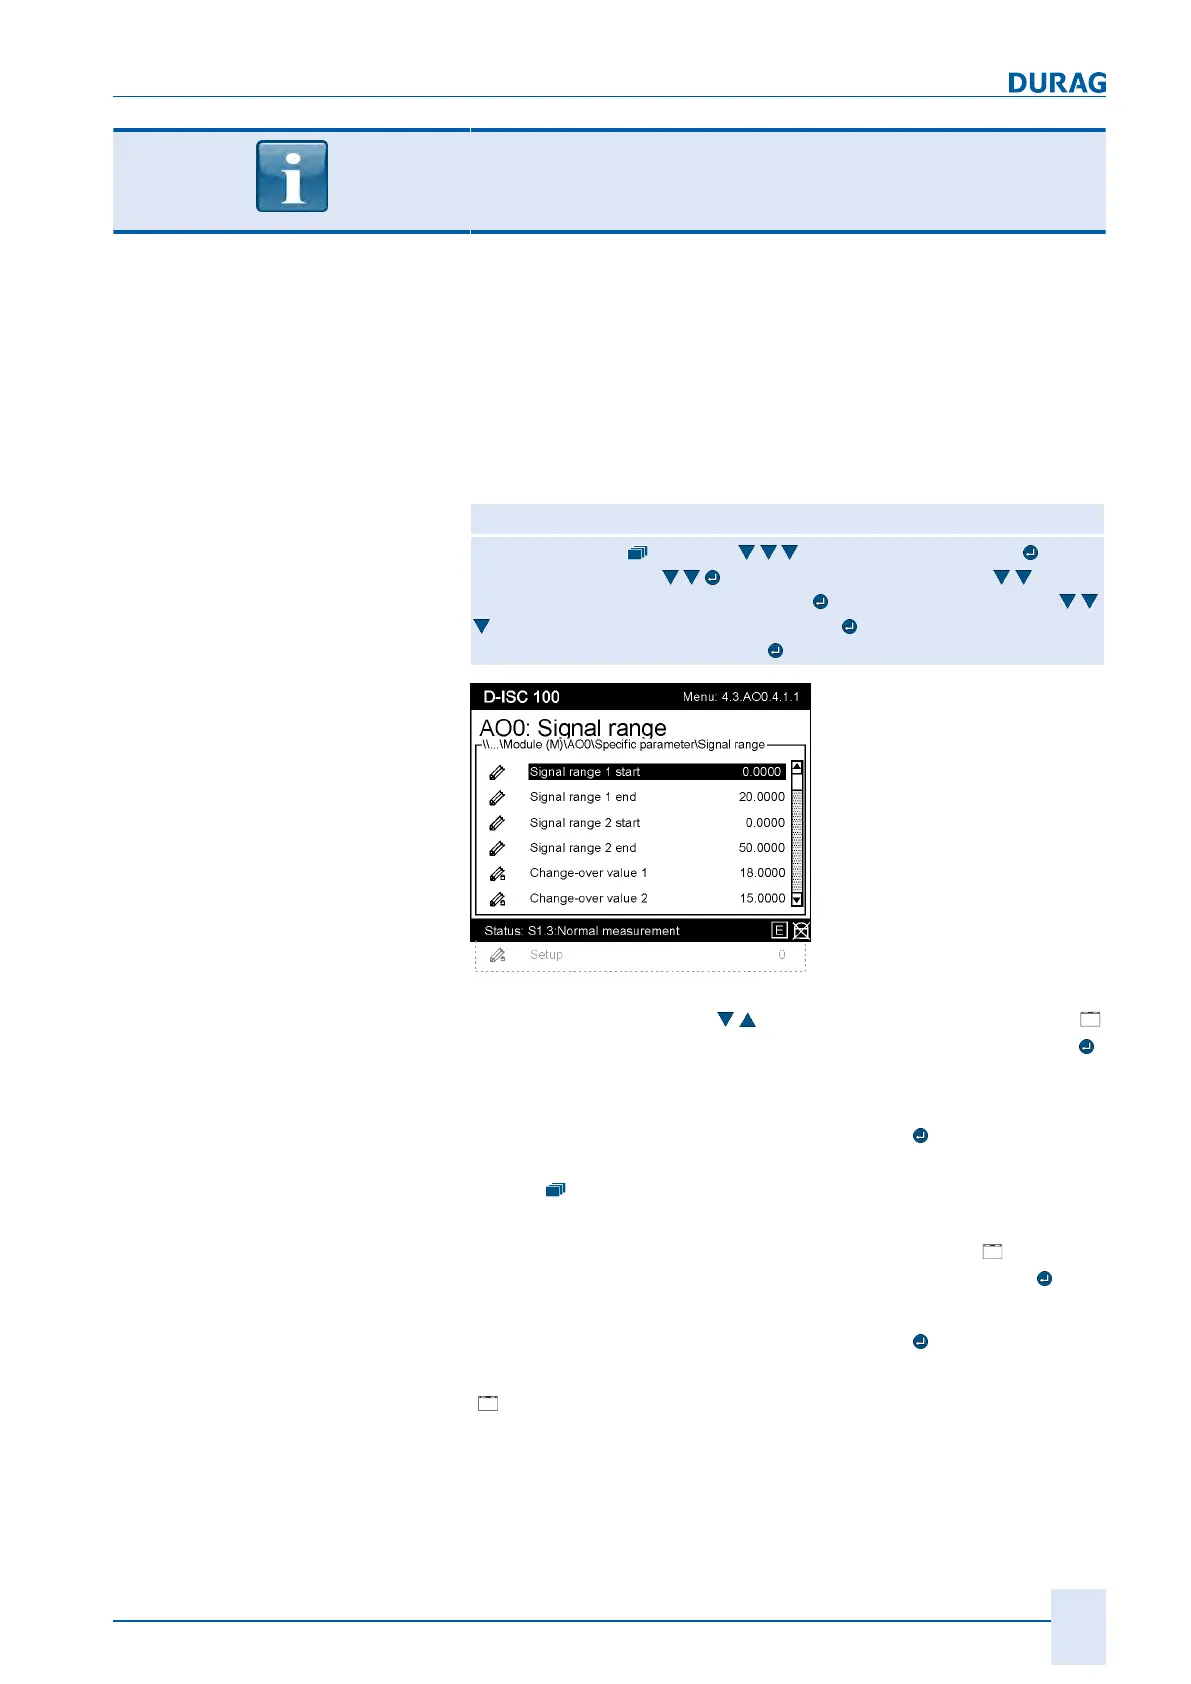
=Signal range MENU4.3.AO0.4
Fig.15.39: Setting the signal range
First use the arrow keys (
) on the keypad [}203] to select [
Signal range 1 start] and confirm the selection by pressing the
key.
1.
Use the arrow keys to set the desired value (as a physical
unit of the measured value) and press the
key to confirm.
The
key can also be used to switch on the on-screen key-
board (see also Bildschirmtastatur [}204] nutzen [}70]).
2.
Now use the arrow keys on the keypad to select [
Signal
range 1 end] and confirm the selection by pressing the
key.
3.
Use the arrow keys to set the desired value (as a physical
unit of the measured value) and press the
key to confirm.
Repeat the procedure if you wish to set the second signal range
[
signal range 2].
The following settings
must only be performed if you wish to set
a second signal range
:
 Loading...