1
2
3
4
5
6
7
8
9
6 | www.eddy.com
Reddy Overview
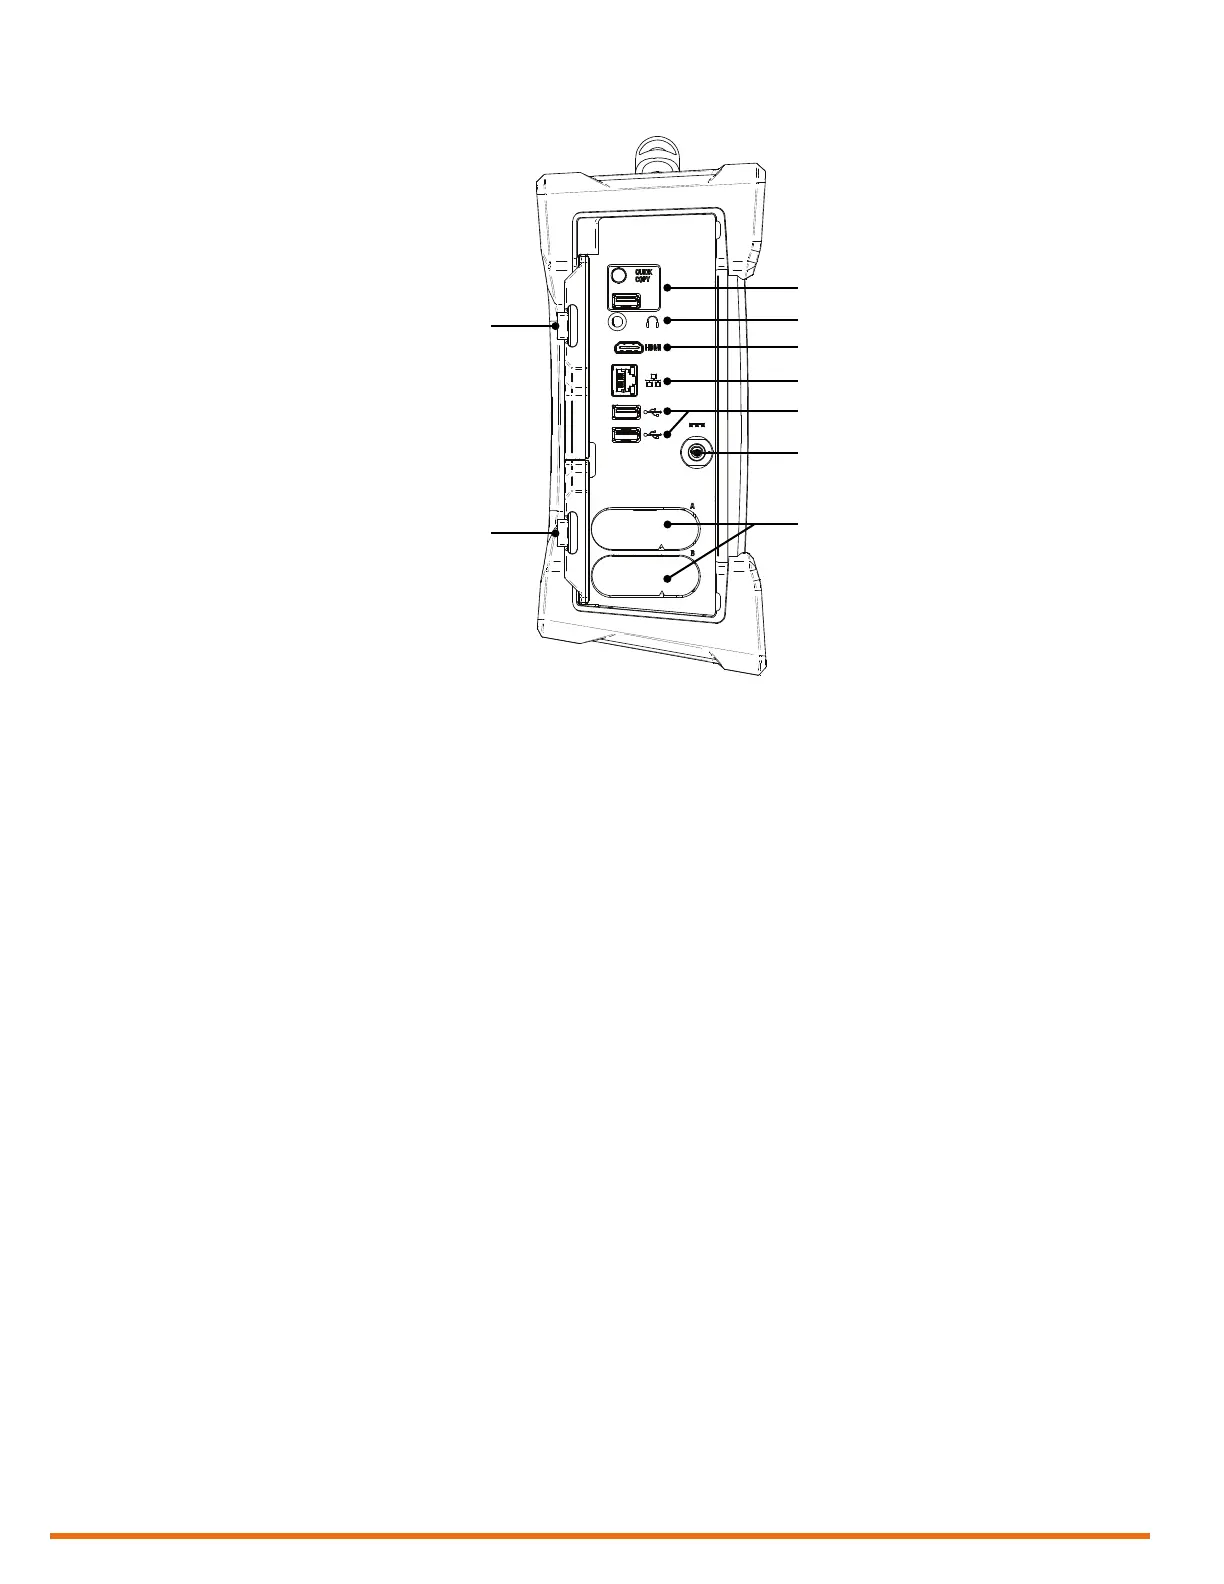
Left
1. Protective connector door
Protects the Reddy’s powerful connectivity
from the elements when they are not in use.
2. Quick copy
Use the QuiCk Copy button to transfer all
your inspection data to a USB mass storage
device. This allows you to transfer this data
easily.
3. Audio connector
Use this connector to hook up a headset to
Reddy.
4. HDMI
®
connector
Use this connector to hook up an external
monitor to Reddy.
5. Network connector
Use this connector to hook up Reddy to a
local area network (LAN). This connector
is equipped with two indicators with the
following behavior:
Connection indicator (upper)
• Green: communication established
between Reddy and the network
• Blinking green: activity between Reddy
and the network
• Unlit: no link to network
Connection speed indicator (lower)
• Amber: operating as a gigabit connection
(1 G b p s )
• Green: operating as a 100 Mbps
connection
• Off: operating as a 10 Mbps connection
6. USB 2.0 connectors
Use these connectors to hook up USB
devices to Reddy such as a mouse or
external disk drive.
7. Power connector
Use the supplied power cord to operate
Reddy and recharge the batteries.
8. Battery compartments
Insert the supplied batteries into the
appropriate battery compartment. For
details about batteries, see page 10.
9. Protective battery compartment
door
Protects the battery compartments from
the elements.